Select the relevant video to see how Qualimi is used
All about tasks, TASKs, jobs, defects, non-conformances, bugs
Useful info before we start:
- To add a TASK, you require the Add TASK Permission
- To learn more about Roles and Permissions, click here
Steps to add a task on the web app
In the example used below:
- Task has been defined as TASK
- Category 1 has been defined as State
- Category 2 has been defined as City
- Category 3 has been defined as Building
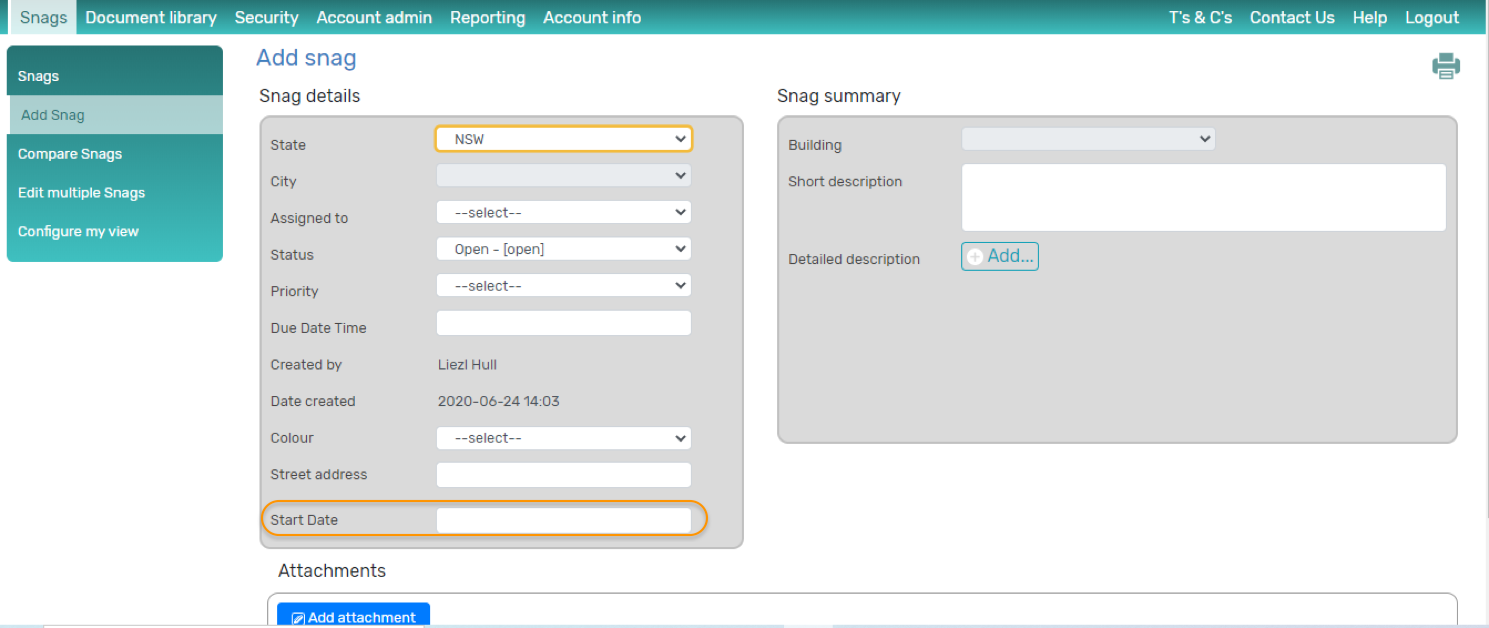
1. Go to TASKs > Add TASK
2. The Add TASK screen is displayed; Note: your categories are displayed with the information you captured for each
3. Capture the details of the TASK; add attachments if required and SAVE
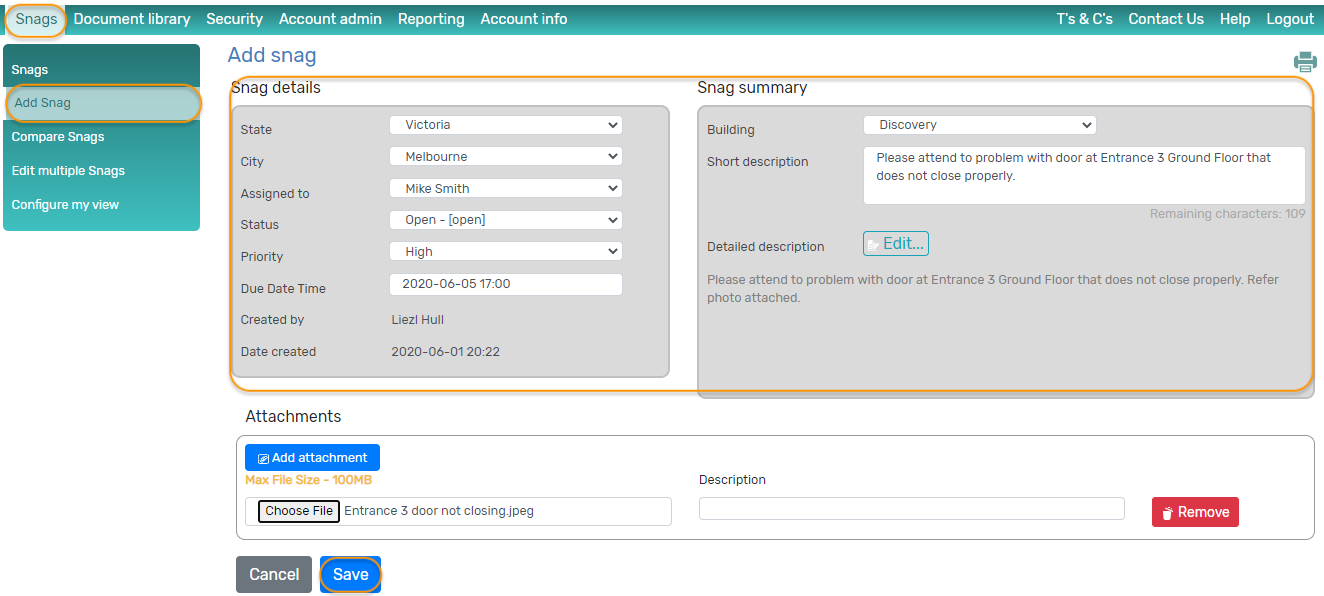
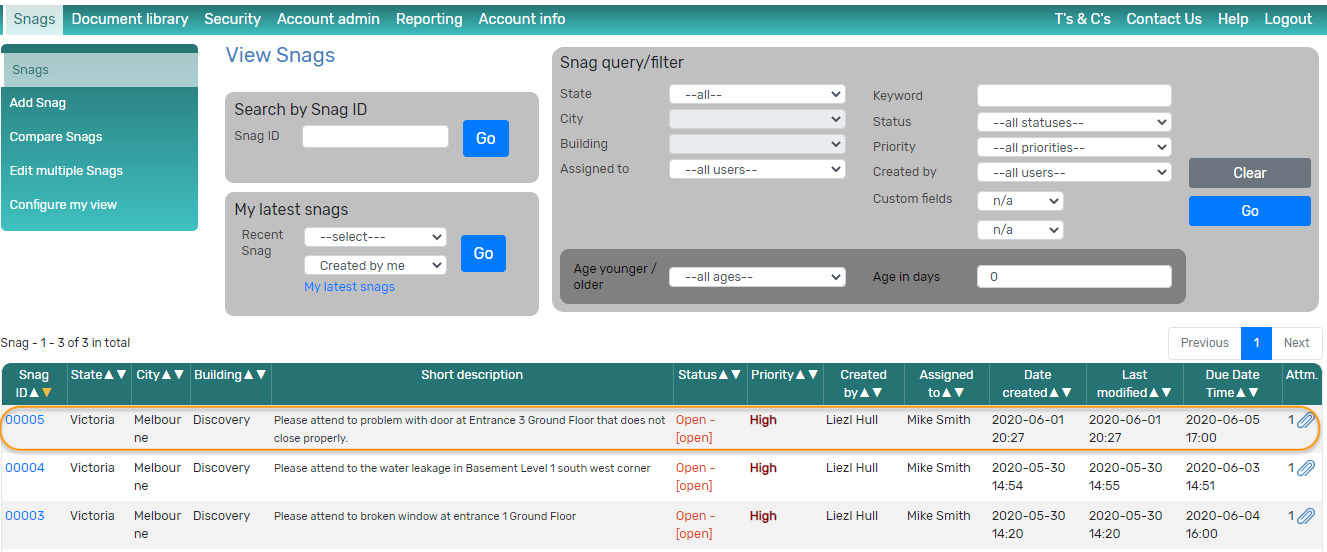
The TASKs screen is displayed with the TASK listed
Steps to search for tasks on the web app
In the example used below:
- Task has been defined as TASK
- Category 1 has been defined as State
- Category 2 has been defined as City
- Category 3 has been defined as Building
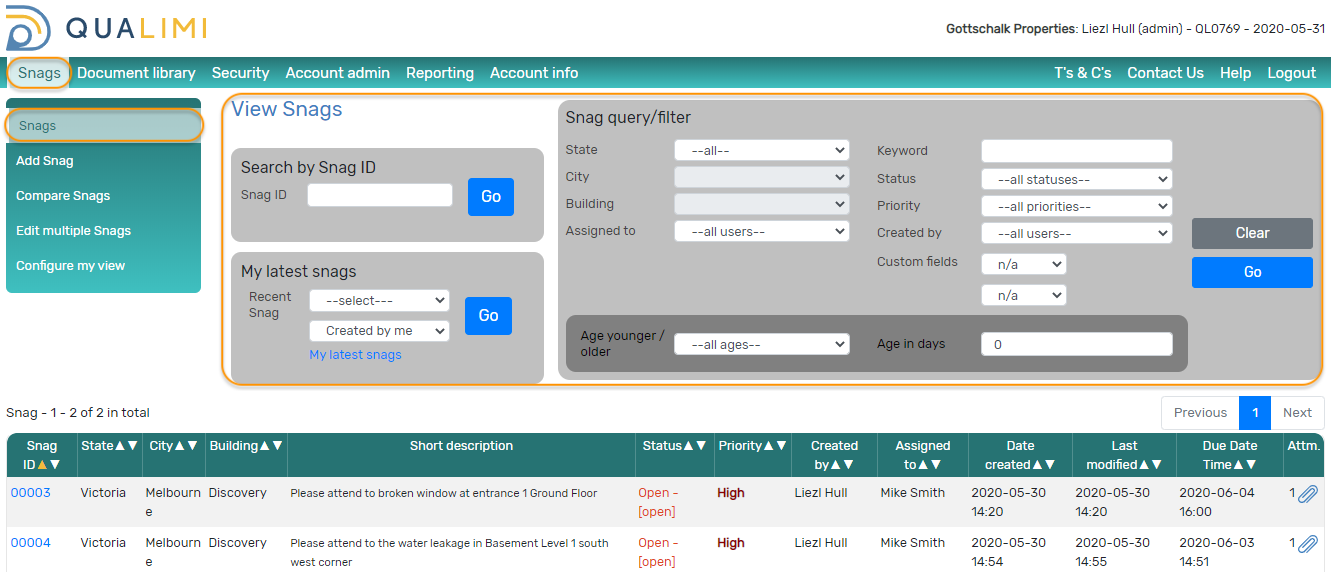
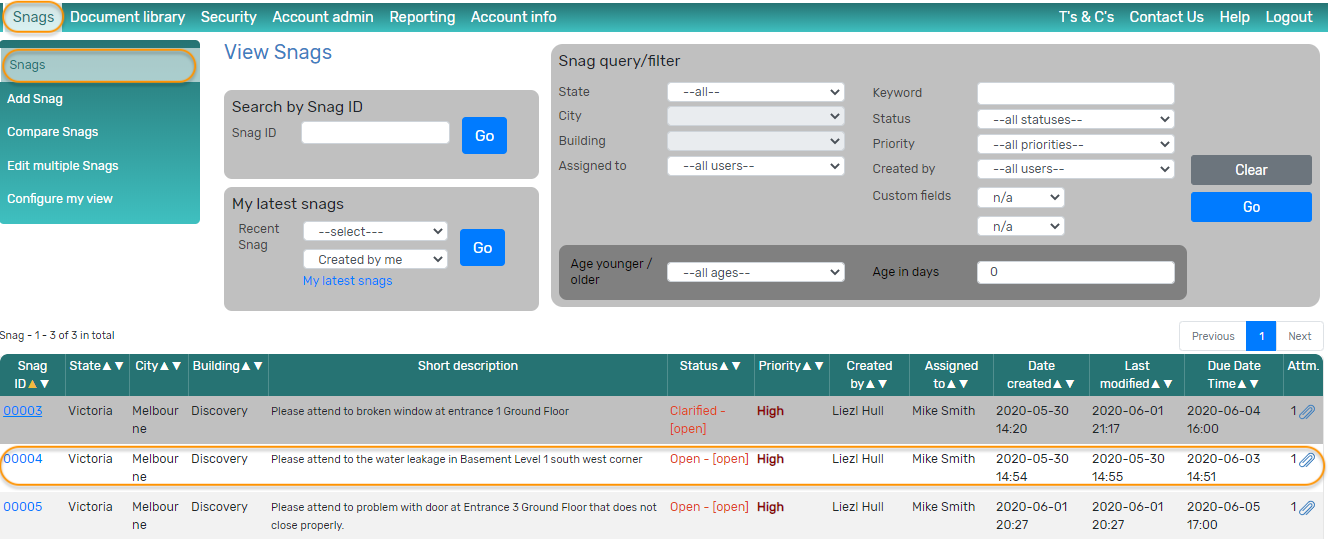
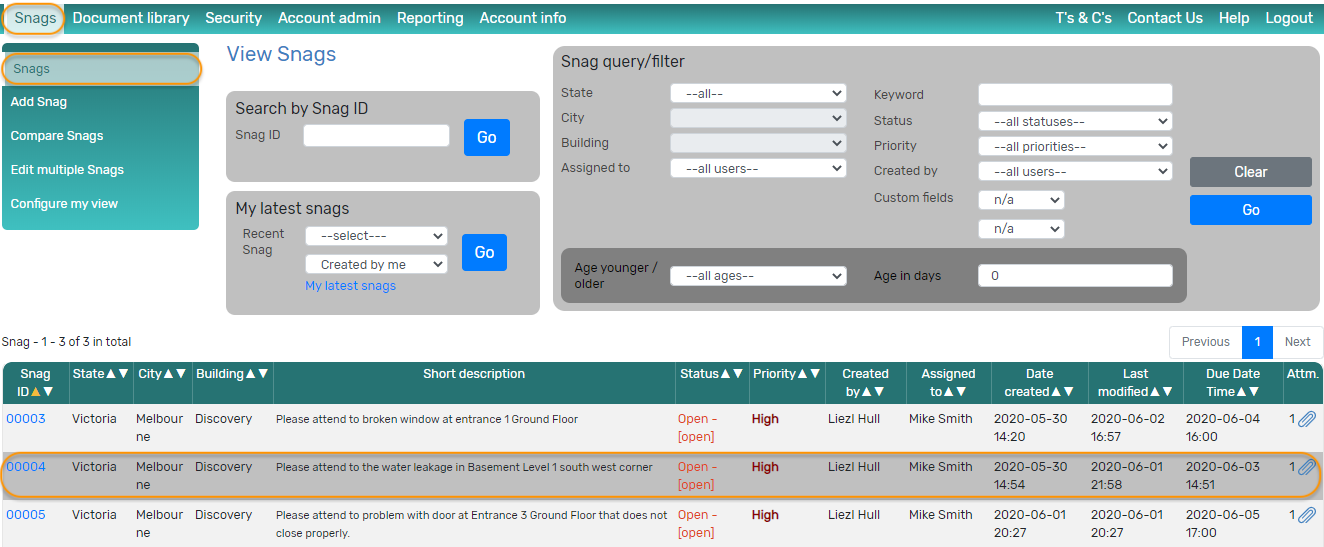
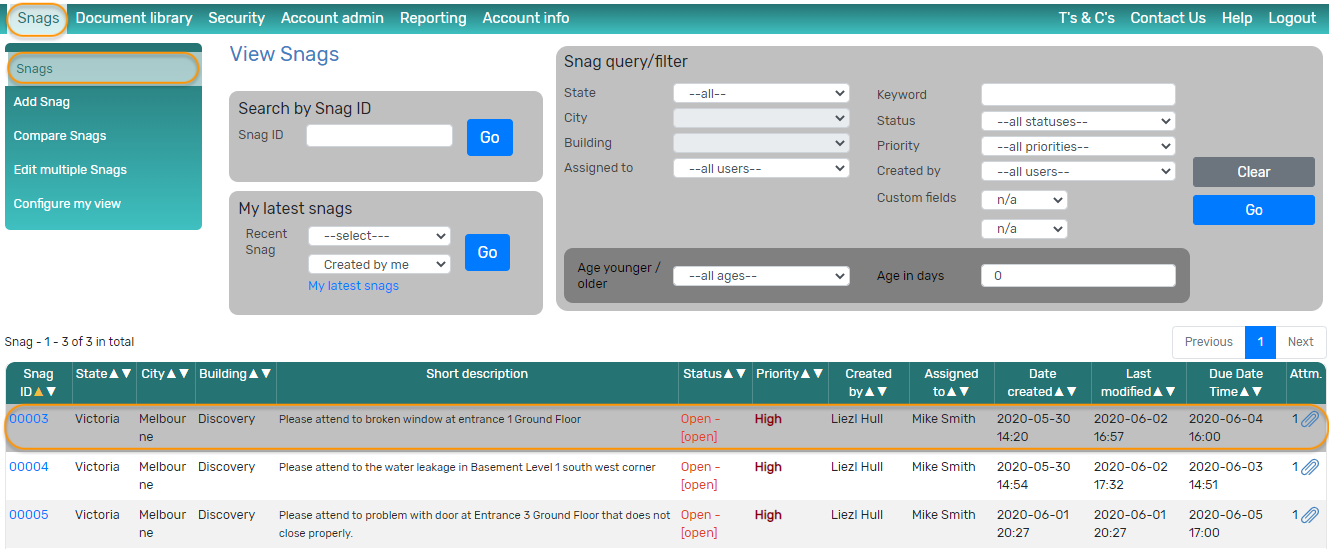
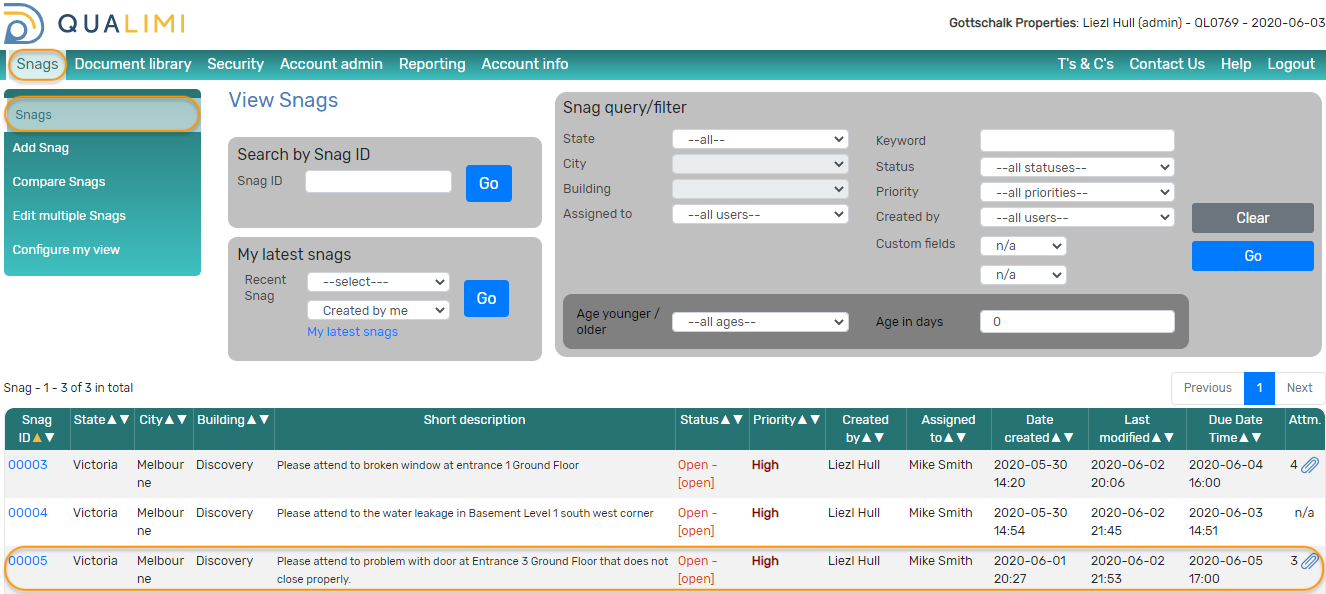
1. Go to the View TASKs screen by selecting TASKs > TASKs
2. Use the Filters to refine your search and select GO
Steps to add a comment to a task (TASK) on the web app
In the example used below:
- Task has been defined as TASK
- Category 1 has been defined as State
- Category 2 has been defined as City
- Category 3 has been defined as Building
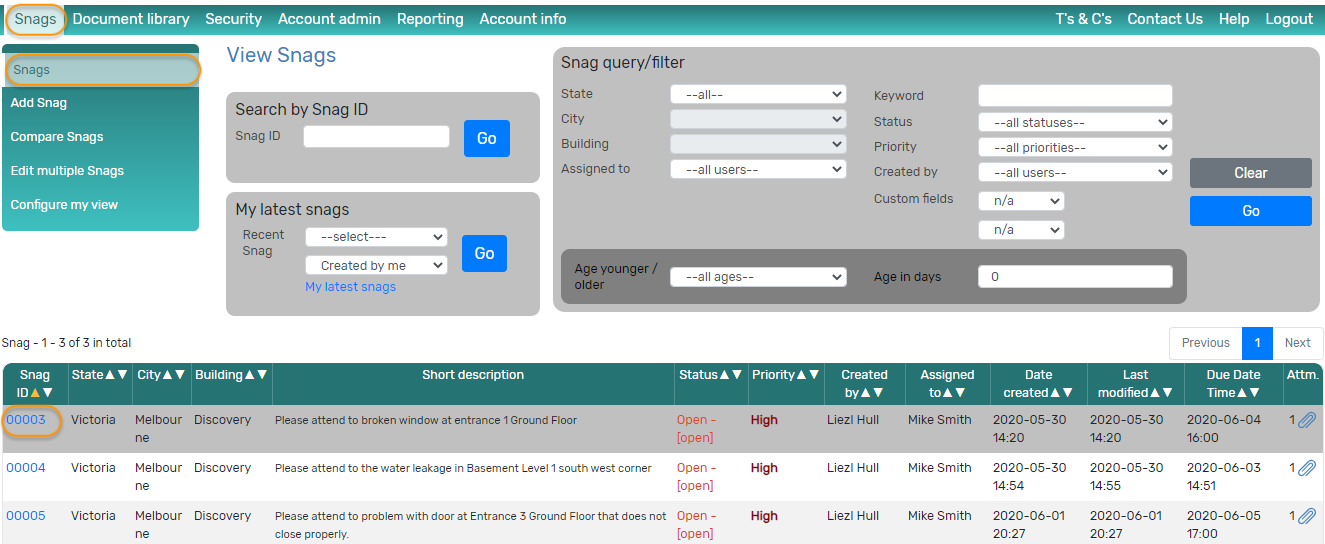
1. Go to the View TASKs screen by selecting TASKs > TASKs
2. Use the Filters to refine your search and select GO
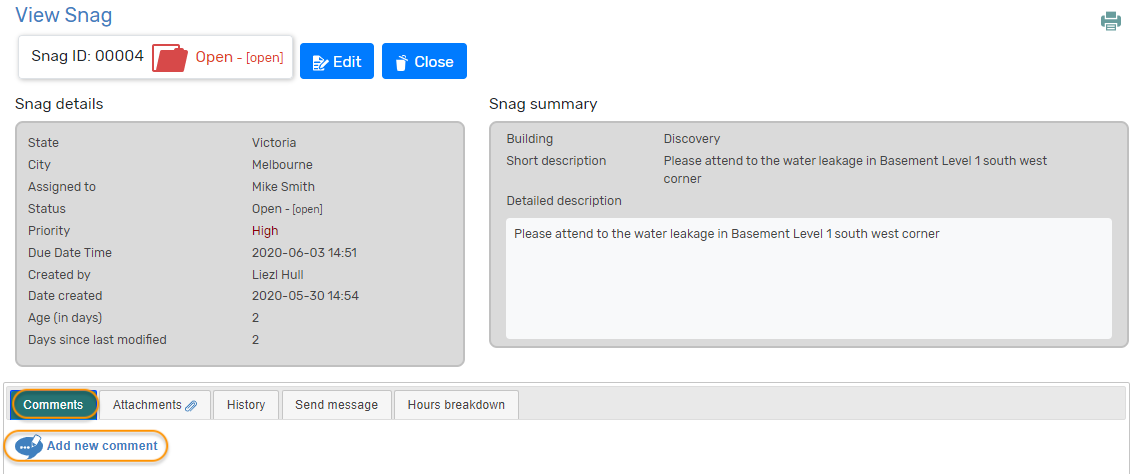
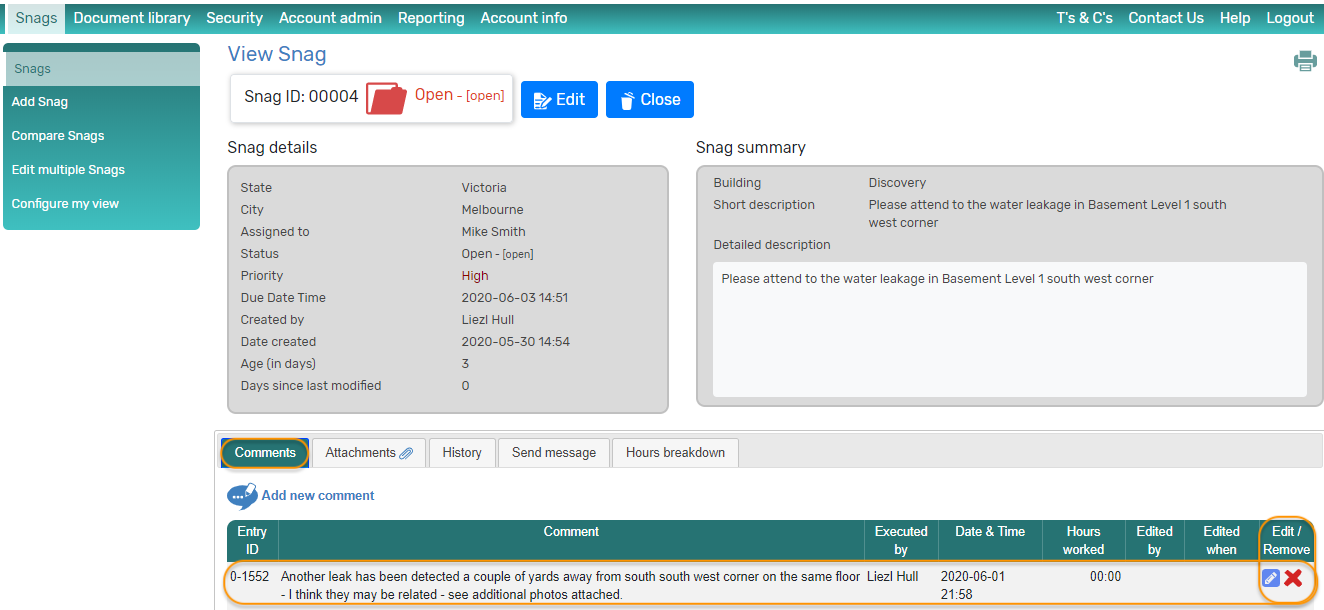
3. Select the TASK you wish to comment on by clicking on the task ID; the View TASK screen is displayed
4. Select ADD NEW COMMENT under the Comments Tab
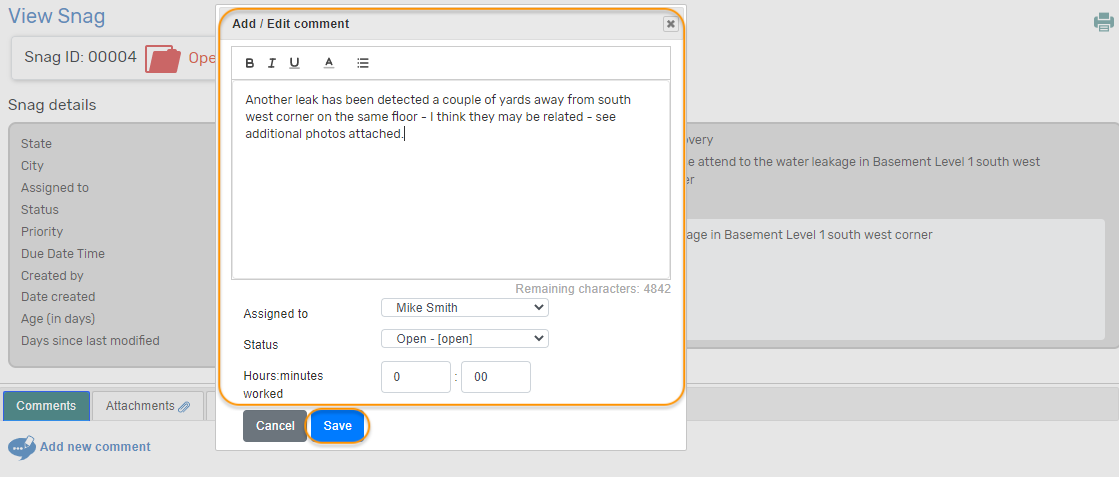
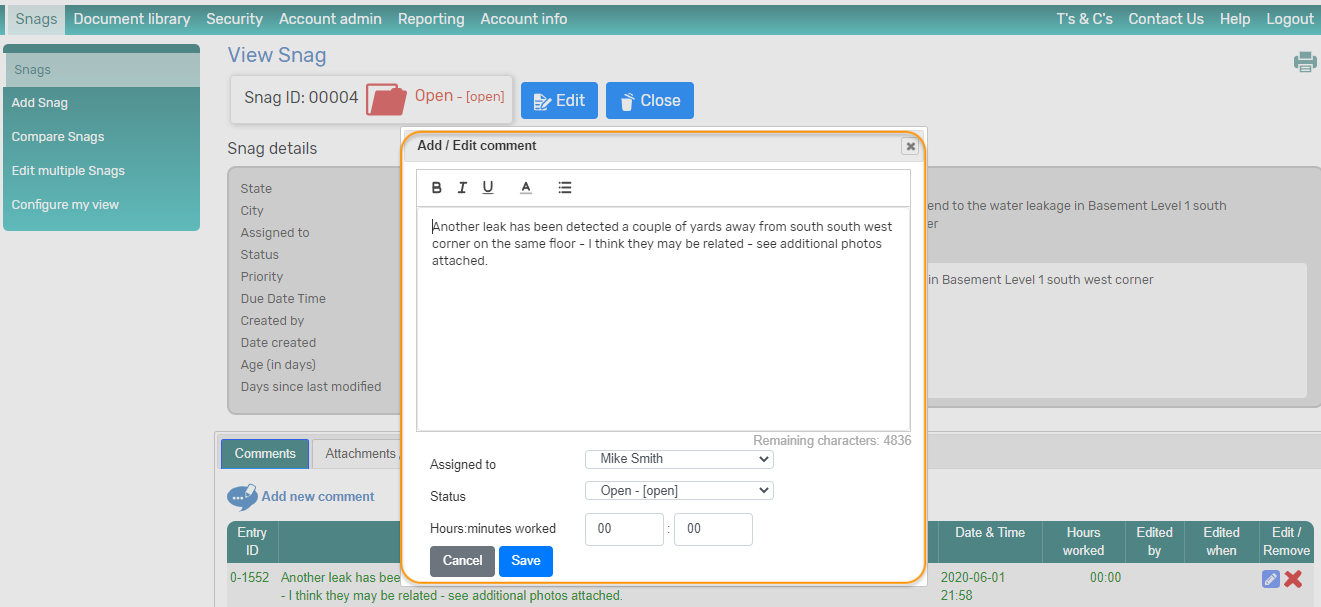
5. Capture the comment in the pop-up provided; if required you can also change the Status, assign the TASK to another person and capture hours spent on this TASK;
- Status and Assigned To will only be available to you to change if you have the Edit or Assign TASK Permission. To learn more about Roles and Permissions, click here
6. Select SAVE
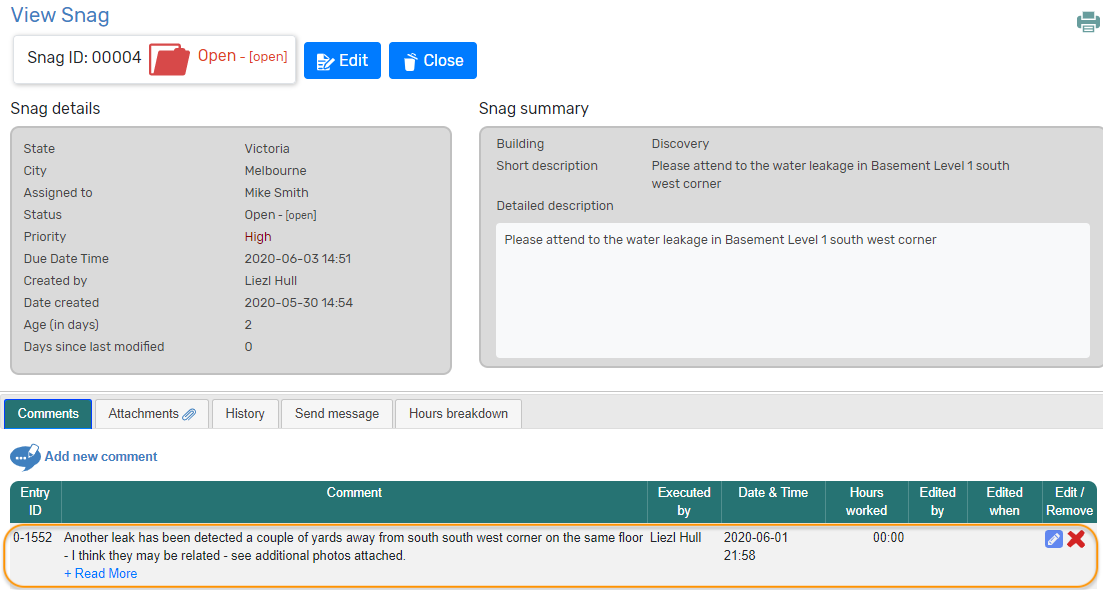
Comment has been added
Steps to edit / remove a comment on the web app
In the example used below:
- Task has been defined as TASK
- Category 1 has been defined as State
- Category 2 has been defined as City
- Category 3 has been defined as Building
1. Go to the View TASKs screen – Select TASKs > TASKs
2. Use the Filters to refine your search and select GO
3. Select the TASK you wish to edit a comment on by clicking on the task ID; the View TASK screen is displayed
4. Under the Comments tab: Select the EDIT or REMOVE icon next to comment you wish to edit or remove
- The EDIT and REMOVE Comment icons will only be available to you if you have the Edit Comment Permission. To learn more about Roles and Permissions, click here
5. If you are editing: the Edit Comment pop-up is available where you can change the comment; if required you can also change the Status, assign the task to another person and capture hours spent on this task; Select SAVE
- Status and Assigned To will only be available to you to change if you have the Edit or Assign TASK Permission. To learn more about Roles and Permissions, click here
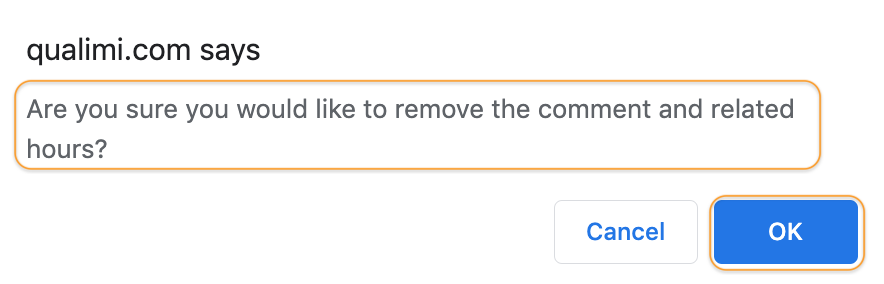
5. If you are deleting: a message is displayed confirming that you want to delete this comment. Select OK
Steps to add an attachment to an existing task (TASK) on the web app
In the example used below:
- Task has been defined as TASK
- Category 1 has been defined as State
- Category 2 has been defined as City
- Category 3 has been defined as Building
1. Go to the TASKs screen – select TASKs > TASKs
2. Use the Filters to refine your search and select GO
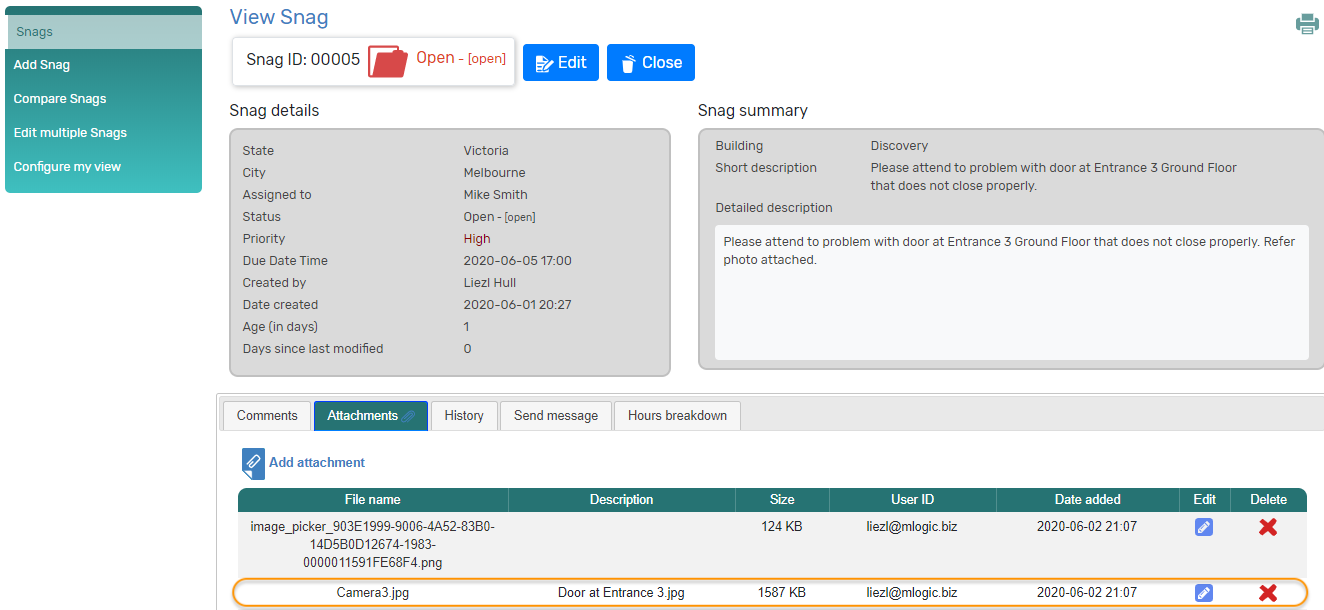
3. Select the TASK you wish to add an attachment to; the View TASK screen is displayed
4. Under the Attachments tab: Select ADD ATTACHMENT; CHOOSE FILE button is displayed
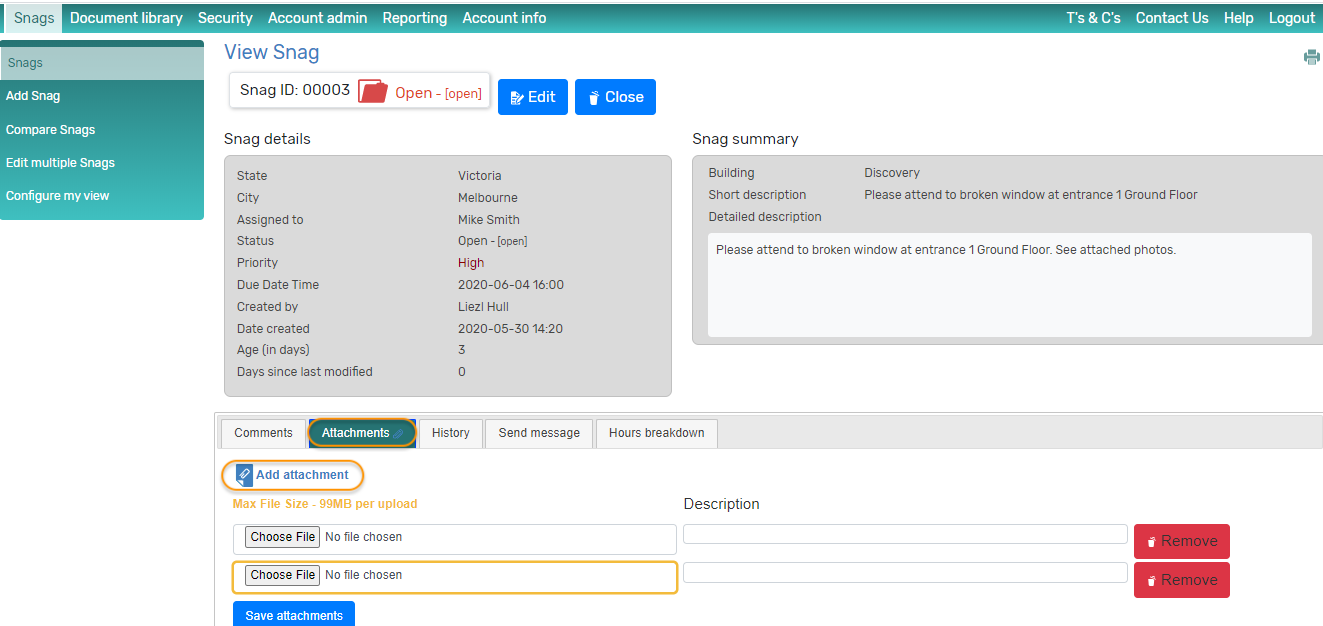
5. Select CHOOSE FILE and select the document you want to attach from your repository
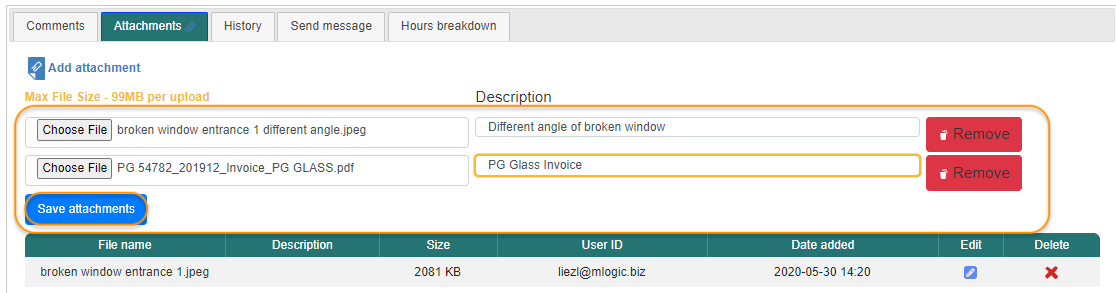
- You can select ADD ATTACHMENT multiple times and multiple options are made available to add documents simultaneously
- You can add an additional description for an attachment where the attachment lacks a user-friendly name e.g. photos often have default names consisting of random letters and numbers; to make it easier for the person you are assigning this to, give each photo a user friendly name
- The maximum size per cumulative upload is 99MB – e.g. if you have 3 documents of 29MB each, you have reached your max for this upload
6. Select SAVE ATTACHMENTS
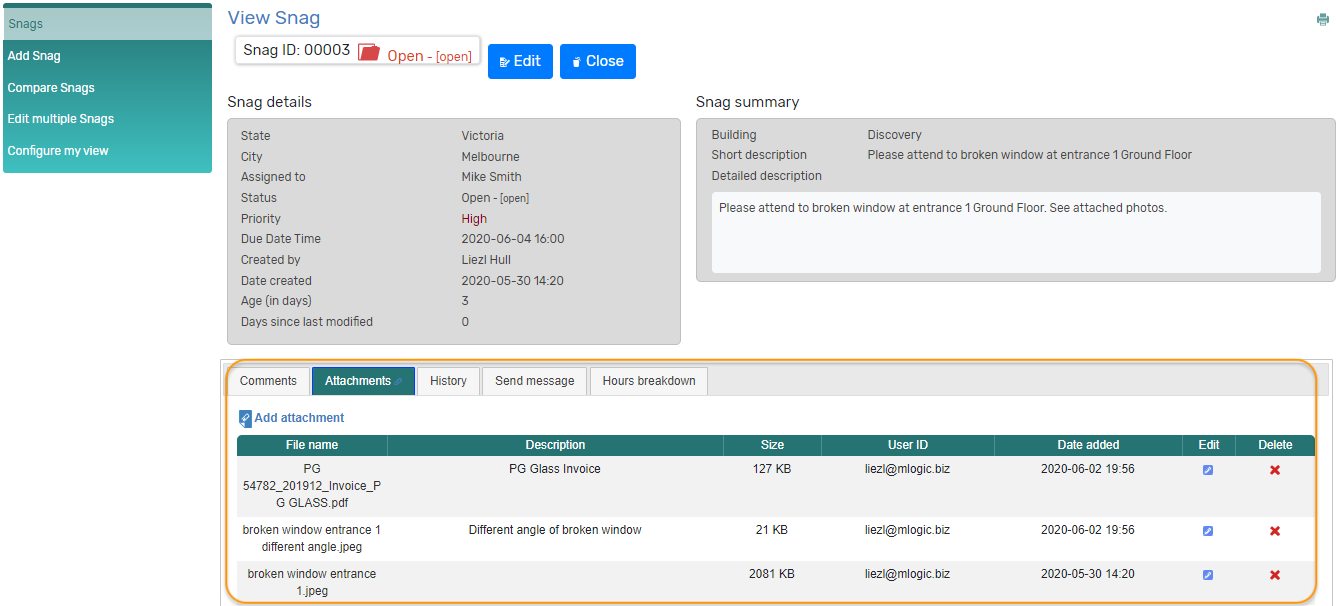
Attachments uploaded
Steps to Remove an attachment from a task (TASK) on the web app
In the example used below:
- Task has been defined as TASK
- Category 1 has been defined as State
- Category 2 has been defined as City
- Category 3 has been defined as Building
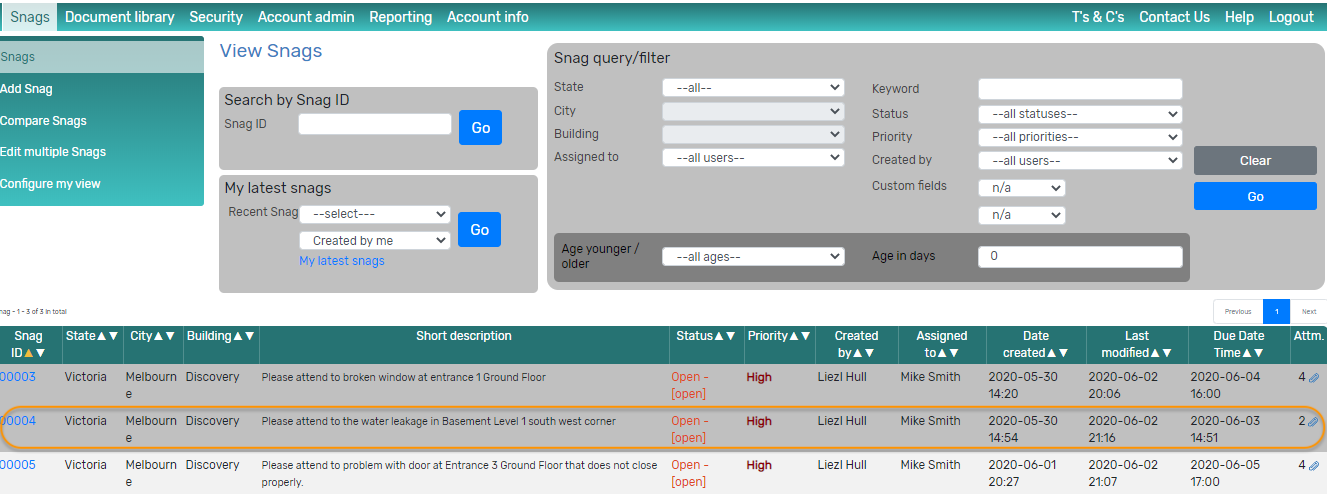
1. Go to the TASKs screen – select TASKs > TASKs
2. Use the Filters to refine your search and select GO
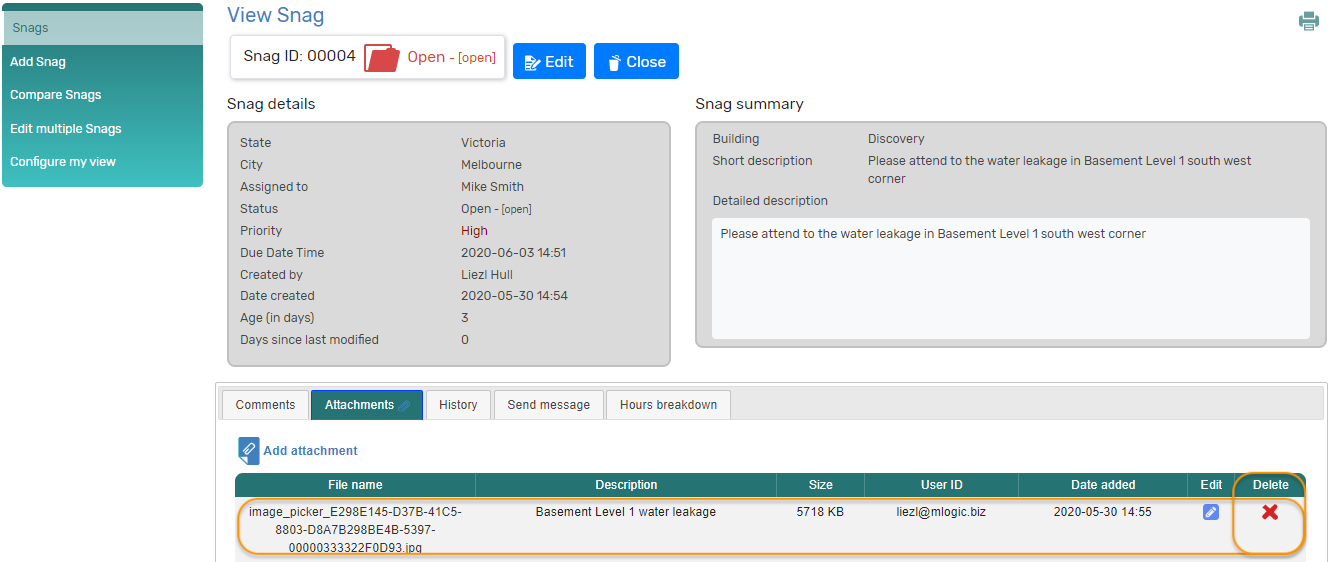
3. Select the TASK you wish to remove an attachment from; the View TASK screen is displayed
4. Under the Attachments tab: select the DELETE icon next to the attachment
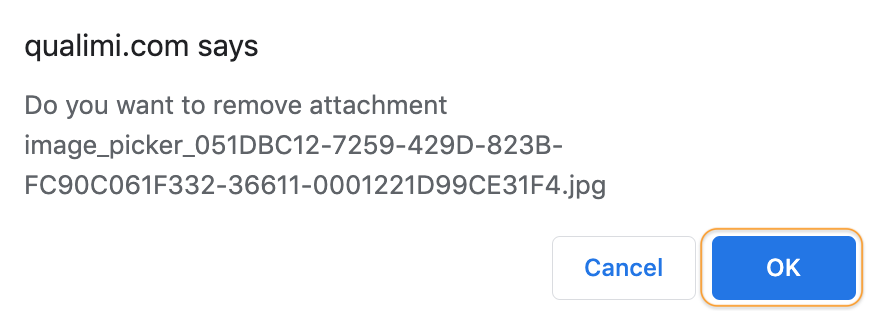
5. Select OK on the confirmation pop-up
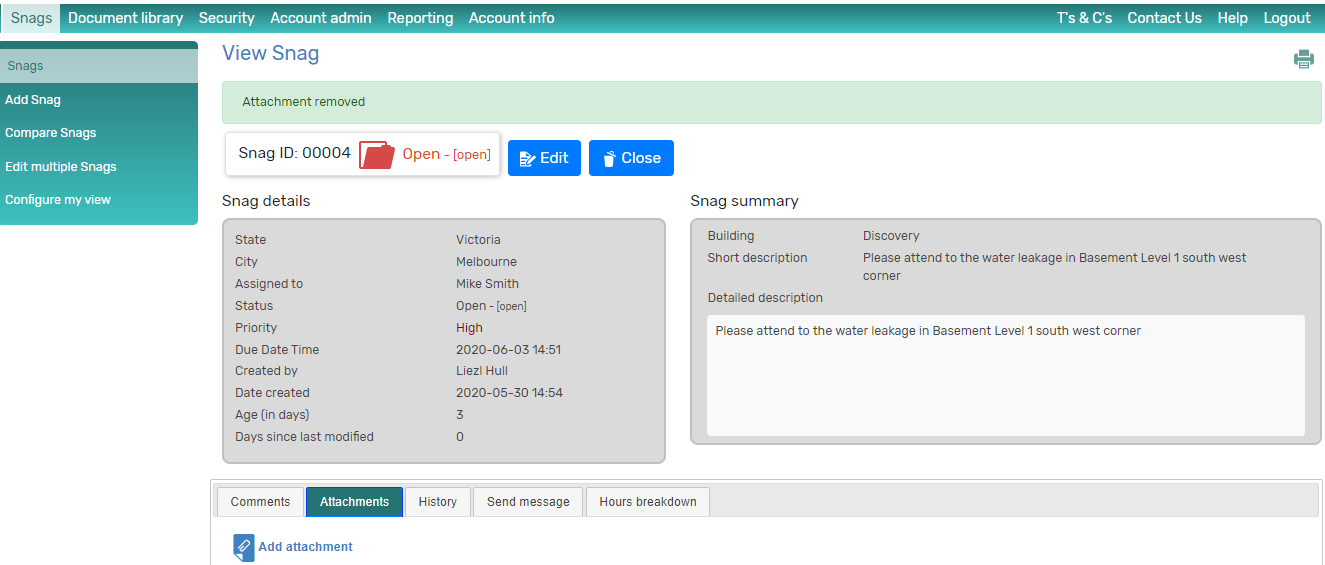
Attachment is removed
Steps to Add description to attachment / edit description of attachment on the web app
In the example used below:
- Task has been defined as TASK
- Category 1 has been defined as State
- Category 2 has been defined as City
- Category 3 has been defined as Building
Why? An attachment often lacks a user-friendly name e.g. photos often have default names consisting of random letters and numbers; to make it easier for the person you are assigning this TASK to, give each photo a user-friendly name.
1. Go to the TASKs screen – select TASKs > TASKs
2. Use the Filters to refine your search and select GO
3. Select the TASK on which you wish to add/edit the description of an attachment; the View TASK screen is displayed
4. Under the Attachments Tab: Select the EDIT icon next to the attachment

5. Add a description or edit the existing description
6. Select SAVE

Description has been added / edited
Useful info before we start:
- To Edit a task, you require the Edit task Permission. This permission will allow you to edit all attributes of a task.
- If you have the Assign task Permission, you will be able to edit all attributes of the task except the Short and Detailed Description
- To learn more about Roles and Permissions, click here
Steps to edit/assign a task (TASK) on the web app
In the example used below:
- Task has been defined as TASK
- Category 1 has been defined as State
- Category 2 has been defined as City
- Category 3 has been defined as Building
1. Go to the TASKs screen – select TASKs > TASKs
2. Use the Filters to refine your search and select GO
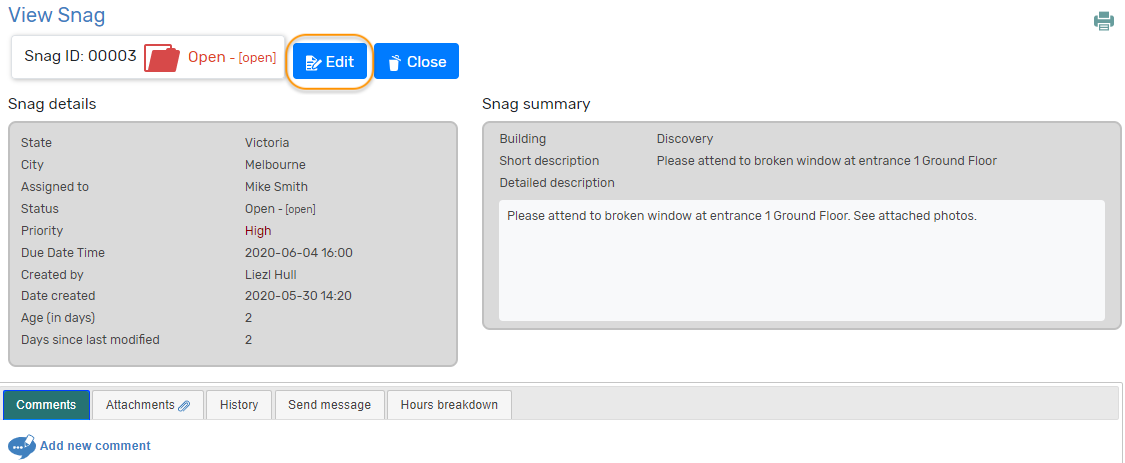
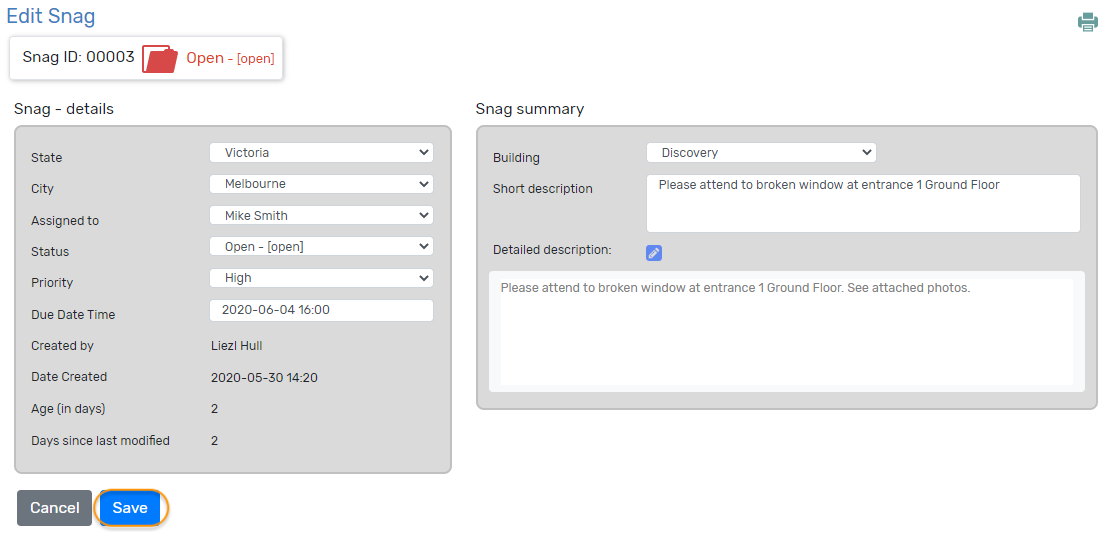
3. Select the TASK you wish to edit/assign; the View TASK screen is displayed
4. Select EDIT or ASSIGN – depending on the option available to you
5. Edit the details of the TASK that you require to change and SAVE
Steps to change the definition of Task and Task Categories
In the example used below:
- Task has been defined as TASK
- Category 1 has been defined as State
- Category 2 has been defined as City
- Category 3 has been defined as Building
- Category 4 has not been defined - we don’t require it for our business
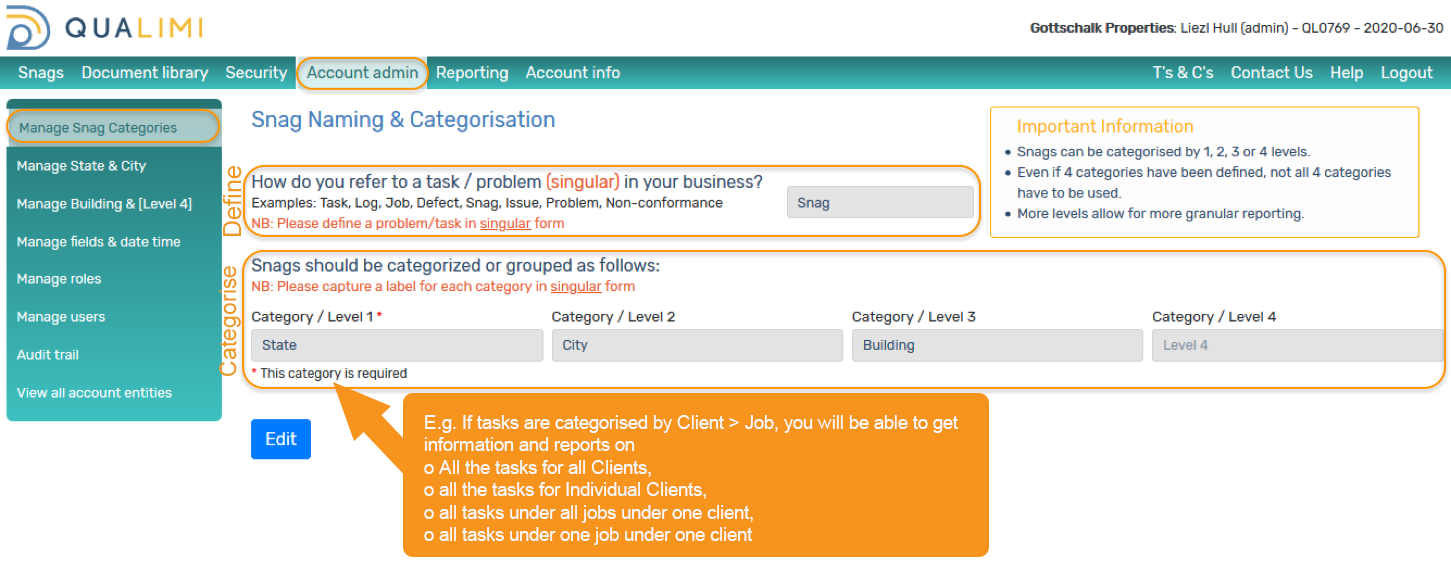
1. Go to: Account admin > Manage TASK Categories – depending on how you defined tasks for your business
2. Select the EDIT button
3. Change how you define or refer to a problem / task in your business
- NB: Both Tasks and Categories must be defined in SINGULAR form
4. Change how you categorise these tasks
5. Select SAVE
Refer to the examples supplied if required

Add & Edit business information under Categories
Steps to Add information under Category 1
In the example used below:
- Task has been defined as TASK
- Category 1 has been defined as State
- Category 2 has been defined as City
- Category 3 has been defined as Building
- Category 4 has not been defined - we don’t require it for our business
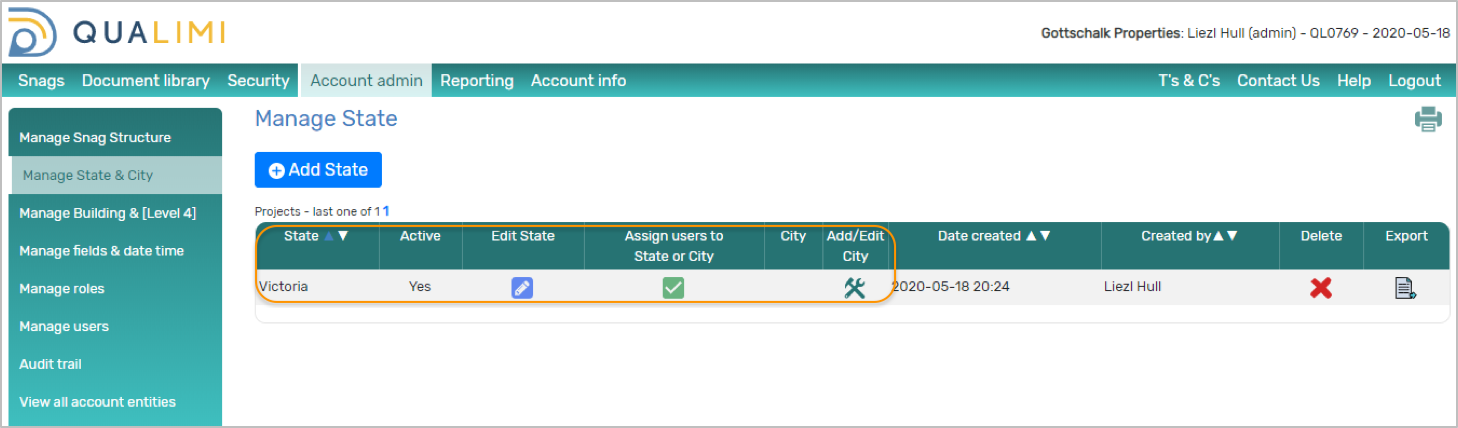
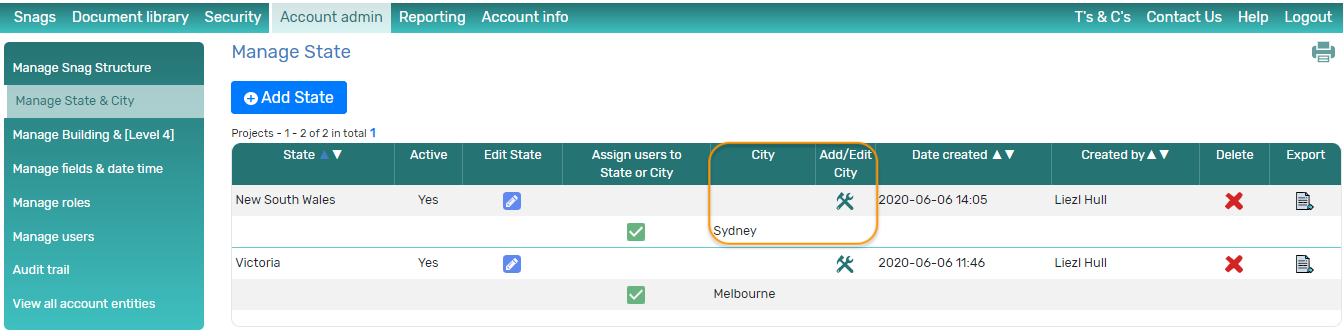
1. Go to Account admin > Manage State & City - depending on your categories
2. Select ADD STATE to add the first entity for this category
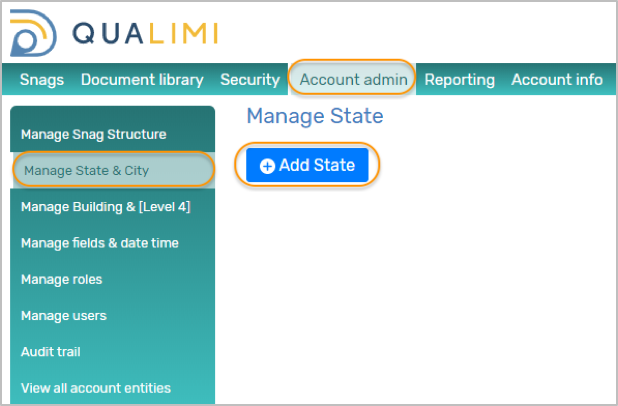
3. Capture the name of the State and SAVE
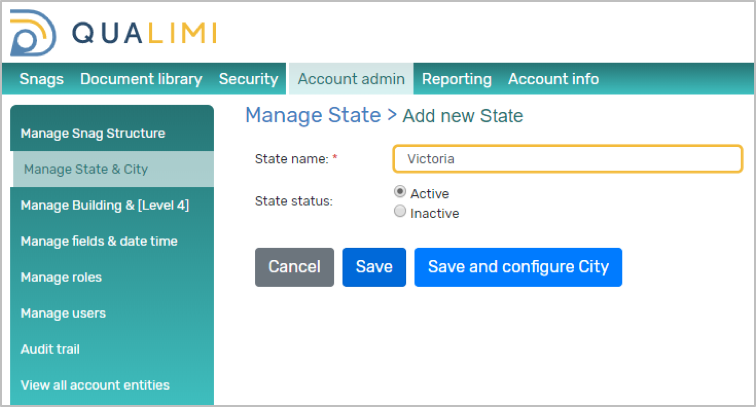
State has been added
Steps to Edit information under Category 1
In the example used below:
- Task has been defined as TASK
- Category 1 has been defined as State
- Category 2 has been defined as City
- Category 3 has been defined as Building
- Category 4 has not been defined - we don’t require it for our business
1. Go to Account admin > Manage State & City - depending on your categories
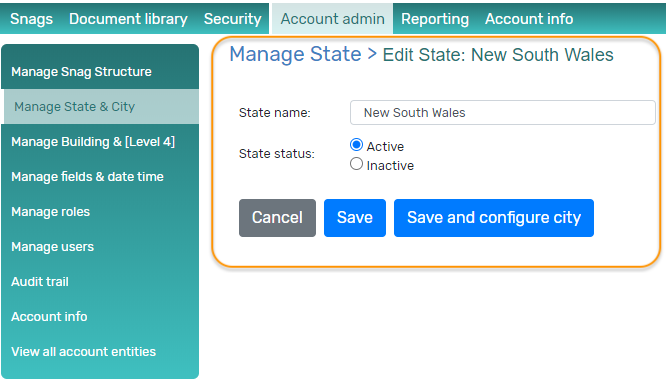
2. Select the EDIT STATE icon next to the state you would like to edit
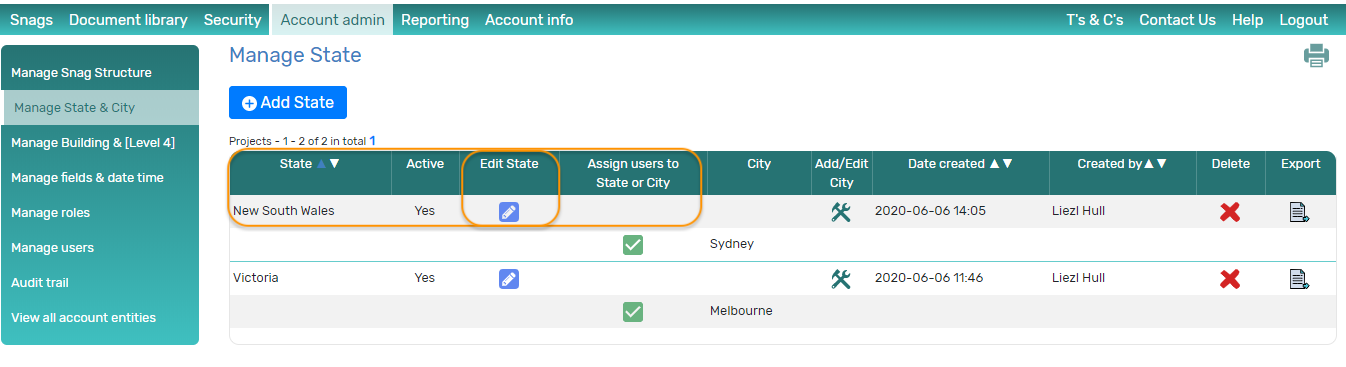
3. Edit the name of the State and SAVE
Steps to Add information under Category 2
In the example used below:
- Task has been defined as TASK
- Category 1 has been defined as State
- Category 2 has been defined as City
- Category 3 has been defined as Building
- Category 4 has not been defined - we don’t require it for our business
1. Go to Account admin > Manage State & City - depending on your categories
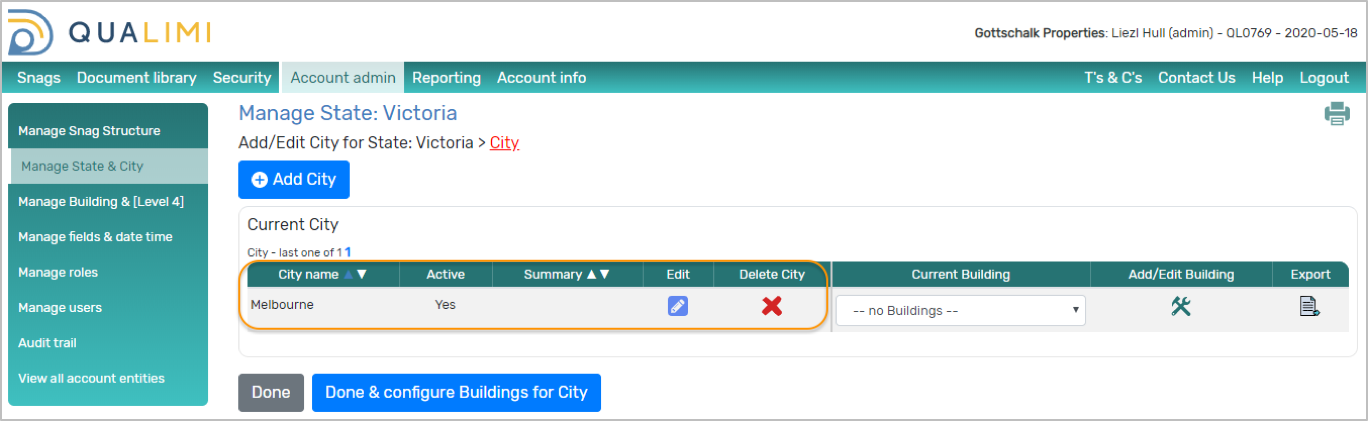
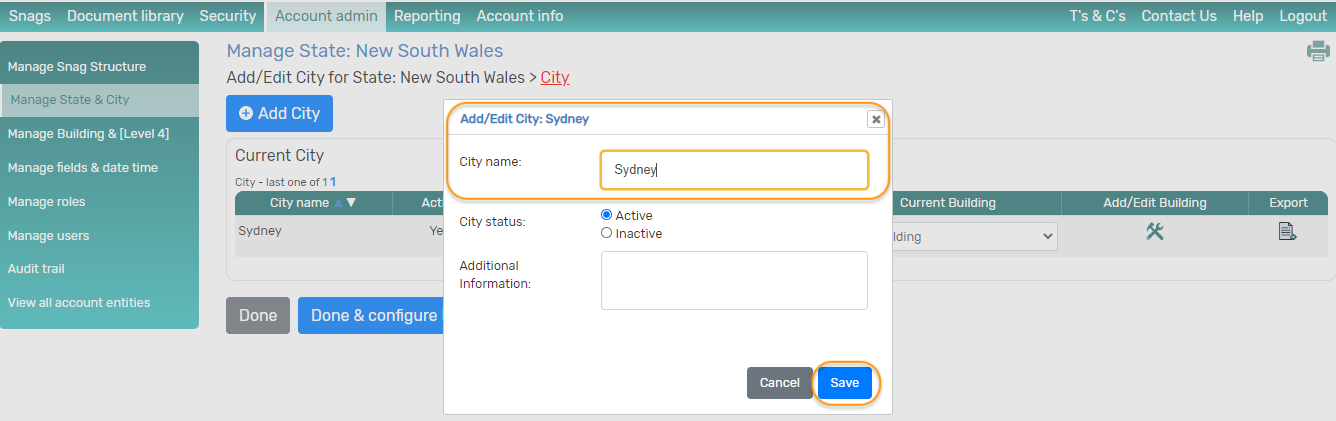
2. Select the ADD / EDIT CITY icon next to the state for which you would like to add a city; the Manage State screen is displayed for this specific state
3. Select the ADD CITY button
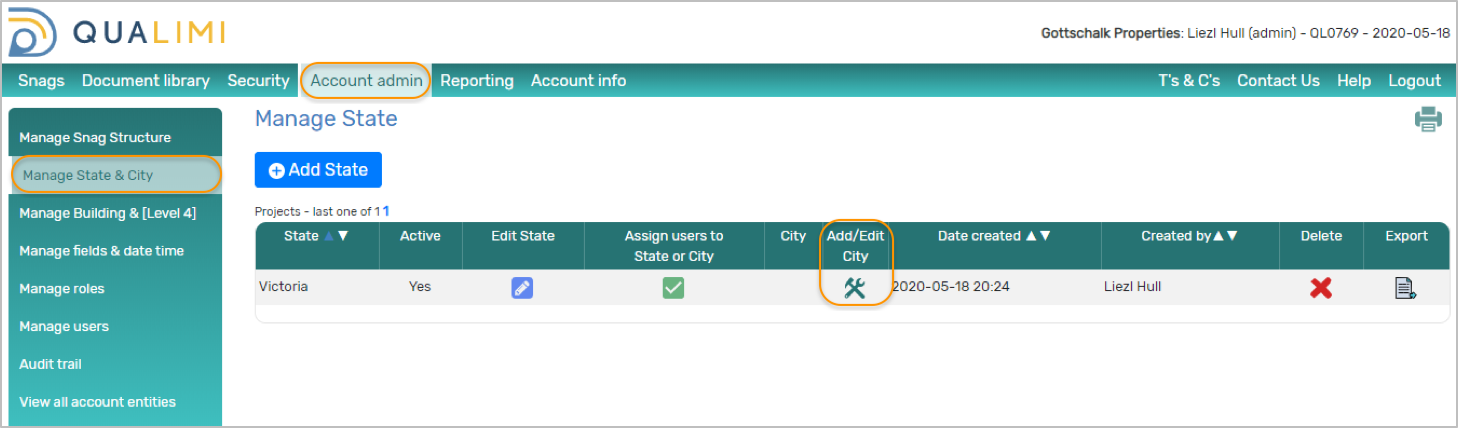
4. Capture the name of the City and SAVE
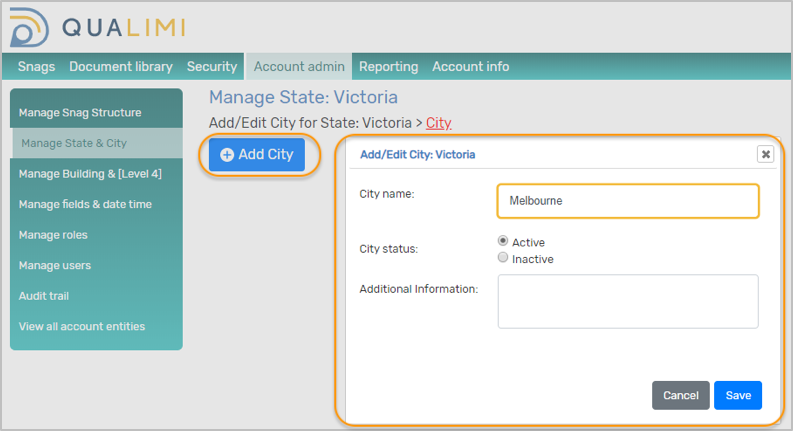
City has been added
Steps to Edit information under Category 2
In the example used below:
- Task has been defined as TASK
- Category 1 has been defined as State
- Category 2 has been defined as City
- Category 3 has been defined as Building
- Category 4 has not been defined - we don’t require it for our business
1. Go to Account admin > Manage State & City - depending on your categories
2. Select the ADD / EDIT CITY icon next to the city you would like to change; the ADD/EDIT CITY FOR STATE screen is displayed
3. Select the EDIT icon next to the city you want to change
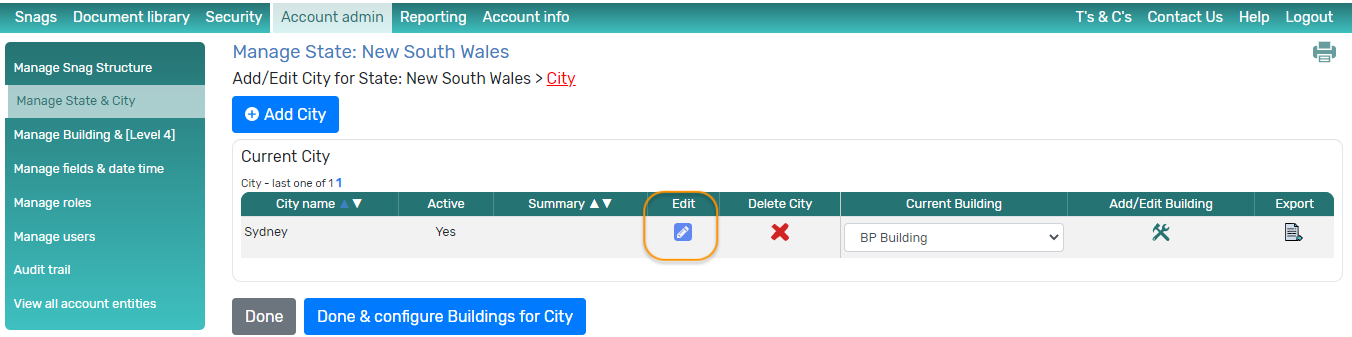
4. Make your change to the City and SAVE
Steps to add information under Category 3
In the example used below:
- Task has been defined as TASK
- Category 1 has been defined as State
- Category 2 has been defined as City
- Category 3 has been defined as Building
- Category 4 has not been defined - we don’t require it for our business
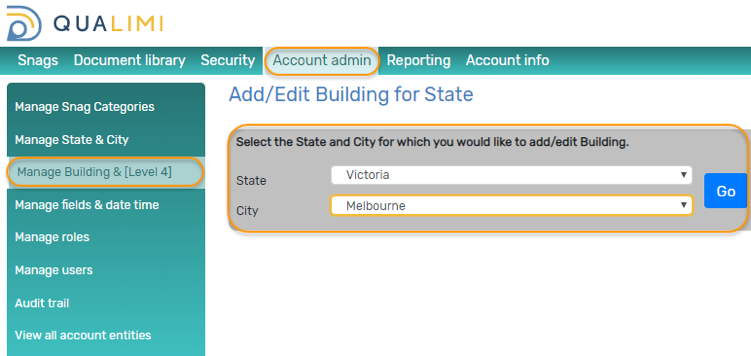
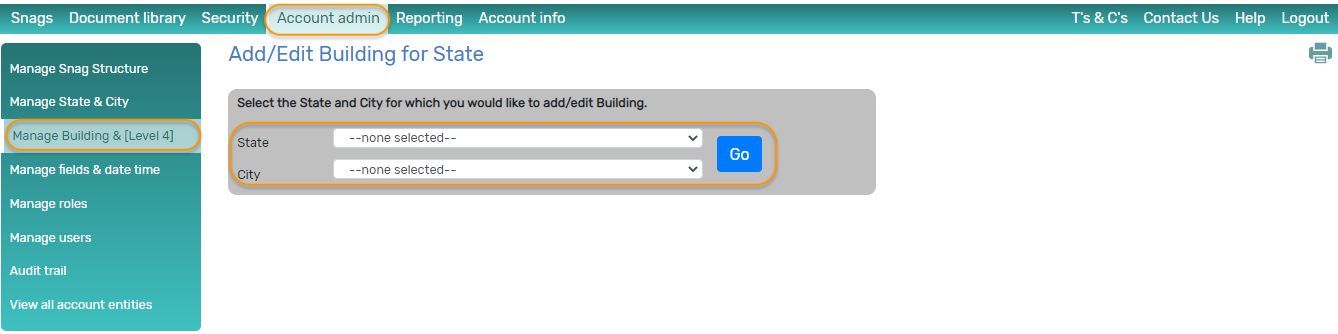
1. Go to Account admin > Manage Building & [Level 4] - depending on your categories; in this example Category 4 has not been defined
2. Select the relevant State and City that you would like to add a building for and select GO;
3. Select ADD BUILDING; the Add Building popup is displayed
4. Capture the name of the Building and SAVE
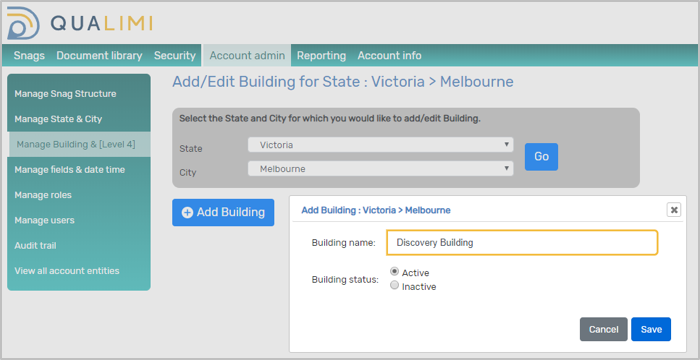
Building has been added
Steps to edit business information under Category 3
In the example used below:
- Task has been defined as TASK
- Category 1 has been defined as State
- Category 2 has been defined as City
- Category 3 has been defined as Building
- Category 4 has not been defined - we don’t require it for our business
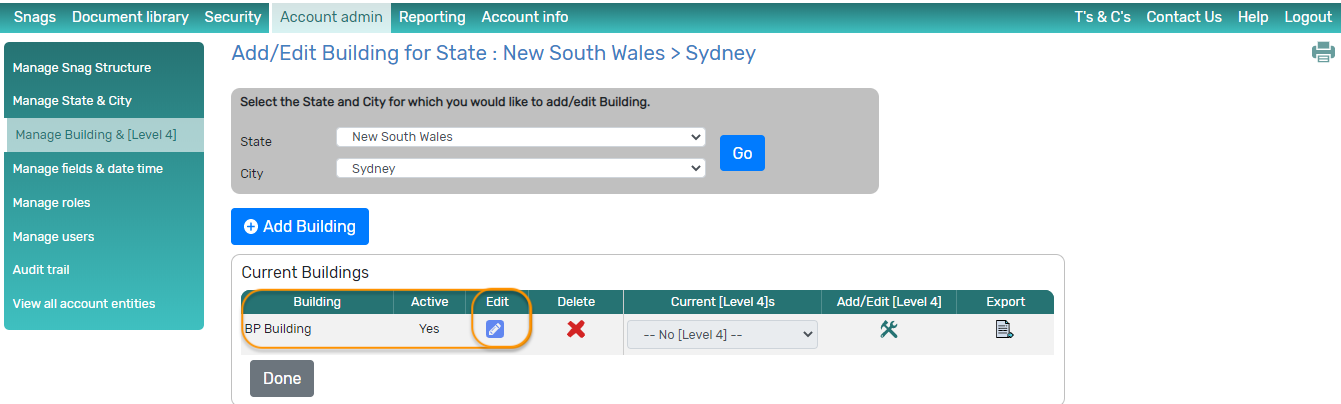
1. Go to Account admin > Manage Building & [Level 4] - depending on your categories; in this example Category 4 has not been defined
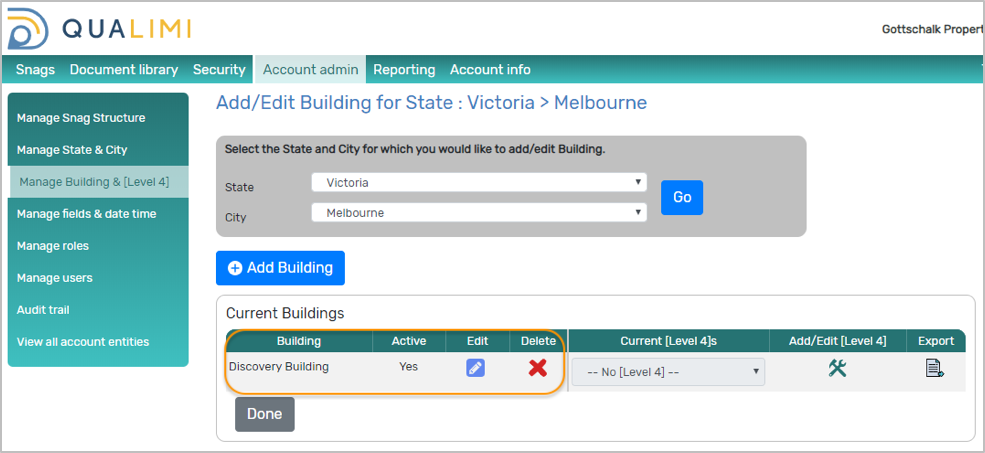
2. Select the State and City under which the Building resides that you would like to change and hit GO
3. Current buildings under this State and City are displayed
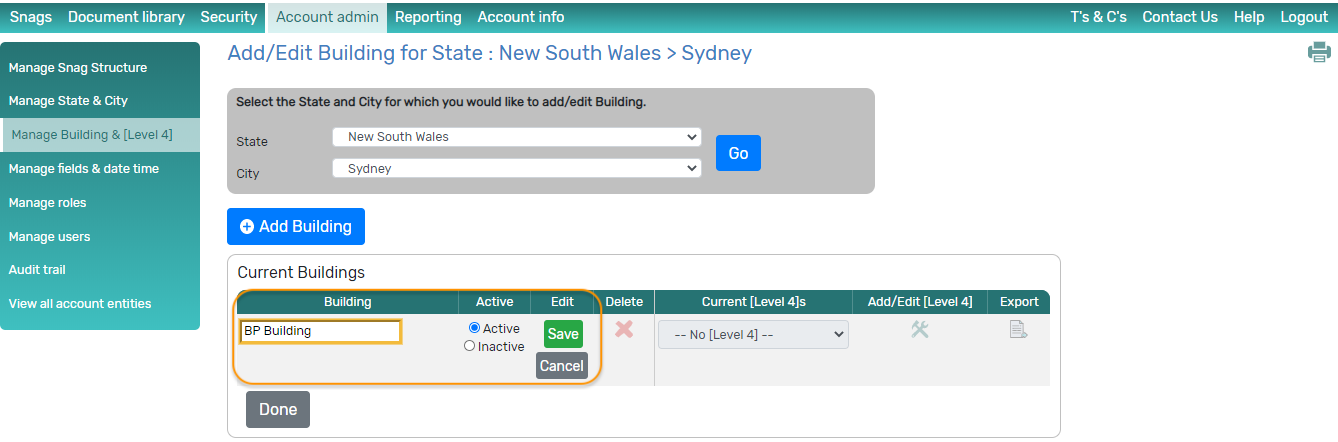
4. Select the EDIT icon next to the building in question
5. Make the relevant change and SAVE
Steps to add business information under Category 4
In the example used below:
- Task has been defined as TASK
- Category 1 has been defined as State
- Category 2 has been defined as City
- Category 3 has been defined as Building
- Category 4 has not been defined - we don’t require it for our business
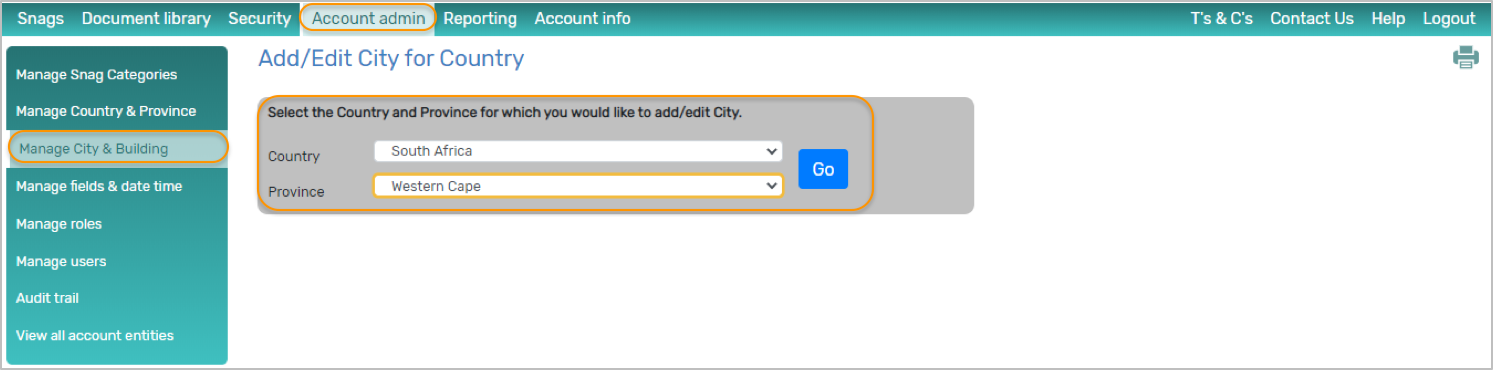
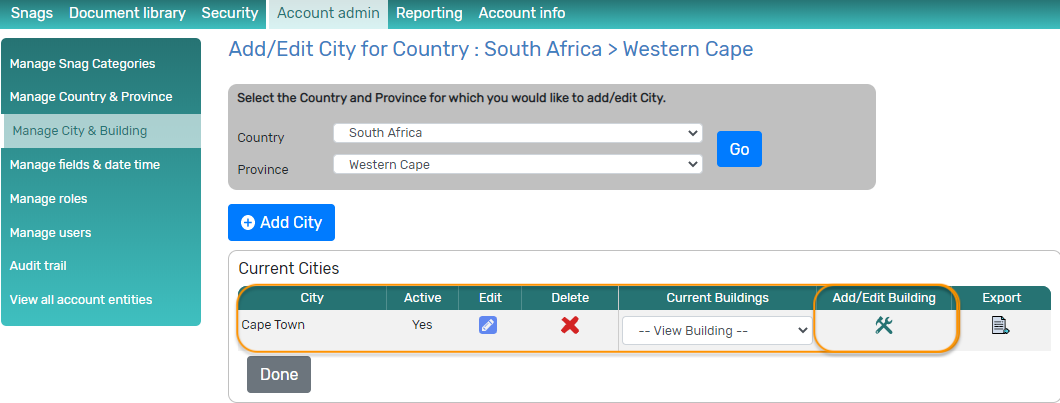
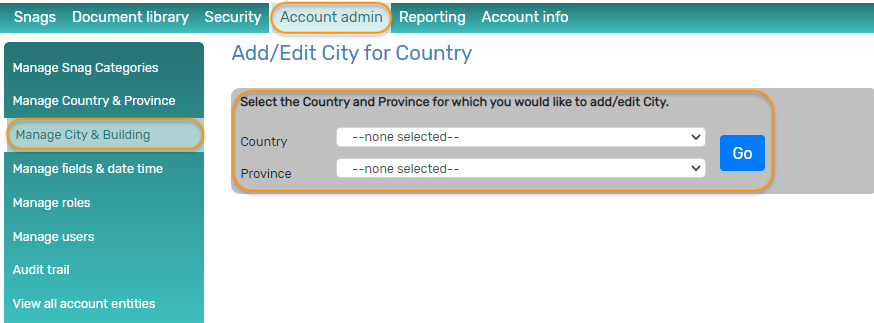
1. Go to Account admin > Manage City & Building - depending on your categories;
2. Select the Country and Province under which the City resides that you would like to add a building for and hit GO
3. Current Cities under this Country and Province are displayed
4. Select ADD/EDIT BUILDING next to the city in question; The ADD/EDIT BUILDING popup is displayed
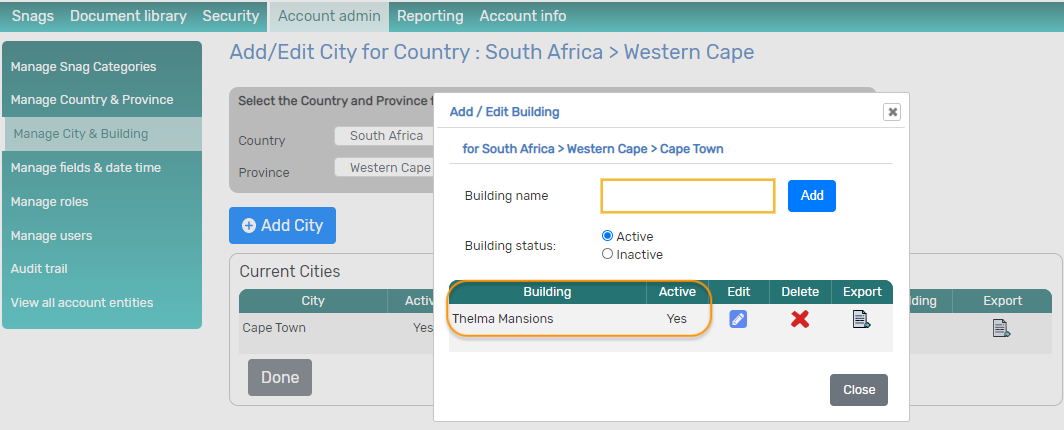
5. Capture the Building name and ADD
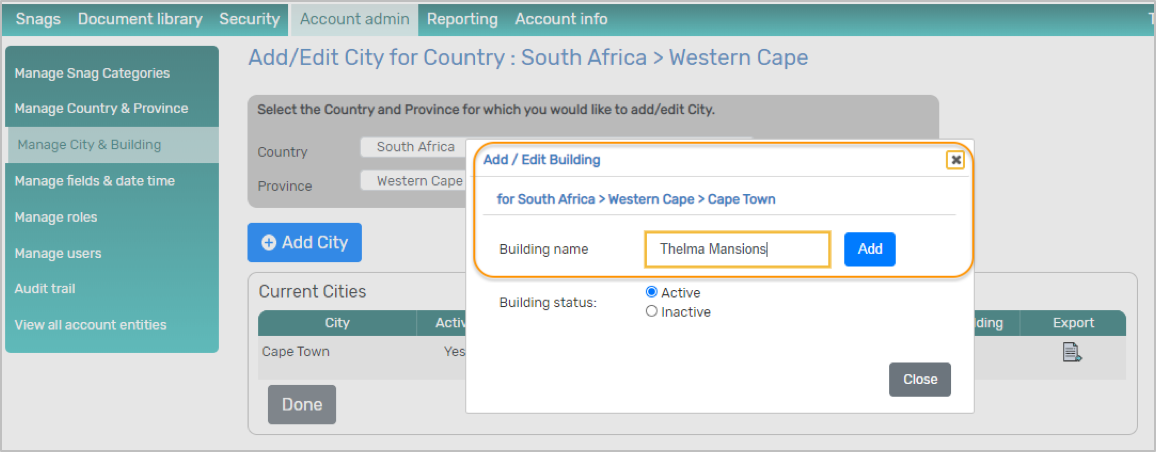
Building has been added
Steps to edit business information under Category 4
In the example used below:
- Task has been defined as TASK
- Category 1 has been defined as Country
- Category 2 has been defined as Province
- Category 3 has been defined as City
- Category 4 has been defined as Building
1. Go to Account admin > Manage City & Building - depending on your categories;
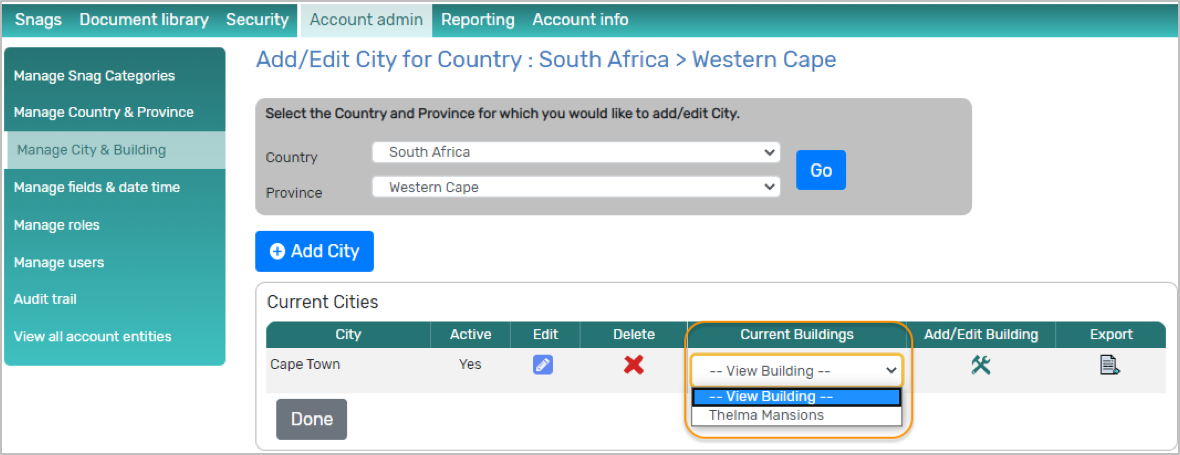
2. Select the Country and Province under which the Building resides that you would like to change and hit GO; Current cities under this Country and Province are displayed
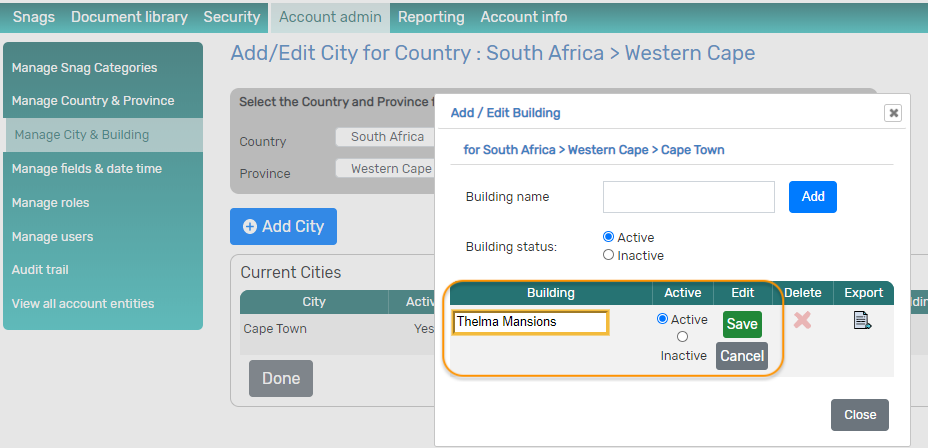
3. Select ADD/EDIT BUILDING next to the city under which a building is to be changed; a list of buildings under this city is displayed
4. Select the EDIT icon next to the relevant building
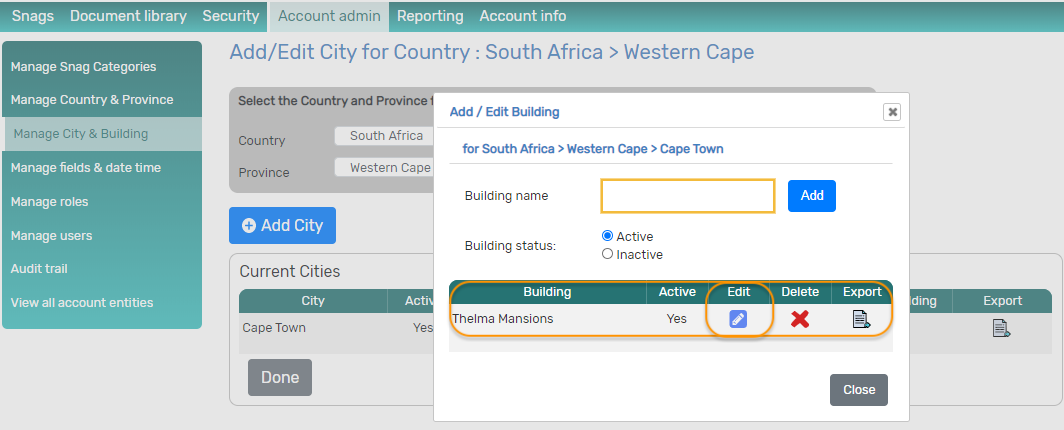
5. Make the change and SAVE
Users – Add, Edit, Assign
Steps to add a user
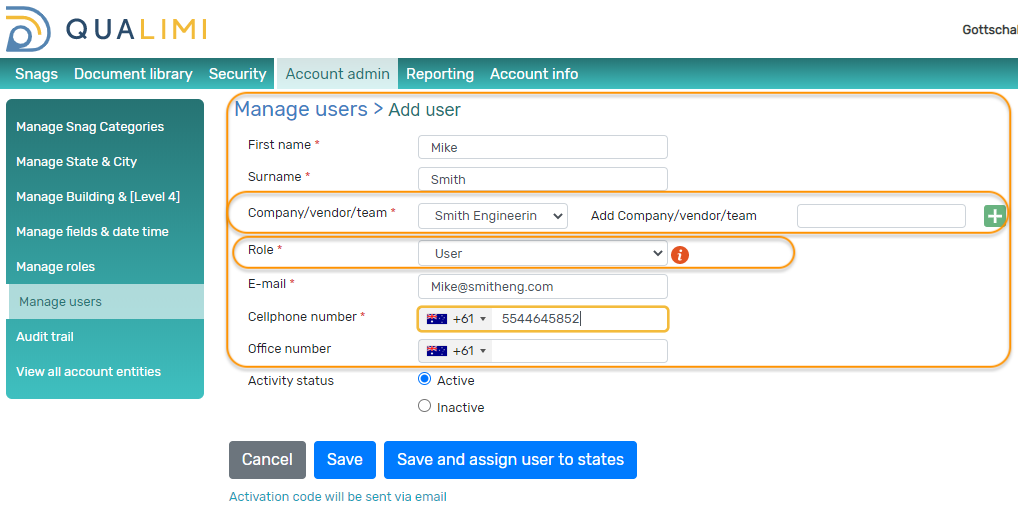
1. Go to Account admin > Manage users
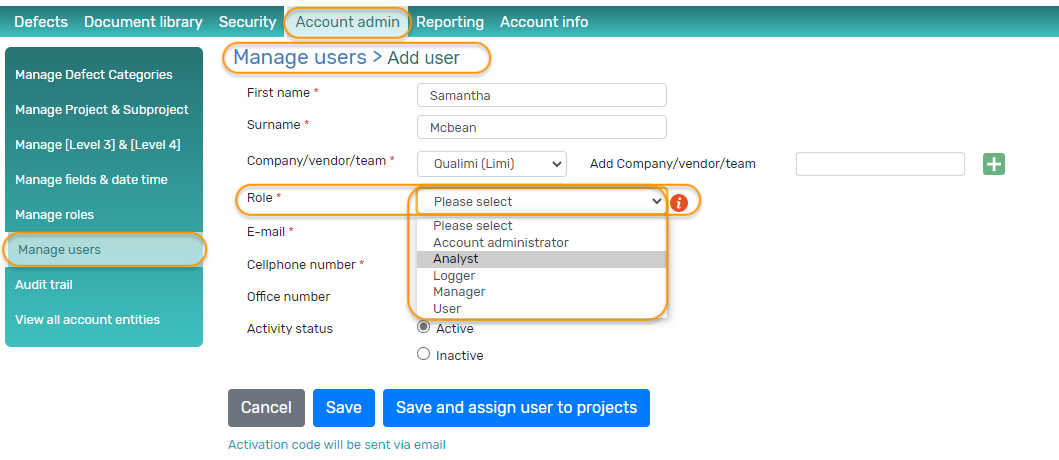
2. Select ADD USER – the Add User screen is displayed

3. Capture the mandatory details of the user indicated with a red * and SAVE
- If the user you are adding works for your company that has signed up for Qualimi, select your company that should be listed in the drop down.
- If the user you are adding works for an external vendor you can add additional companies, vendors or teams by capturing the name of the Company/vendor/team and selecting the Plus icon next to it. This name will subsequently appear in the Company/vendor/team drop down list
a. Company/vendor/team:
b. Role: select a Role for the user – the role will determine what permissions a user has. Click here to learn more about Roles and Permissions.
The user is added
Important info
- The user will receive an email containing a One Time Password (OTP) that they can use to logon to Qualimi web and mobile app. The user will then be asked to create their own password once they have logged on successfully.
- If the user did not receive the email, you can re-invite the user by selecting “Resend invite” on the Manage Users screen
- The Role of a user determines what permissions the user has on the system. To learn more about Roles and Permissions, click here
Useful info before we start
- Users can be assigned to Category 1, and if a Category 2 has been defined, they have to be assigned at Category 2 level. In our example, this means that if a user is granted access to Melbourne, they will have access to all buildings under Melbourne.
- Users cannot be assigned to Category 3 and 4 – assignation is up to Category 2
Steps to assign a user to your categories
In the example used below:
- Task has been defined as TASK
- Category 1 has been defined as State
- Category 2 has been defined as City
- Category 3 has been defined as Building
- Category 4 has not been defined - we don’t require it for our business
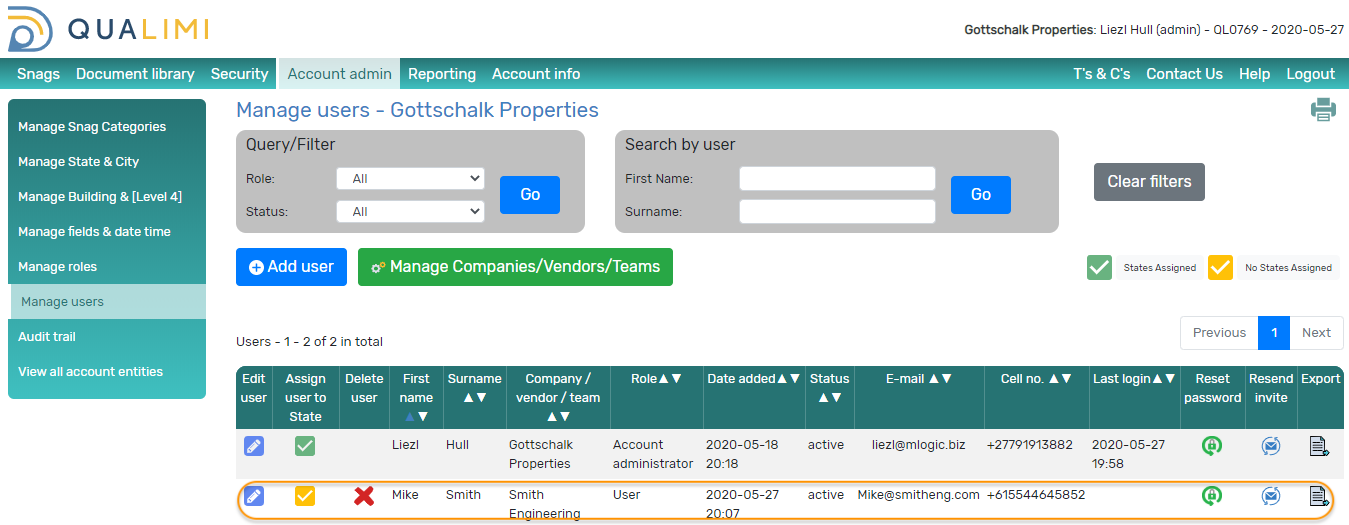
1. Go to Account admin > Manage Users;
2. Select ASSIGN USER TO STATE next to the user you want to assign to States – depending on what your Category 1 is defined as
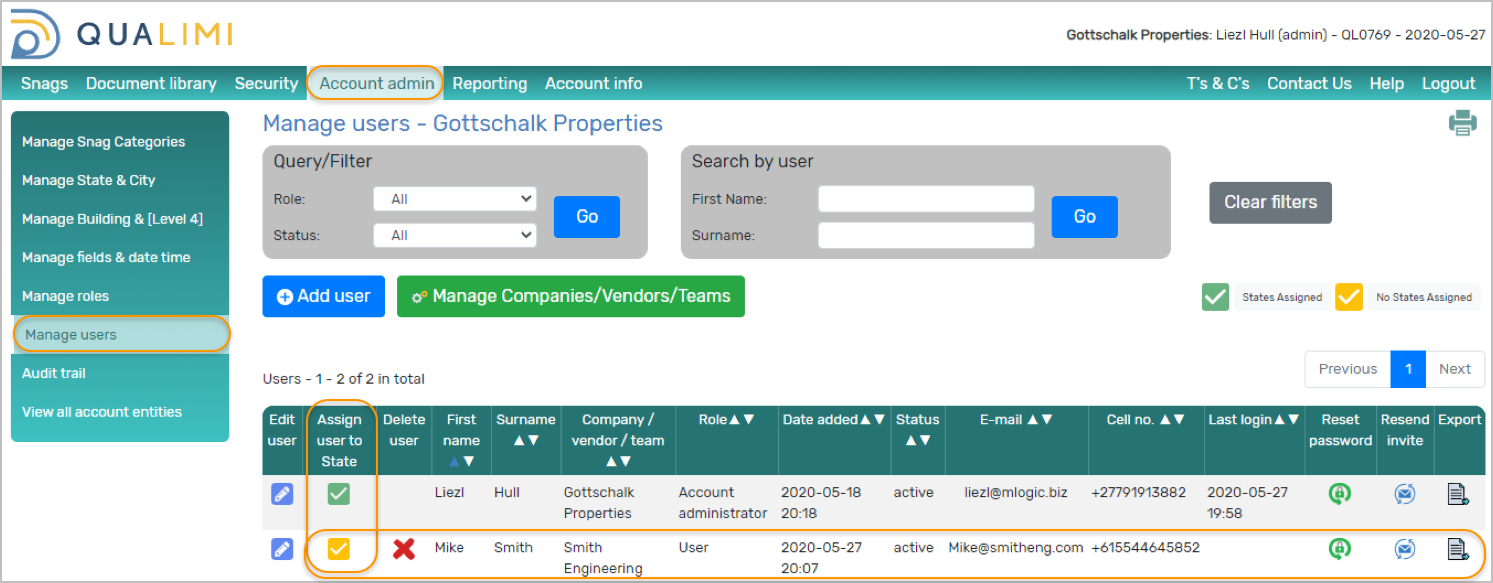
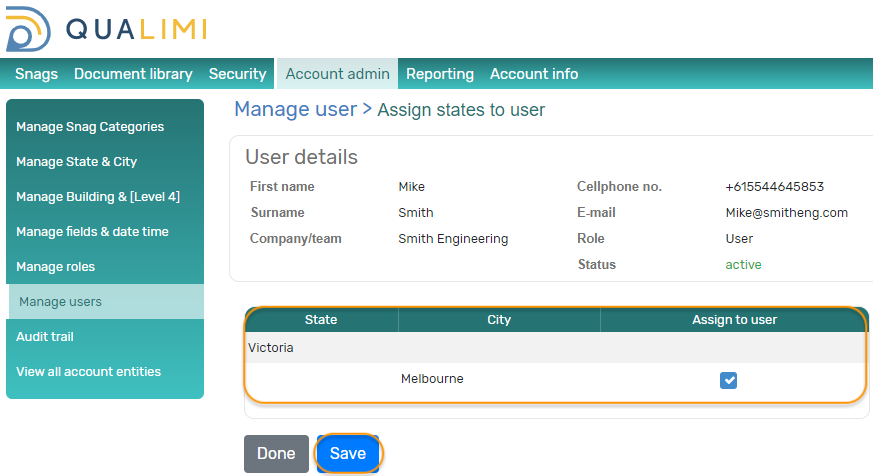
3. On the ASSIGN STATES TO USER screen, select which States this user must have access to and SAVE
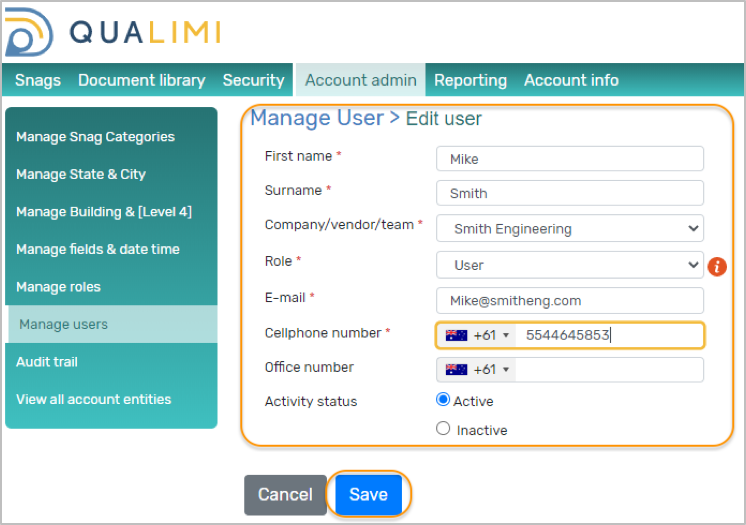
Steps to edit a user’s details
1. Go to Account admin > Manage users;
2. Select EDIT nest to the user you would like to edit
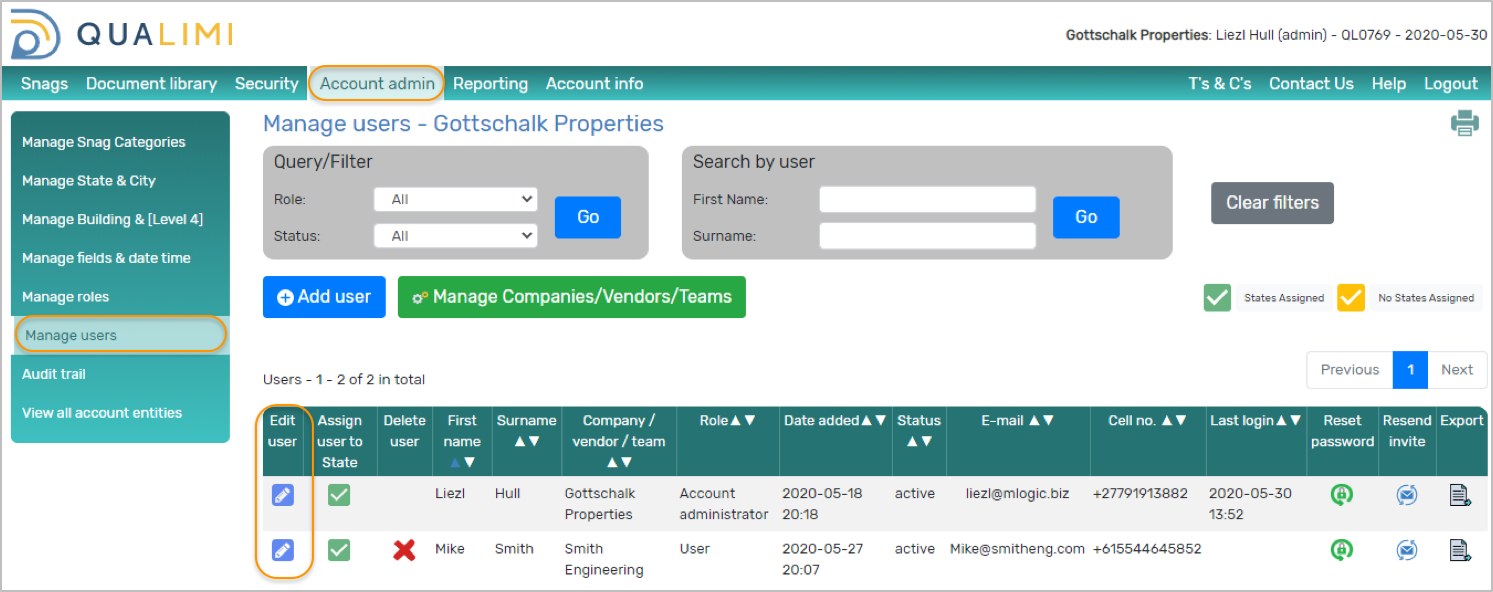
3. The EDIT USER screen is displayed; change the required details and SAVE
Important info
- If a user is an administrator, their address is required as administrators are also billing contacts
- The user will be notified if their email address has been changed
Roles & Permissions
- A Role will determine what rights/permissions a user has on the Qualimi mobile and web apps.
- 4 default roles are available on the system for you to peruse AND you can create your own roles to suit your unique needs. The 4 default roles are:
- Administrator: administrators have full access to all functions
- The Administrator role cannot be changed
- Manager: Managers have access to all functions except adding business information to categories and managing roles
- The Manager role can be changed
- User: Users only have access to add, edit and assign TASKs that they created or that are assigned to them.
- The User role can be changed
- Logger: a logger is a free user with limited access. They can basically log TASKs and edit TASKs assigned to them;
- The Logger role can only be changed to a limited extent, i.e. what they can View, what they can Edit, and access to the Document Library
- You can change the default Manager and User roles, however the Administrator role cannot be changed
- Rights and Permissions are grouped according to the menu of the Qualimi web app i.e.
- TASKs
- Account Admin
- Reporting
- Document Library
- The mobile app only caters for limited functions under TASKs. If a user is granted the TASKs permissions below, these functions are available to that user on both the web and mobile apps:
- View TASK (includes adding comments and attachments)
- Add TASK (includes adding and editing attachments)
- Edit / Assign TASK (includes adding and editing attachments)
- Close TASK
- Edit TASK comments
- Delete attachments (on TASKs only)
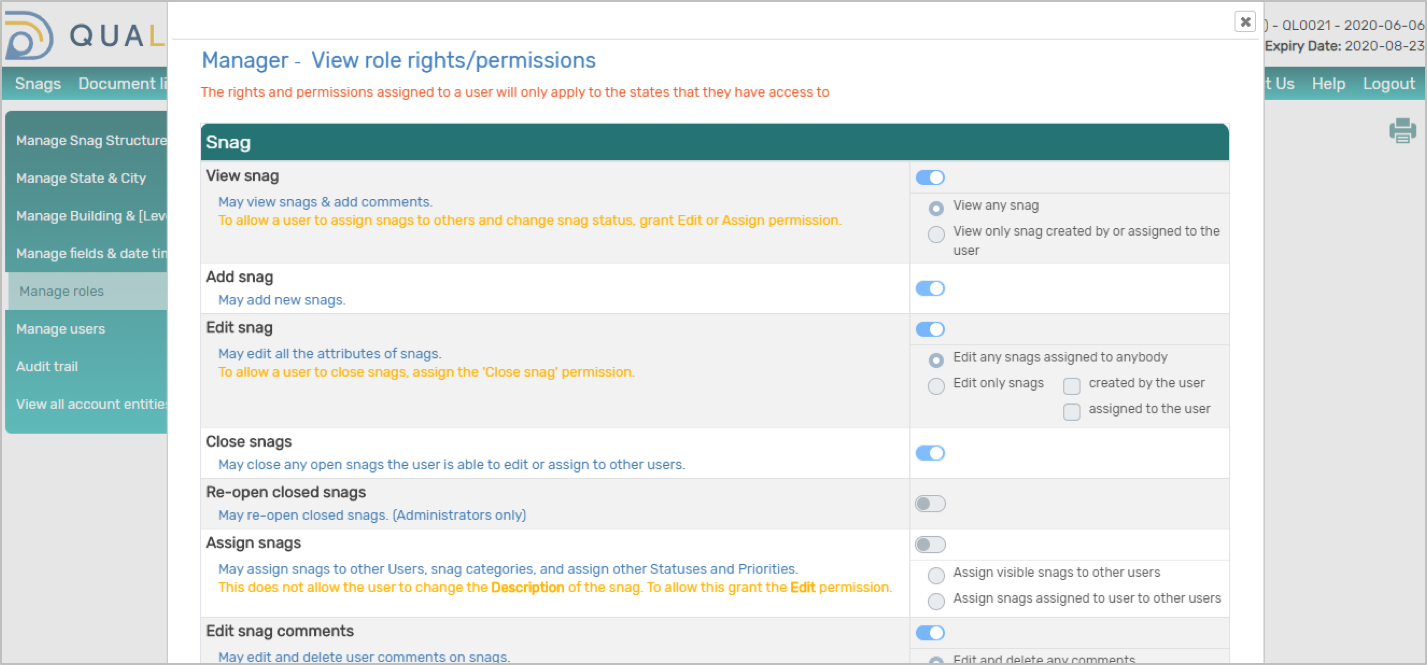
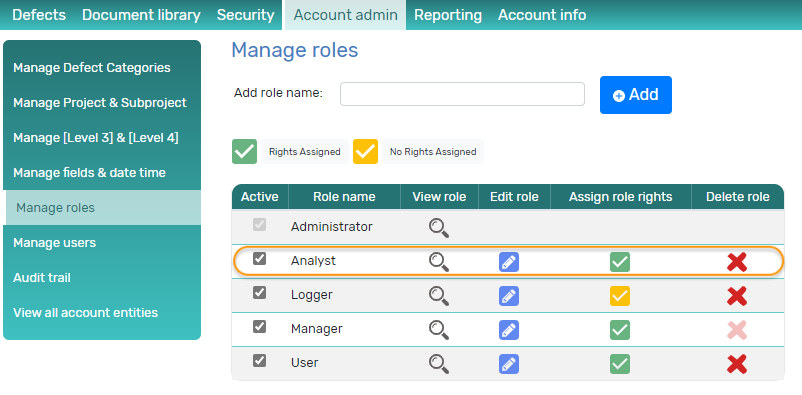
Steps to view roles
1. Go to Account admin > Manage Roles
2. Select the VIEW ROLE icon next to the role you would like to view
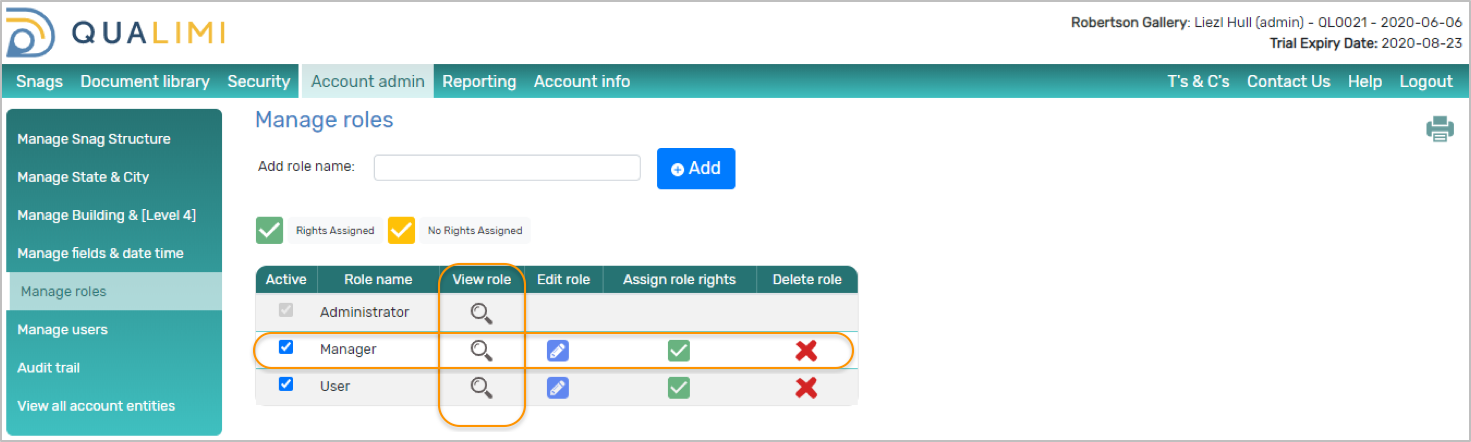
3. The permissions of that role are displayed
- A Role will determine what rights/permissions a user has on the Qualimi mobile and web apps.
- 4 default roles are available on the system for you to peruse AND you can create your own roles to suit your unique needs. The 4 default roles are:
- Administrator: administrators have full access to all functions
- The Administrator role cannot be changed
- Manager: Managers have access to all functions except adding business information to categories and managing roles
- The Manager role can be changed
- User: Users only have access to add, edit and assign TASKs that they created or that are assigned to them.
- The User role can be changed
- Logger: a logger is a free user with limited access. They can basically log TASKs and edit TASKs assigned to them;
- The Logger role can only be changed to a limited extent, i.e. what they can View, what they can Edit, and access to the Document Library
- Rights and Permissions are grouped according to the menu of the Qualimi web app i.e.
- TASKs
- Account Admin
- Reporting
- Document Library
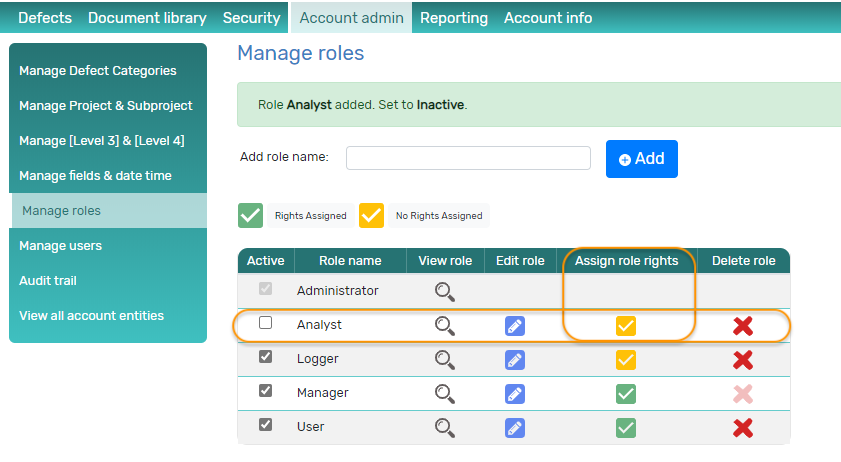
Steps to add a role
1. Go to Account admin > Manage Roles
2. Capture the name of the new role in the Add Role Name field, and select the ADD button
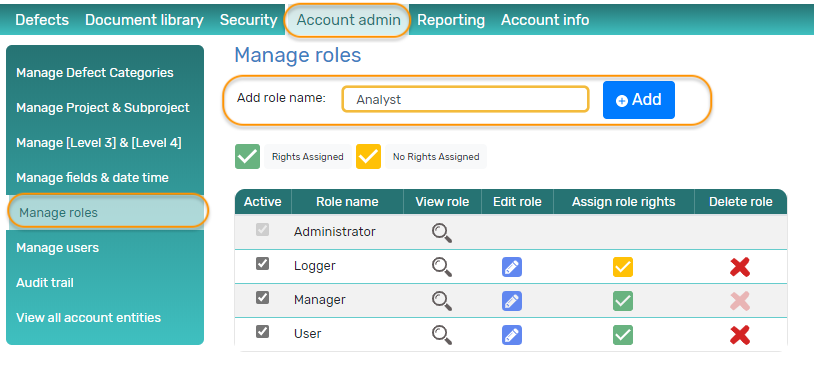
3. The role is listed in the list of roles
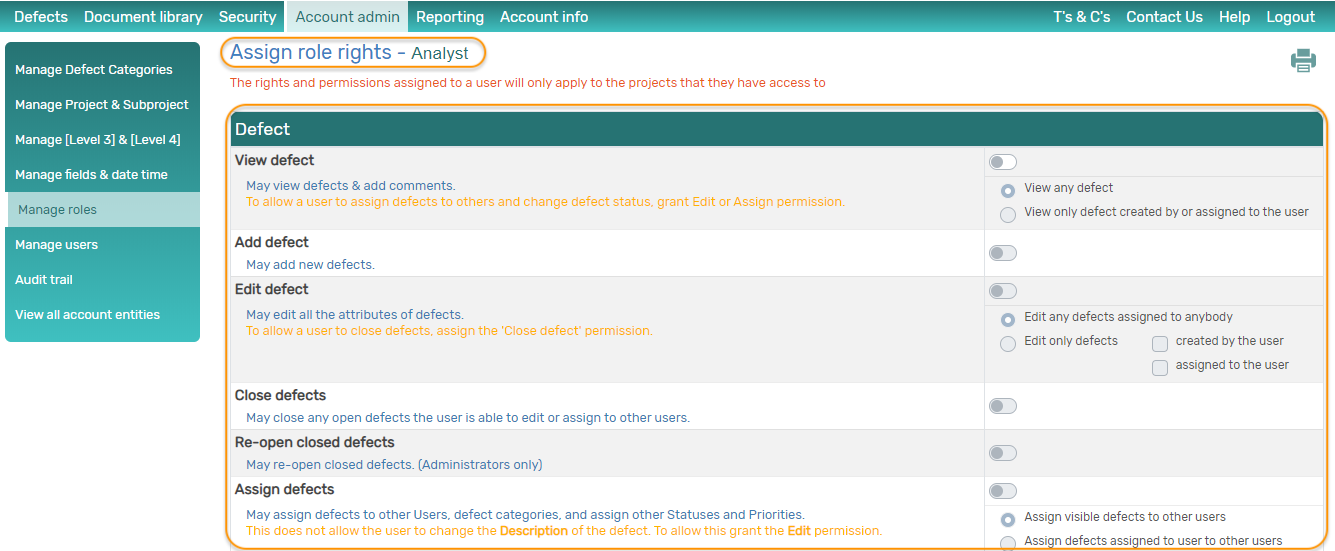
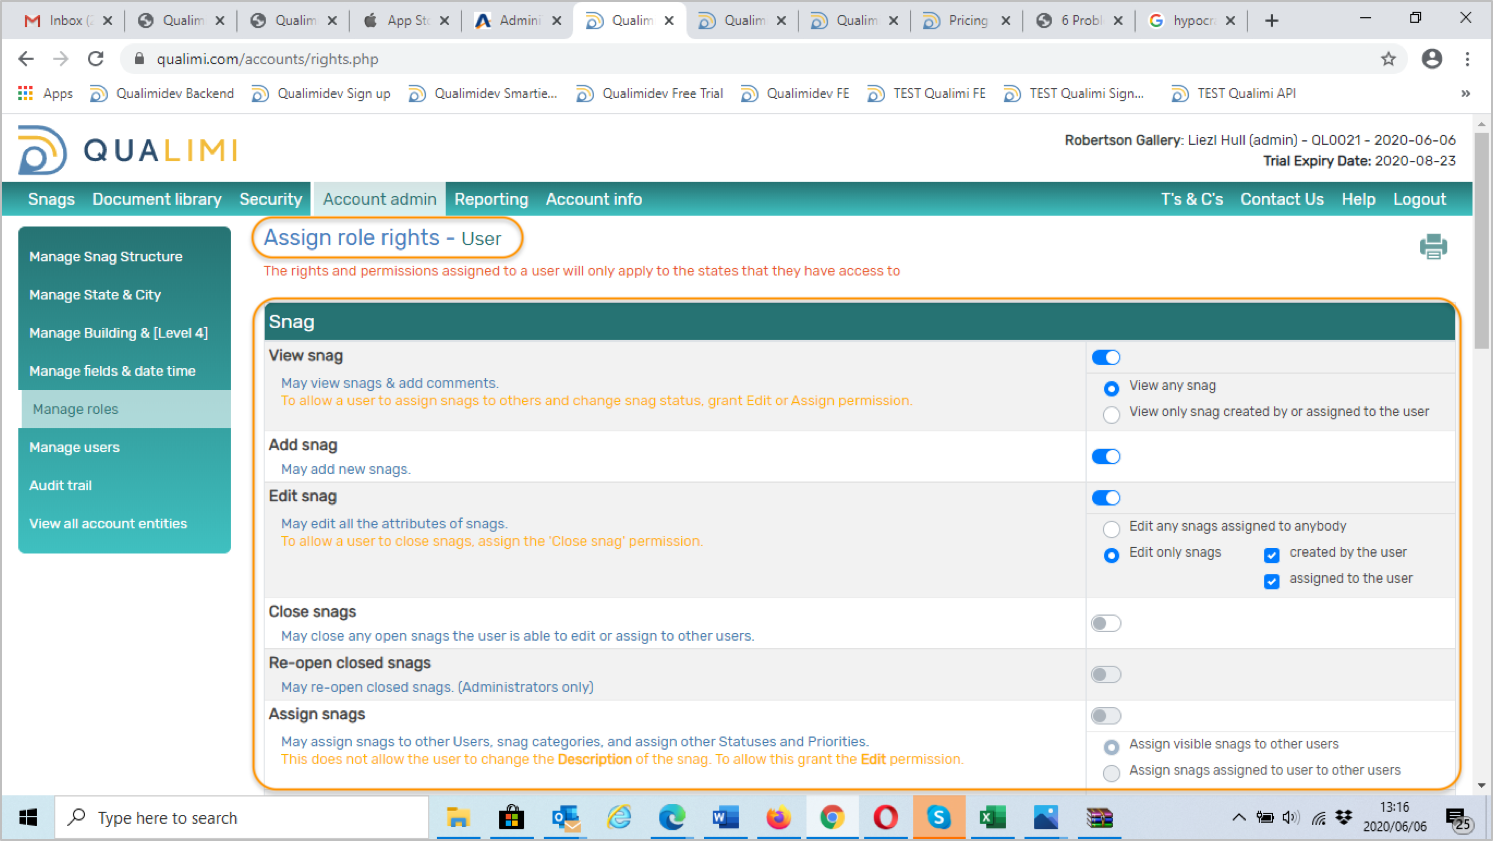
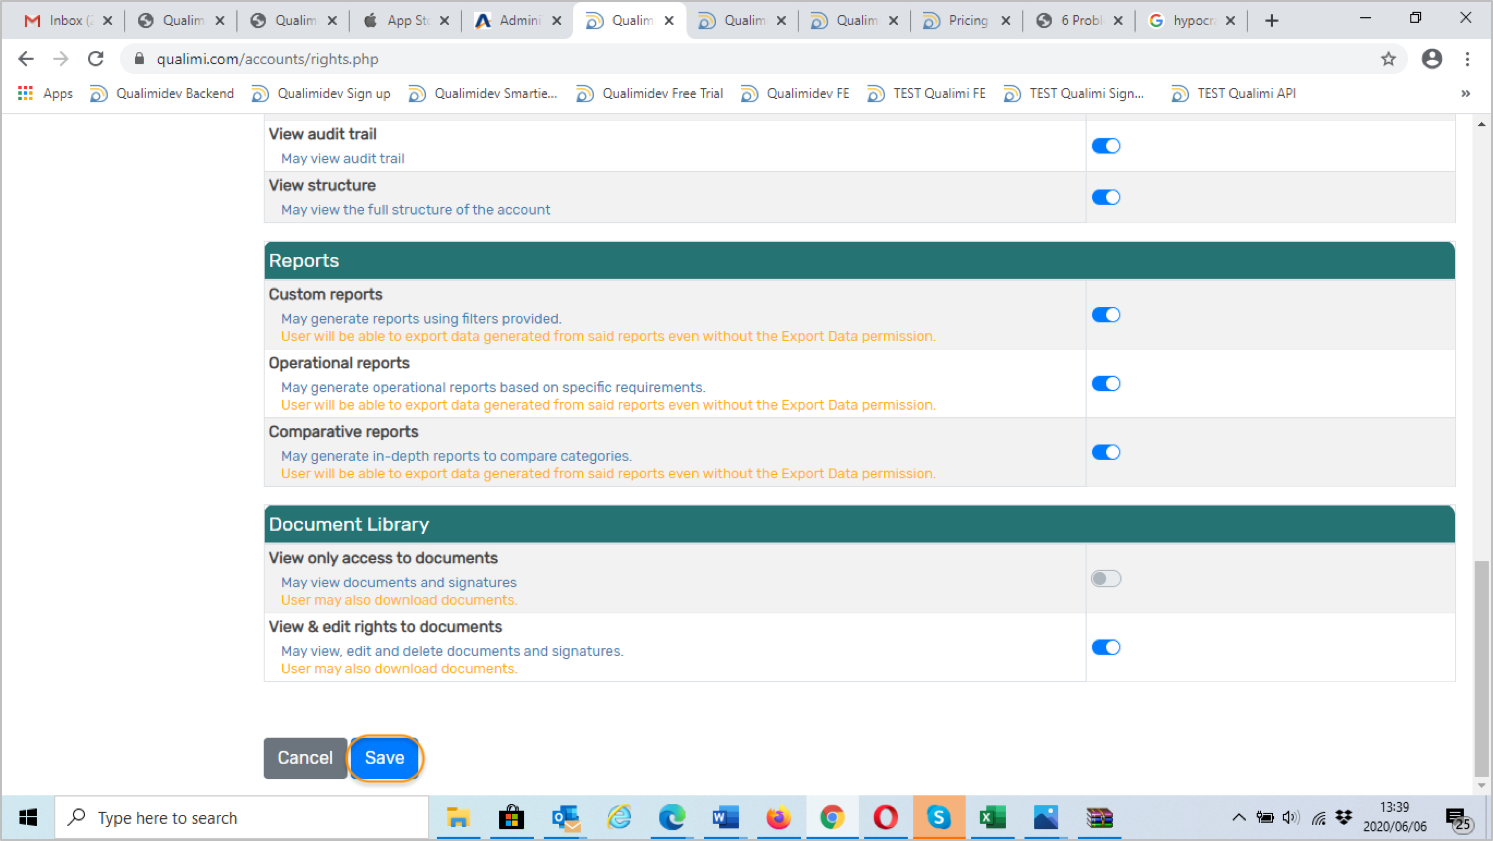
4. Select the ASSIGN ROLE RIGHTS icon next to the new role – the Assign Role Rights screen is displayed
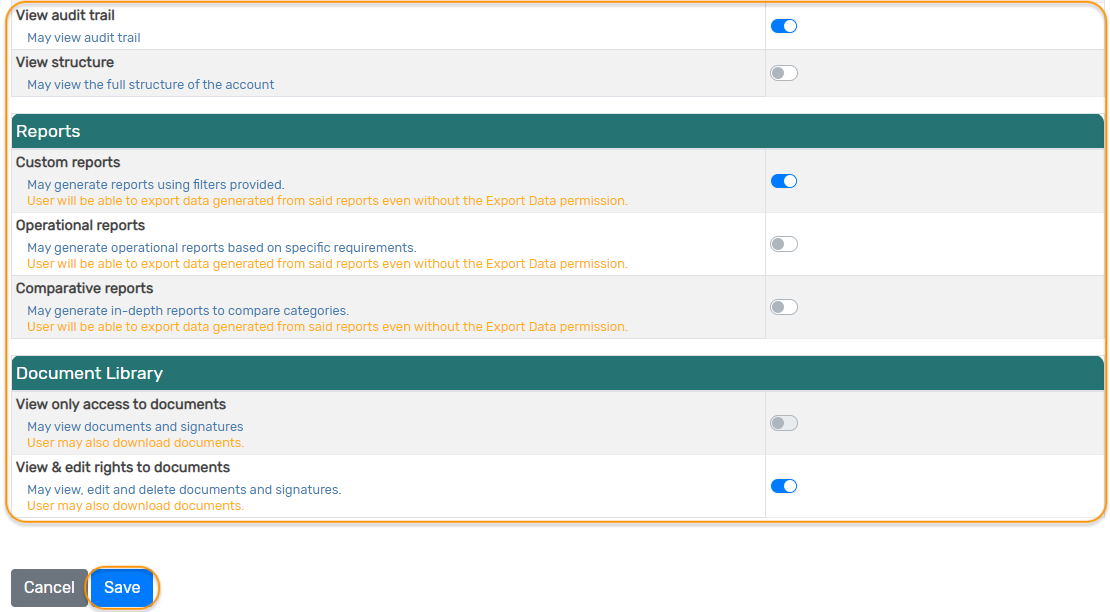
5. Select the rights that you wish this role to have
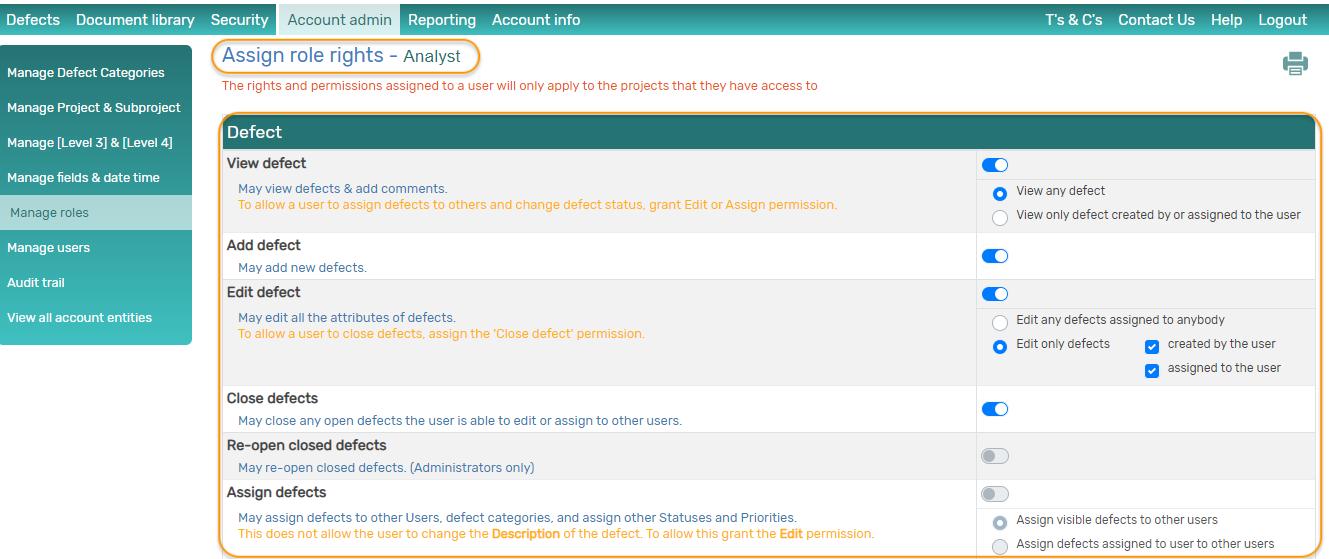
6. Select SAVE
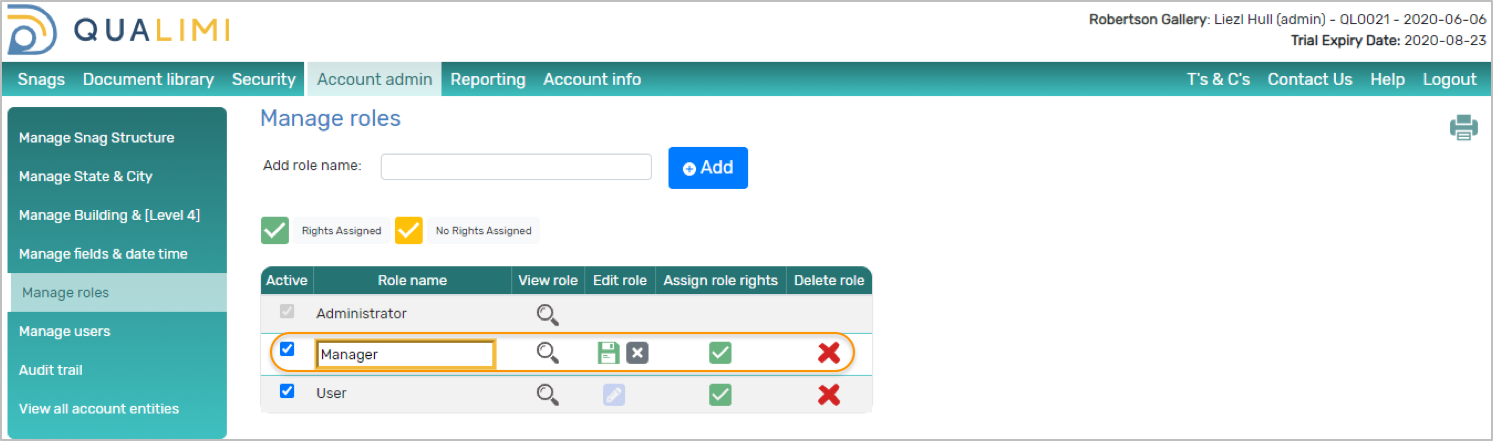
7. The Manage Roles screen with the List of Roles is displayed. The new role is listed and active. The Assign Role rights icon next to this role has turned from yellow to green as rights have been assigned to this role.
8. When adding or editing a user, this new role will be available under the “Role” drop down.
Steps to assign rights/permissions to a role
1. Go to Account admin > Manage Roles
2. Select the ASSIGN ROLE RIGHTS icon next role you would like to change
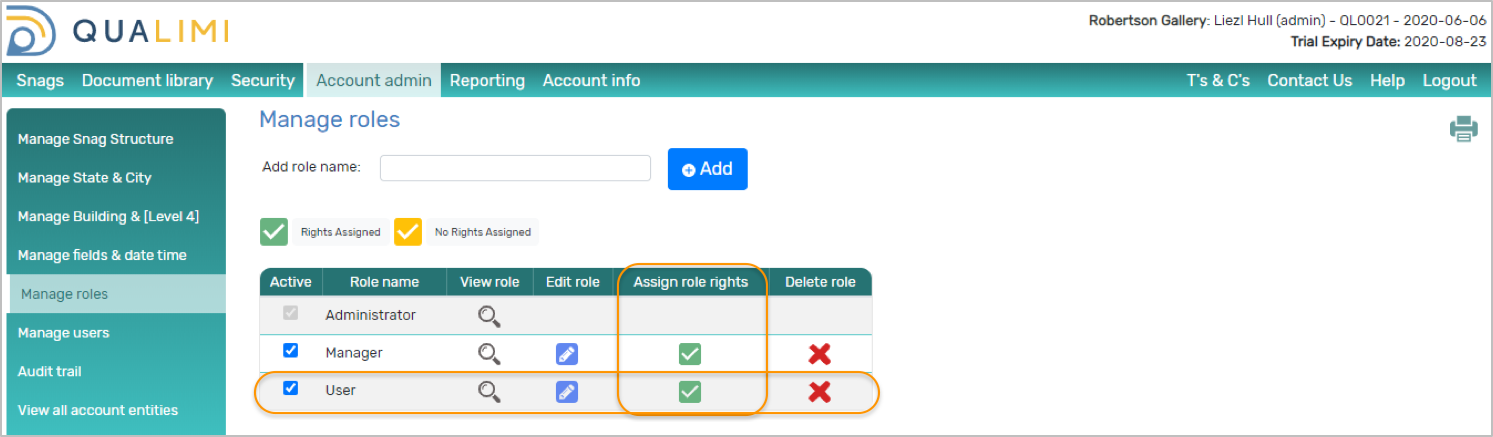
3. The ASSIGN ROLE RIGHTS screen is displayed and you can edit the rights as required
4. Select SAVE
Steps to edit a role name
1. Go to Account admin > Manage Roles
2. Select the EDIT icon next to the role name you would like to change; The role name becomes editable
3. Change the name
4. Select the SAVE icon
Add & Edit Status and Priority
A status defines the “state” of a task.
We have provided some default statuses for your perusal – to get started with, however you can delete the statuses you don’t need and add your own statuses that you require.
The default statuses are:
- Open
- Clarified
- Closed
- Duplicate
- In progress
- Not satisfactory
- To be checked
- You can add statuses to cater for your business processes and needs
- A status can only be deleted if there are NO tasks associated with this Status
- Status is a mandatory field, i.e. it has to be captured for every task.
- At least ONE open and ONE closed status must exist
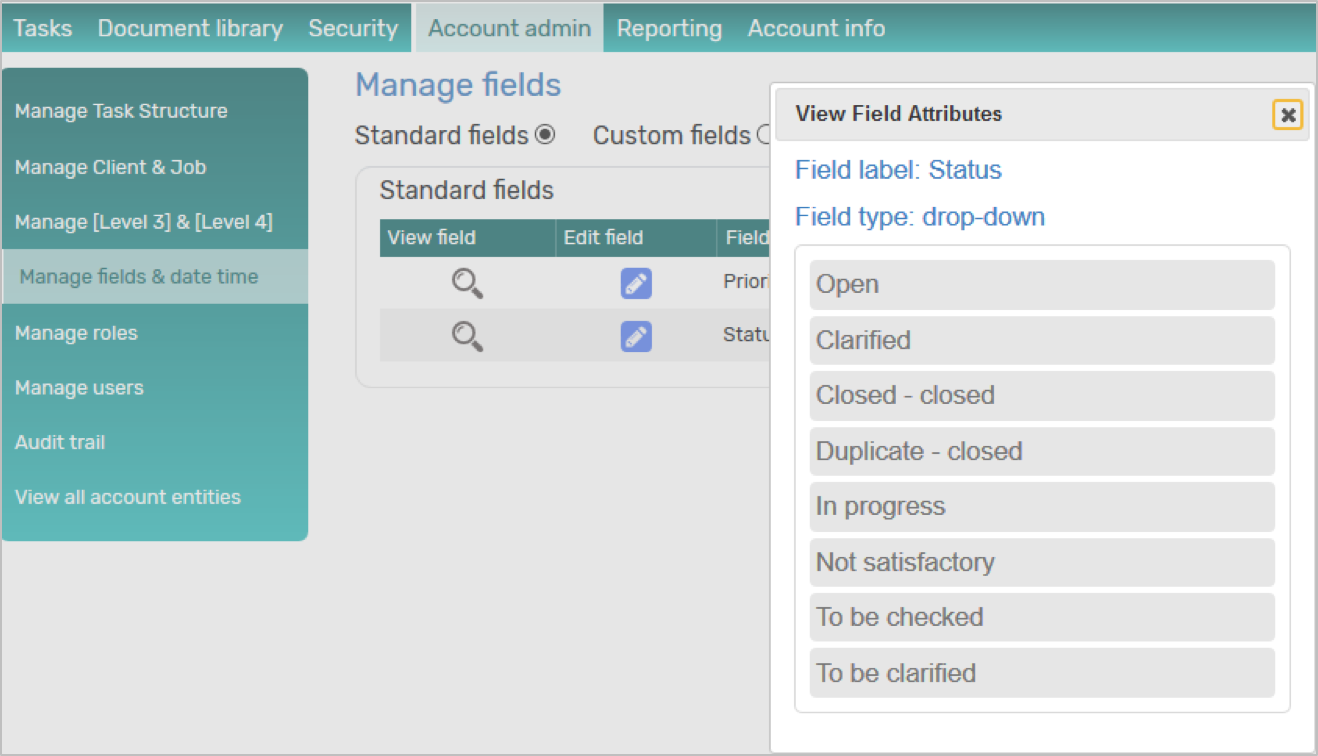
Default Statuses
Steps to add a Status
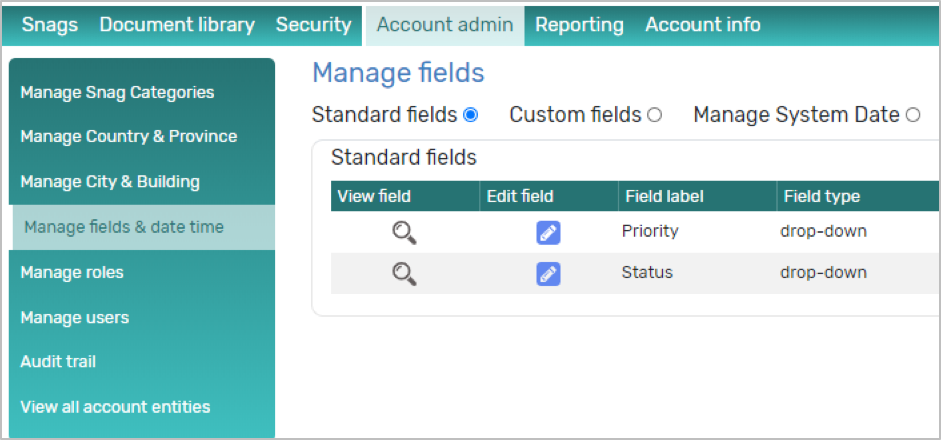
1. Go to Account admin > Manage fields & date time; Standard fields will be selected by default
2. Select the EDIT FIELD icon next to Status; the ADDITIONAL VALUES FOR STATUS popup is displayed
3. Capture the Name of the Status in the ADD STATUS VALUE field
a. If the Status will constitute an Open status, leave the Closed tick box unticked
b. If the Status will constitute a Closed status, tick the Closed tick box
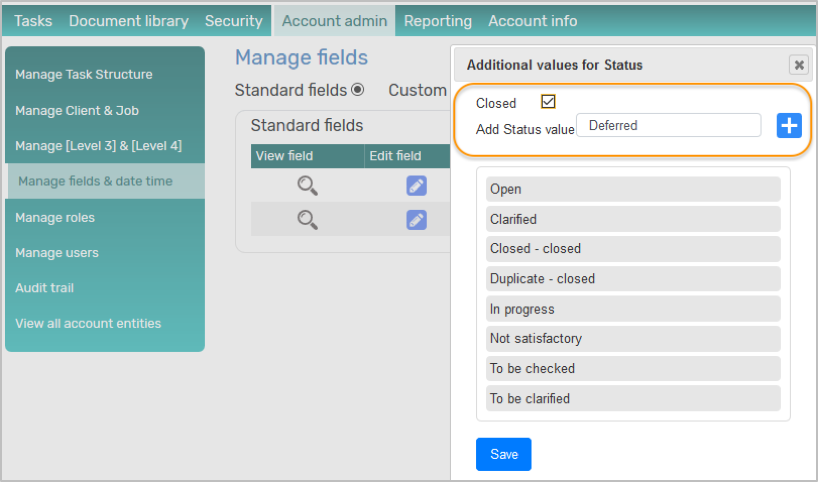
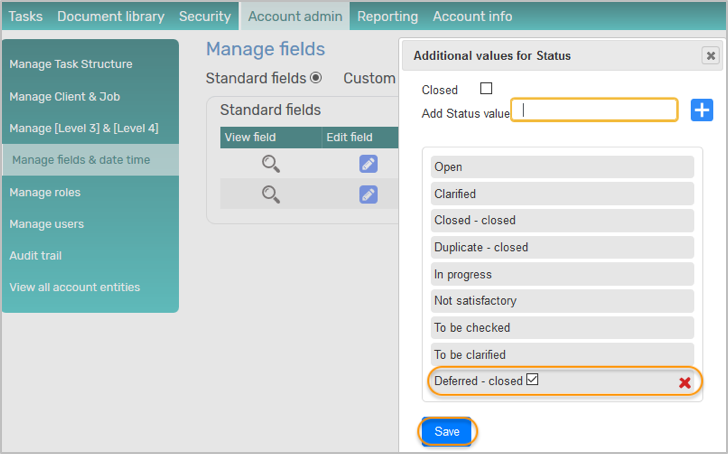
4. Select the ADD icon next to the name; the new Status is listed
5. Select SAVE
- This Status will be available under all categories when adding or editing a TASK
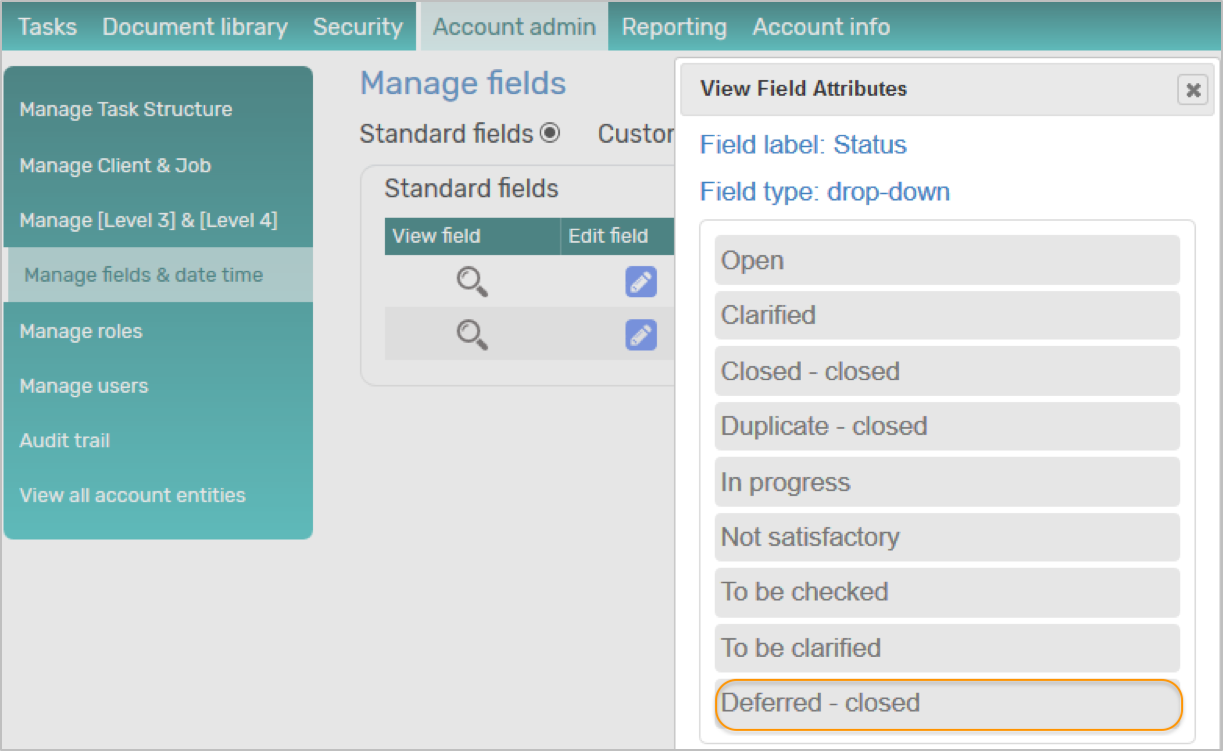
New Status added
A priority defines the “severity” or “urgency” of a task.
We have provided some default priorities for your perusal – to get started with, however you can delete the priorities that you don’t require and add your own priorities.
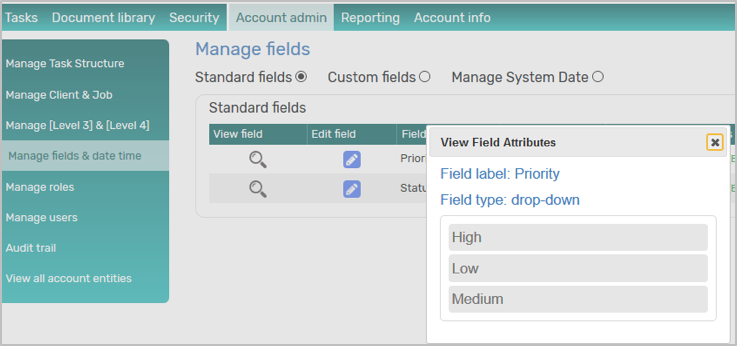
The default priorities are:
- Low
- Medium
- High
- You can add your own priorities to cater for your unique business processes and needs.
- A Priority can only be deleted if there are no or only Closed tasks associated with this Priority
- Priority is a mandatory field, i.e. it has to be captured for every task
- At least ONE Priority must exist
Default Priorities
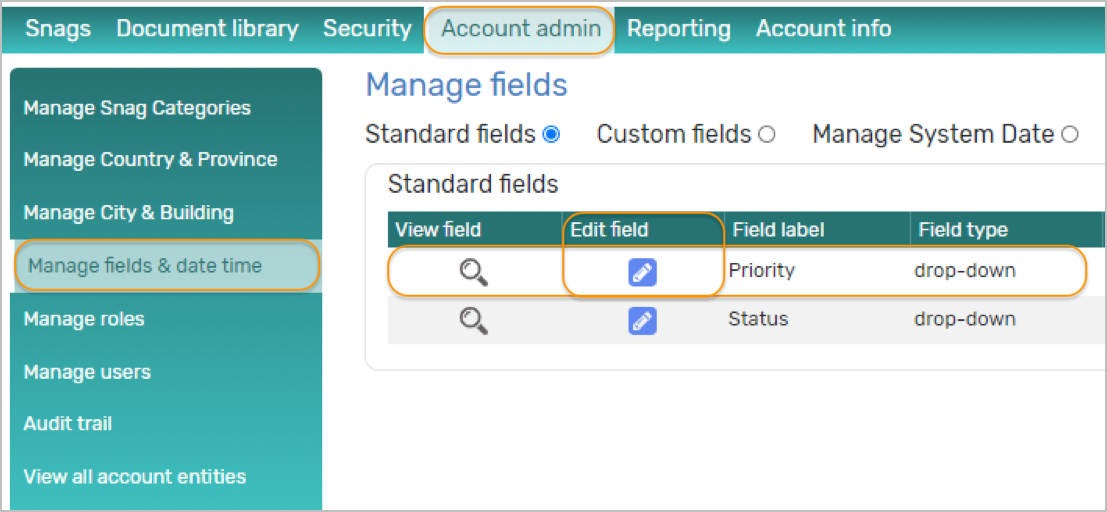
Steps to add a Priority
1. Go to Account admin > Manage fields & date time
2. Select the EDIT FIELD icon next to Priority; the EDIT PRIORITY VALUES popup is displayed
3. Capture the Name of the Priority in the ADD PRIORITY VALUE field
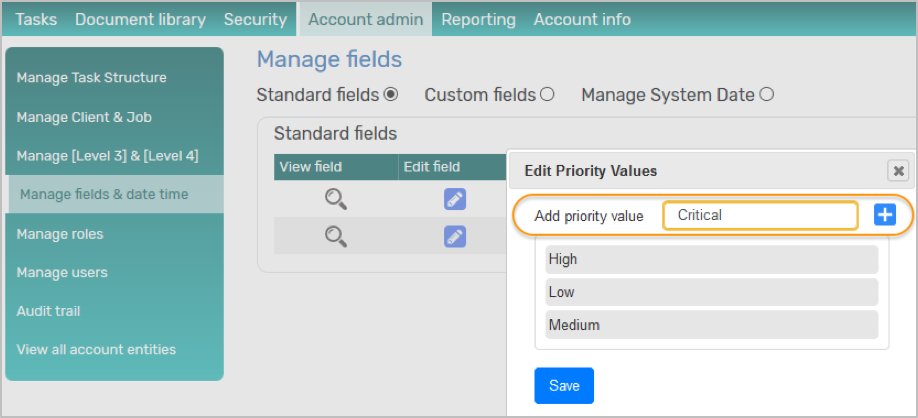
4. Select the ADD icon; the new Priority is listed
5. Select SAVE
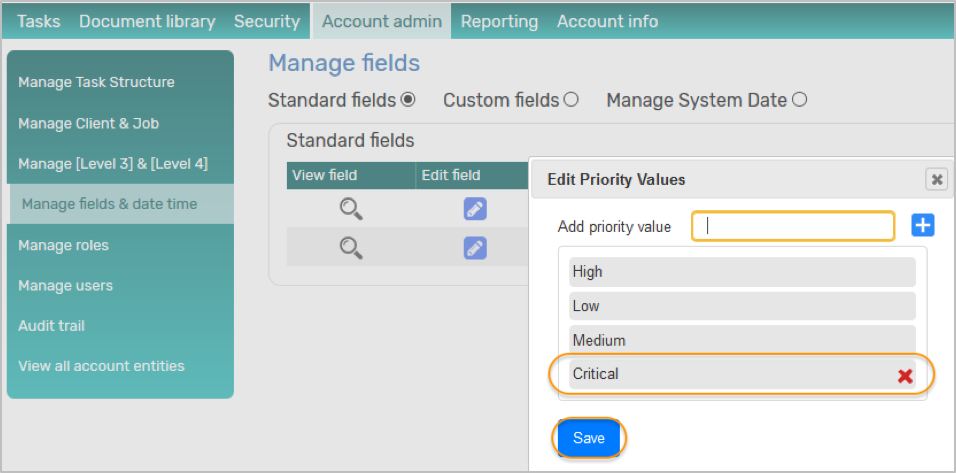
- This Priority will be available under all categories when adding or editing a TASK
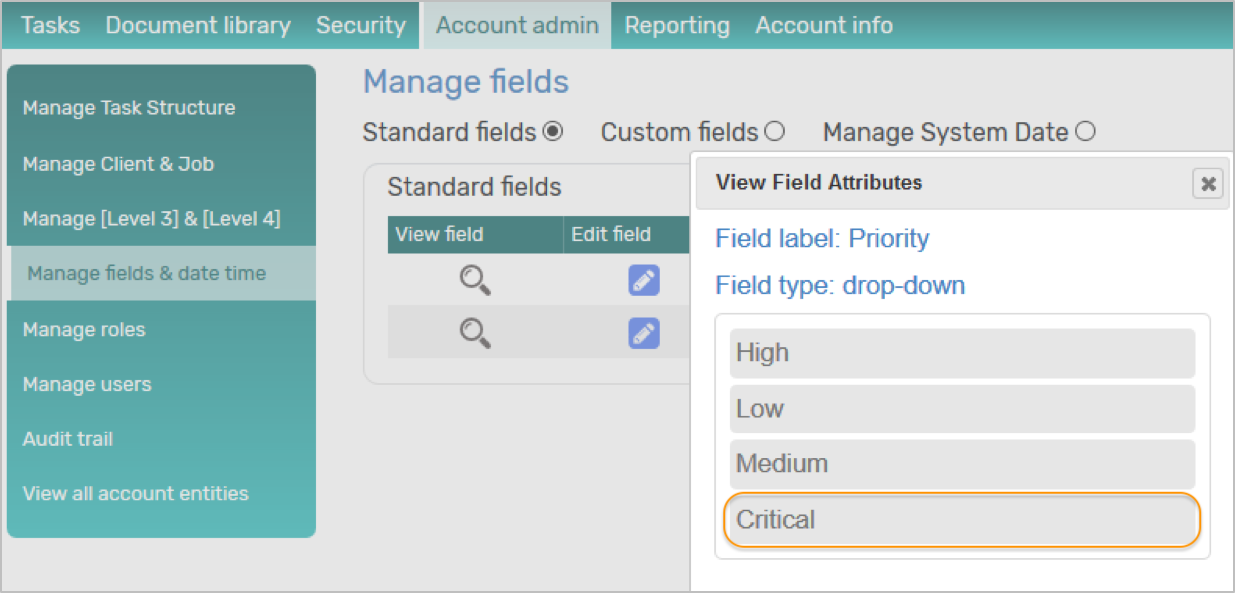
New Priority added
Add Custom Fields, Edit Custom Fields
A custom field is a field that you create yourself when you require some additional information to be captured for every TASK (task).
There are 4 types of Custom Fields:
- Drop-down field: if you need a user to select one value from a list of values for every task, e.g. Colour: red, blue, green, yellow, purple
- Text field: if you need a user to capture a little extra information for each task e.g. Address of site or coordinates
- Numeric field: if you need a user to capture e.g. an amount or a distance
- Date field: if the user is to capture an additional date e.g. Task start date
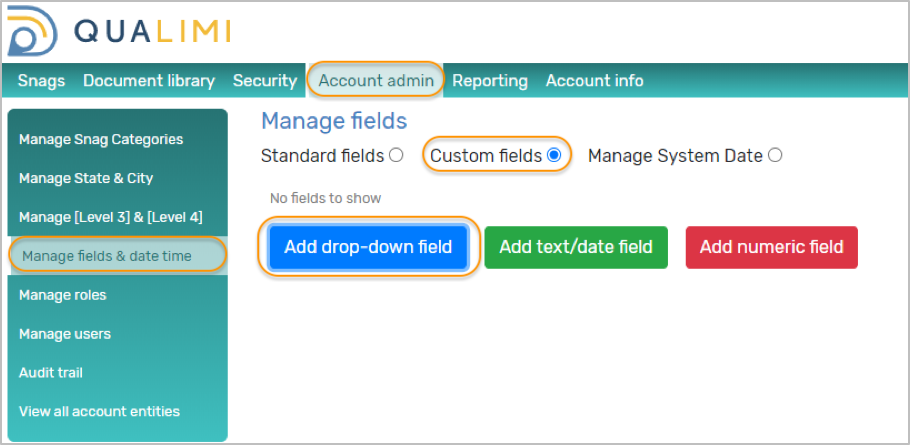
Steps to add a drop-down field
1. Go to Account admin > Manage fields & date time
2. Select Custom fields
3. Select ADD DROP-DOWN FIELD
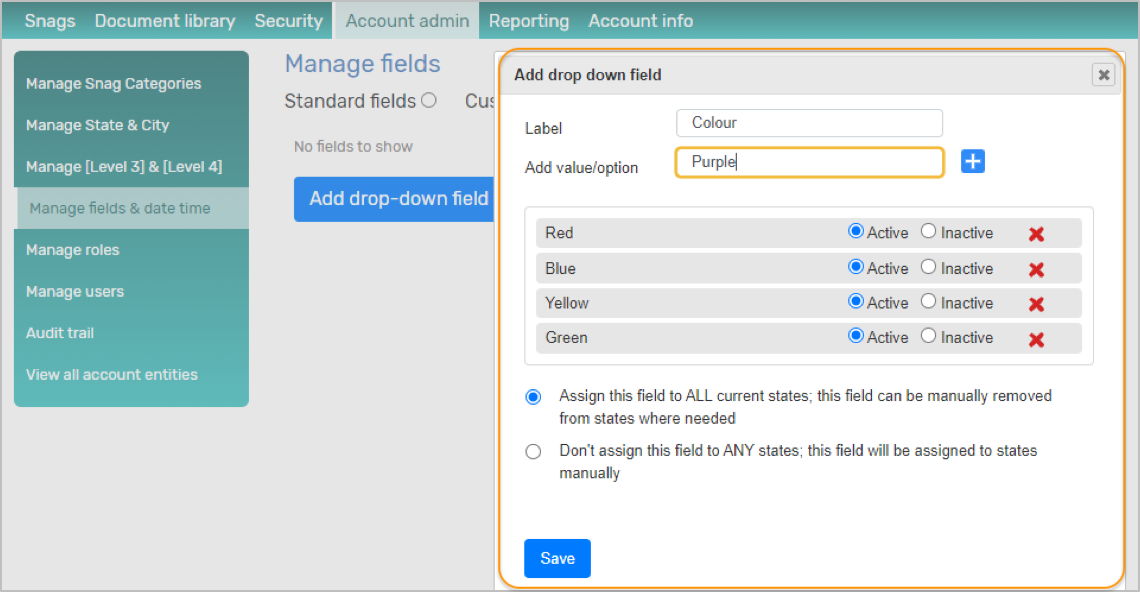
4. Capture the label of the drop-down field e.g. Colour
5. Capture the values required and select the ADD icon after each value is captured; a list of the values will be displayed
6. Once you have completed your list, select whether you would like to assign this drop-down field to
a. ALL categories – by selecting this option this drop-down field will be required for all new tasks under all categories
b. NO categories – by selecting this option this drop-down will not be assigned to any categories and you will have to manually assign it to the specific categories you require
7. Select SAVE
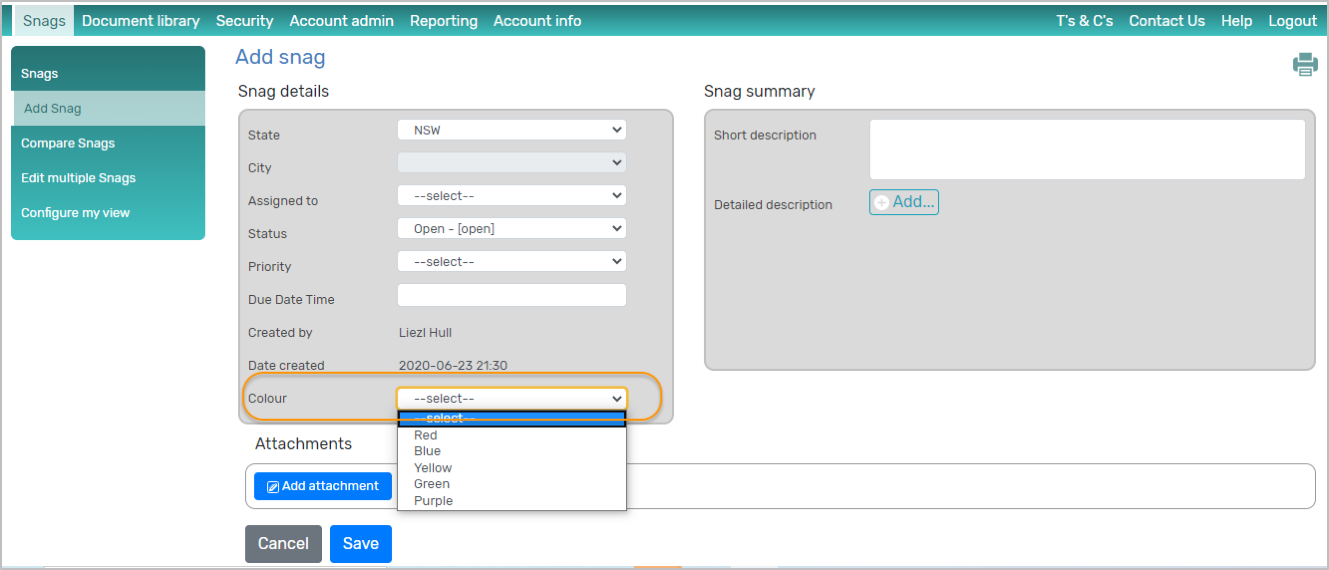
Drop down field is added

Drop-down field is required when adding a task
Steps to make the drop-down field visible when searching TASKs
1. Go to TASKs > Configure My View
2. Select the drop-down field from the left-hand column AVAILABLE COLUMNS
3. Select ADD
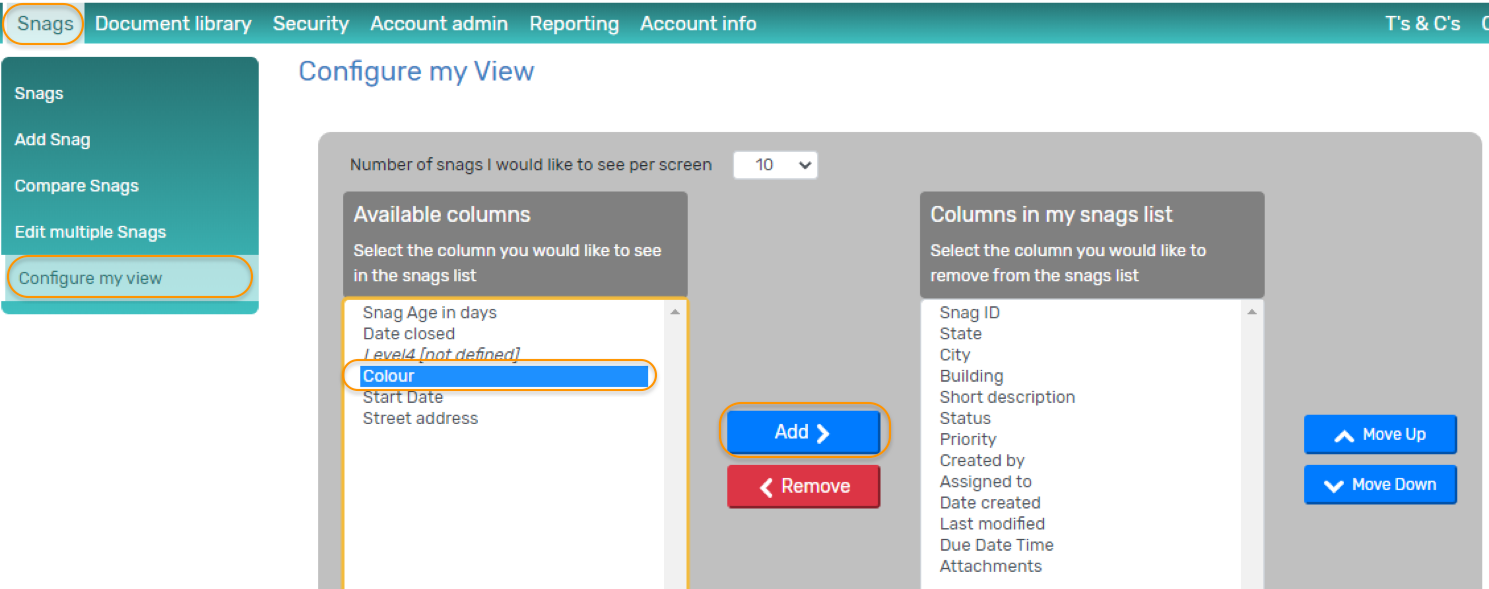
4. The drop-down field is moved to the right-hand column COLUNMS IN MY TASKS LIST
5. Change the order of the fields if you require using the MOVE UP and MOVE DOWN buttons
6. SAVE
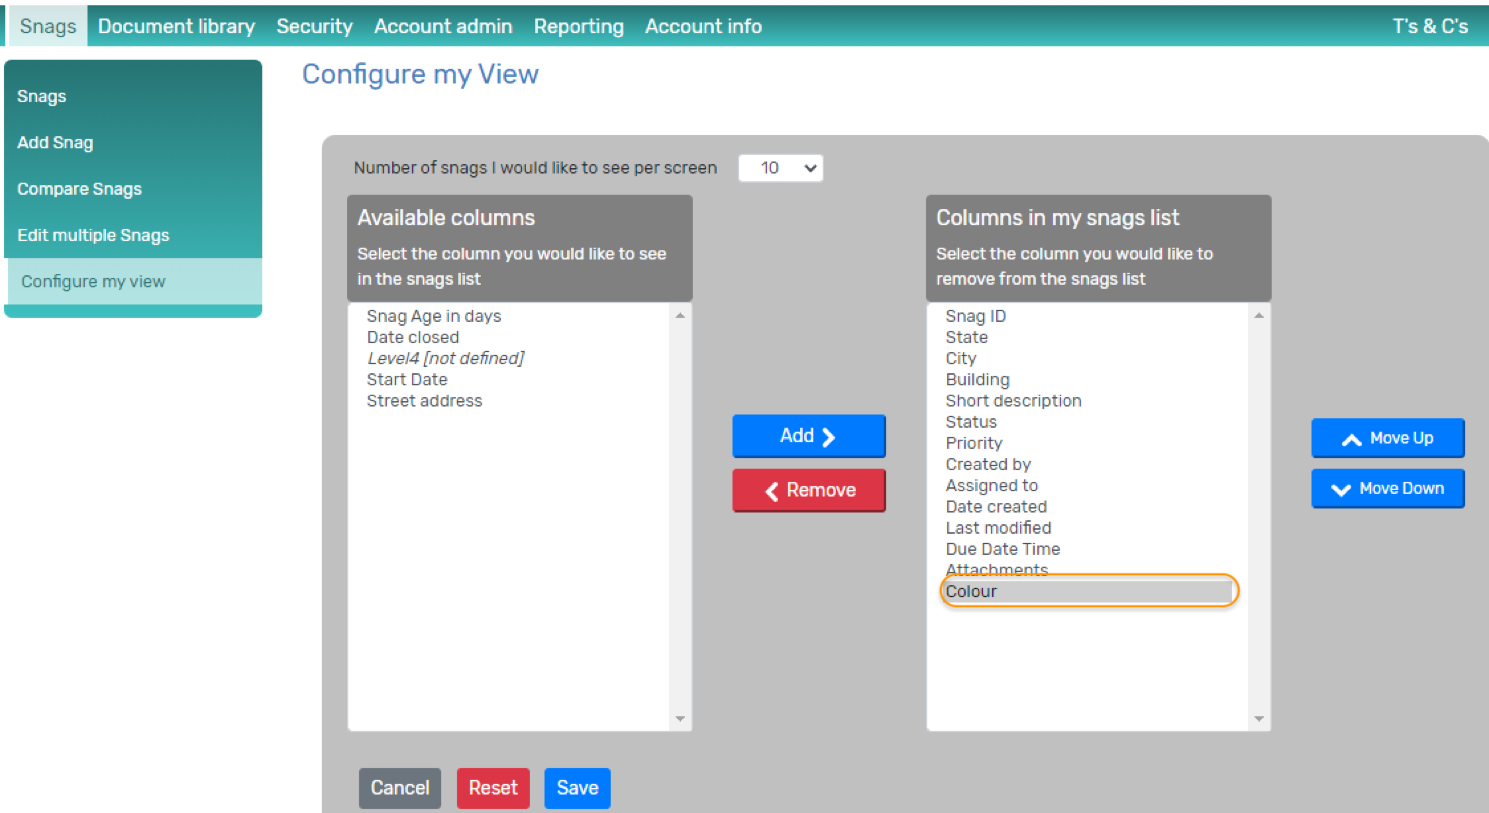
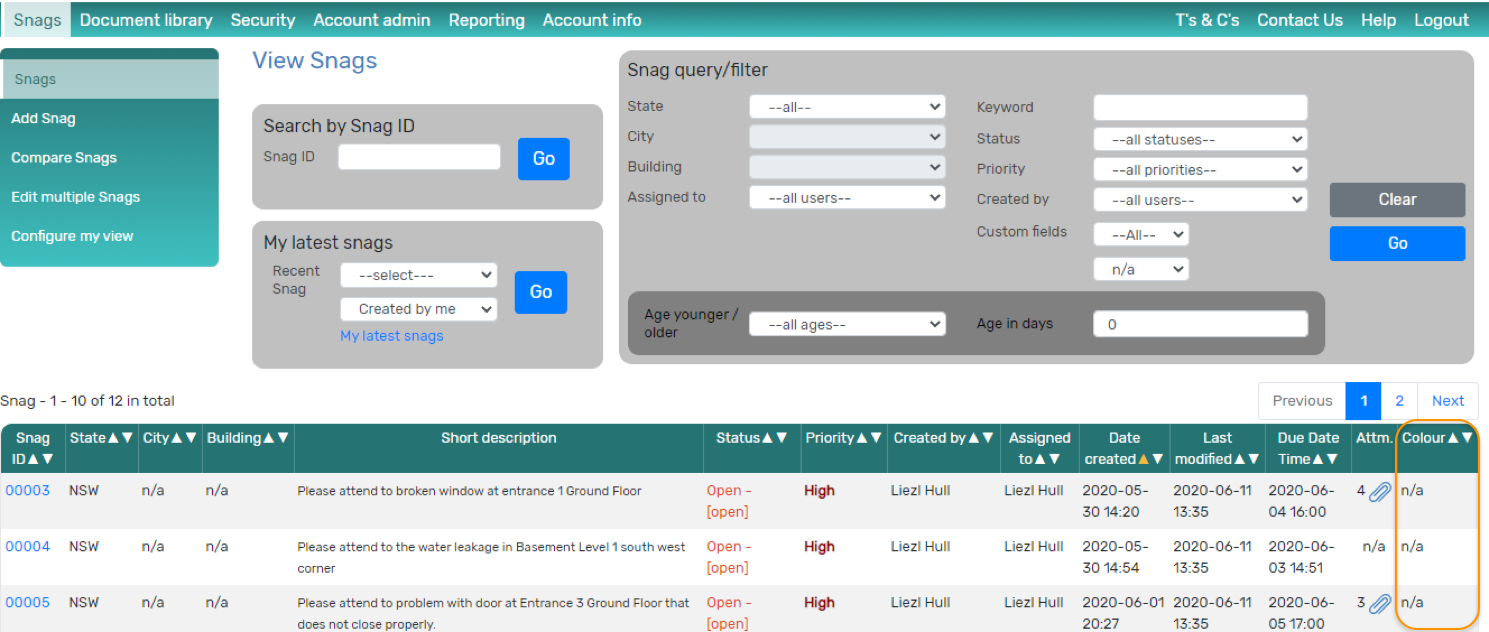
7. The field displays on the TASKs screen
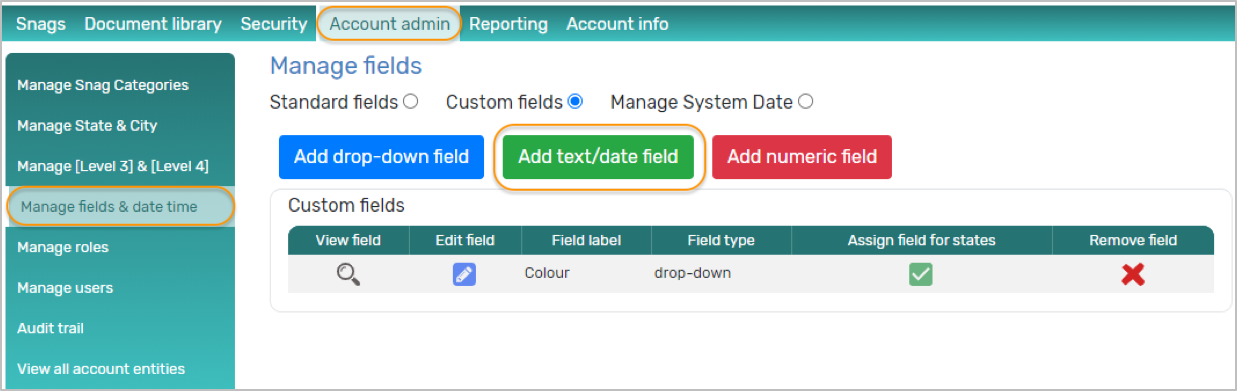
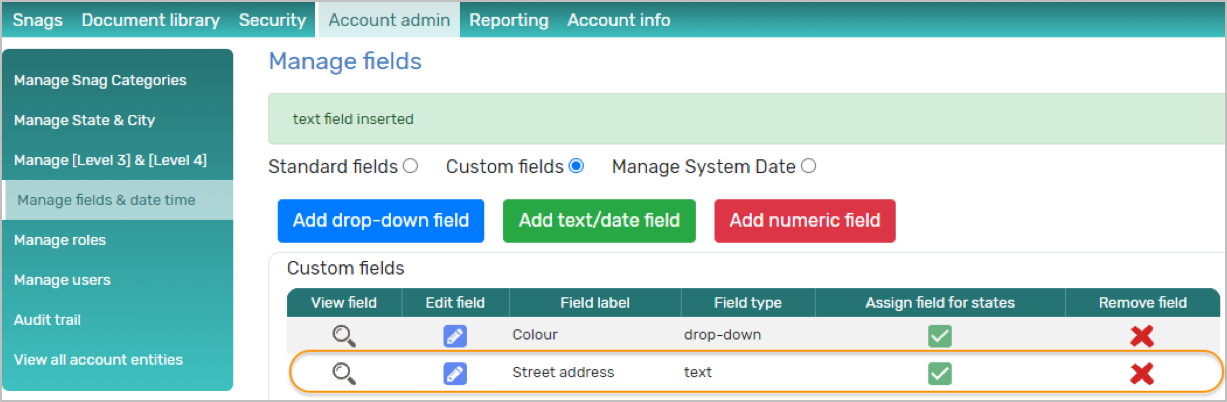
Steps to add a text field
1. Go to Account admin > Manage fields & date time
2. Select Custom fields
3. Select ADD TEXT/DATE FIELD
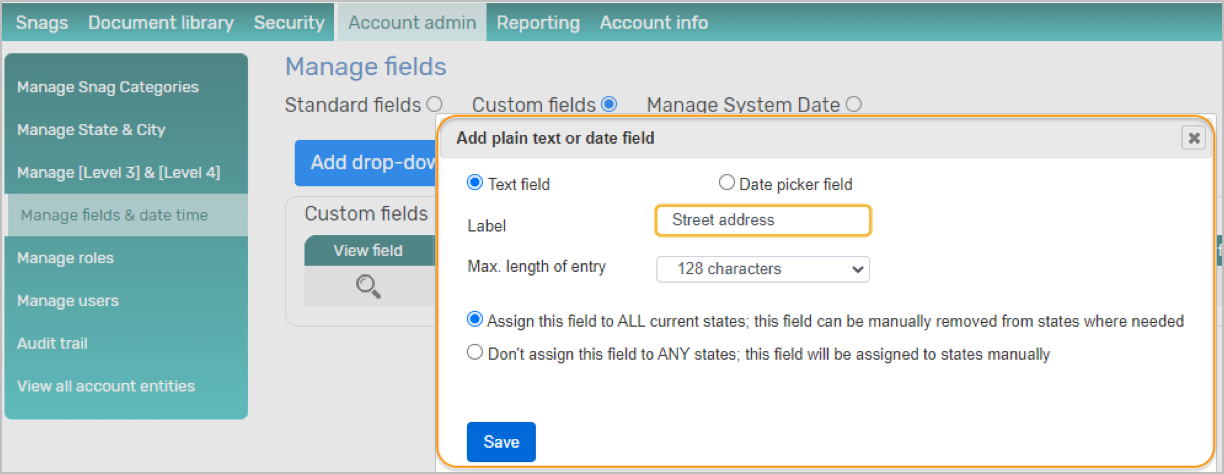
4. The TEXT option is selected by default
5. Capture the label of the field
6. Select the maximum length of the field that you require
- 20 characters
- 50 characters
- 128 characters
7. Select whether you would like to assign this text field to
a. ALL categories – by selecting this option this text field will be required for all new tasks under all categories
b. NO categories – by selecting this option this drop-down will not be assigned to any categories and you will have to manually assign it to the specific categories you require
8. Select SAVE
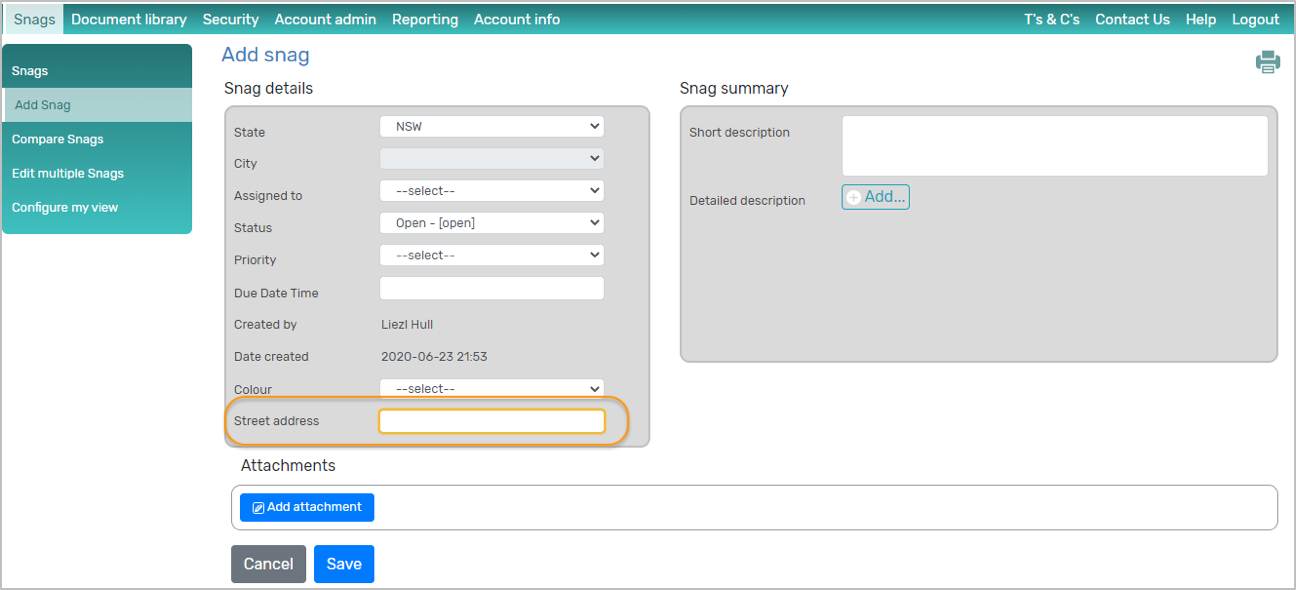
Text field is added
Text field is required when adding a task
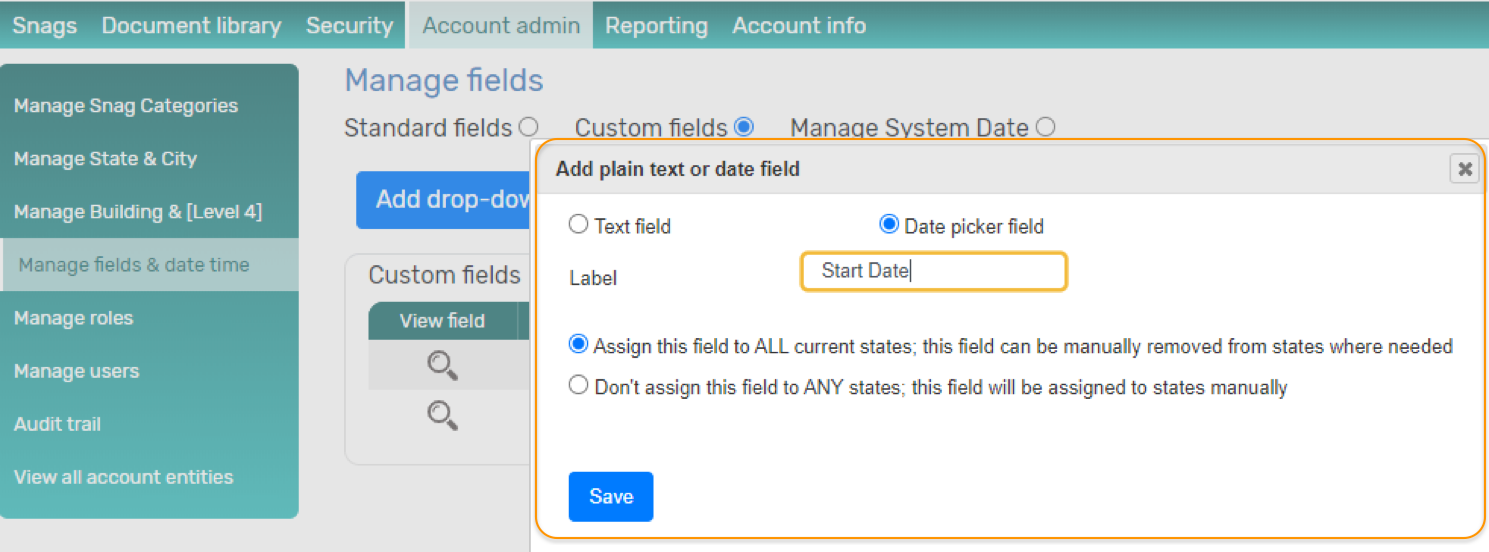
Steps to add a date field
1. Go to Account admin > Manage fields & date time
2. Select Custom fields
3. Select ADD TEXT/DATE FIELD
4. Select DATE PIKCER FIELD
5. Capture the label of the field
- Note: the date format will be in the format currently set for the account. Refer Manage Date & Time to change the date format for the account
6. Select whether you would like to assign this text field to
a. ALL categories – by selecting this option this text field will be required for all new tasks under all categories
b. NO categories – by selecting this option this drop-down will not be assigned to any categories and you will have to manually assign it to the specific categories you require
7. Select SAVE
Date field is added
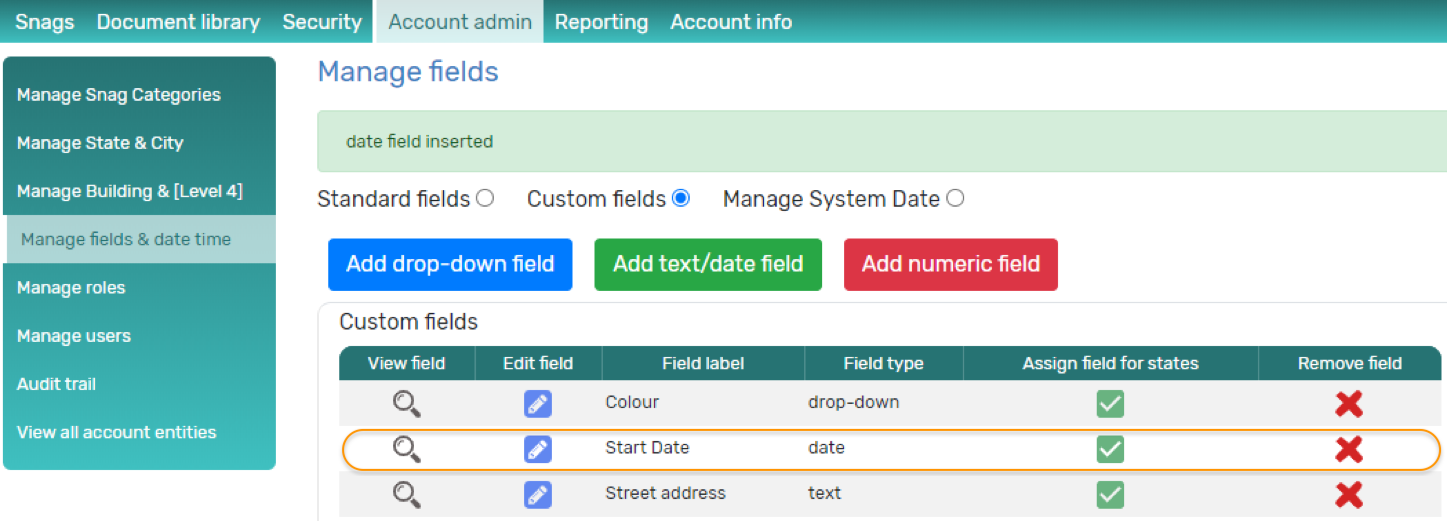
Date field is required when adding a TASK
- In this example we have categorised tasks by Job.
- If a job has been completed, and you would like to keep the history of all the tasks in a job, but you don’t want any new tasks to be logged for it, you can simply deactivate the job.
To do this:
1. Go to Categories
2. Jobs
3. Select Edit Job next to the relevant Job
4. Select Inactive
5. Save; this job is now specified as [inactive]
By deactivating the Job, users won’t be able to log new tasks for this job under Tasks
You can also not search for this job under View Tasks.
You will, however, still be able to access tasks for this job under Reports:
1. Go to Reports
2. Go to Custom Reports / Operational Reports / Comparative Reports
3. Select Active and Inactive Jobs
4. Use the filters to refine your search and select GO
5. Your search results will include the deactivated jobs
- In this example we have categorised tasks by Job.
- Note that Tasks cannot be deleted individually - however you could deactivate the job they belong to, and then delete the job.
- You could also create a Project called Trash, move unwanted tasks into Trash, de-activate this job and delete it.
It is important to note that only INACTIVE jobs can be deleted. To de-activate a Job:
1. Go to Categories
2. Jobs
3. Select Edit Job next to the relevant Job
4. Select Inactive
5. Save; this job is now specified as [inactive]
You can now delete the Job. To do this:
1. Go to Categories
2. Select Delete Job from the menu next the relevant INACTIVE job
3. You will be warned that all tasks will be deleted permanently
4. Select OK
How to use the mobile app
Note
When an administrator adds a user on the web application, the user will receive an email from Qualimi containing an OTP. The new user can logon to the mobile app with the OTP.
Steps to log onto Qualimi for the first time using the mobile app
1. The administrator adds you as a new user to Qualimi

2. Receive an email with your One Time Password (OTP) and the URL to logon. You can also download the Qualimi app to logon.

3. You opt to logon onto the mobile app after you have installed it on your mobile device
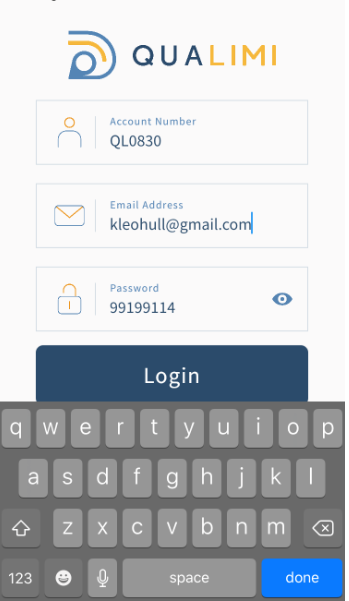
4. Capture your email address and the One Time Password (OTP) and LOG IN
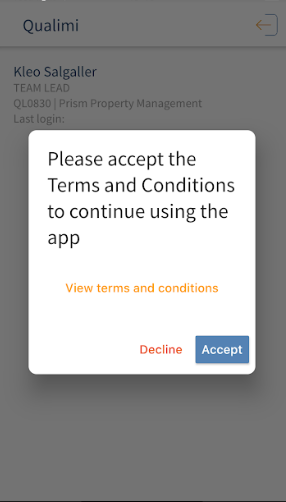
5. You are requested to read and accept the Terms and Conditions; Accept the Terms and Conditions
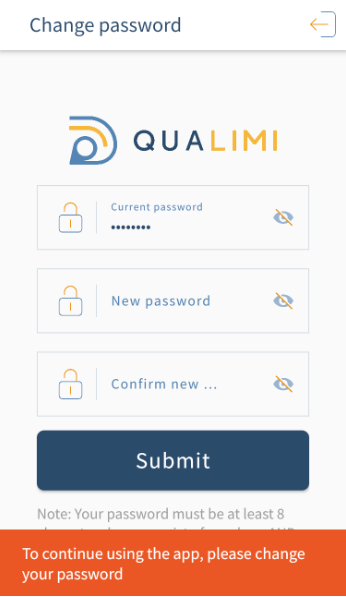
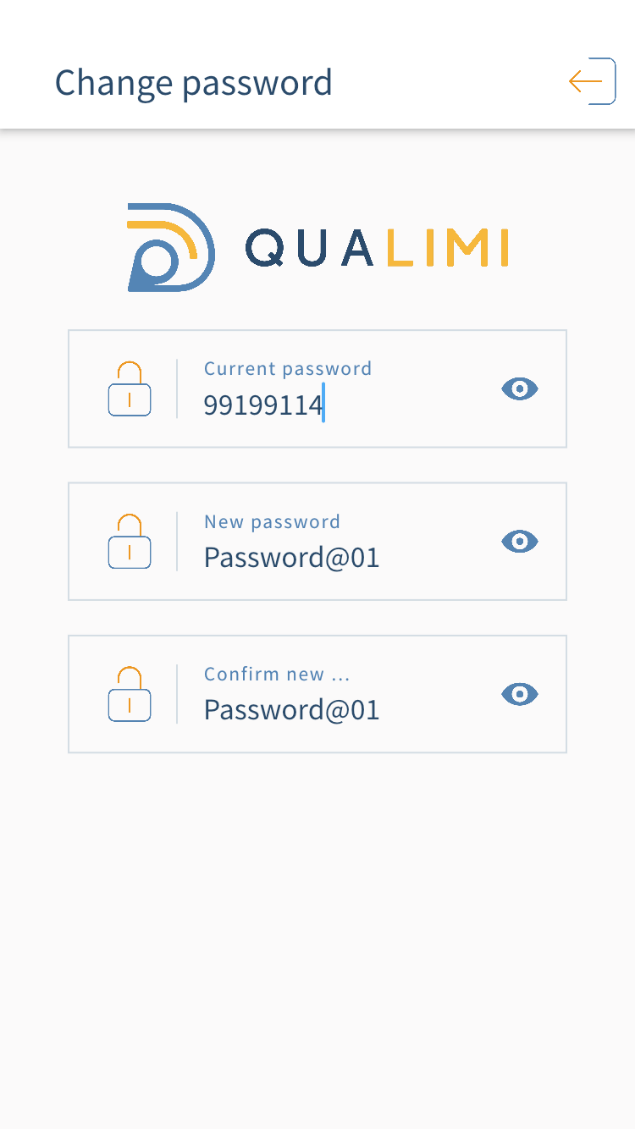
6. You are requested to Change your password; Create a password and SUBMIT
7. You are logged in
Before you can log your first task you need to categorise your tasks and then add your categories. See sections Categorise your tasks and Add your Categories.
Important info
You only need the first level category to be defined. A second level category is purely optional
Category names can be changed at any time
Categories cannot be deleted if there are tasks assigned to the categories.
To log tasks, they have to be organised into a category where they belong. You can define one category and one subcategory (optional). A simple example of these categories/levels would be Client > Jobs. Get started by defining a category.
1. Select the Categories menu item
2. Select Settings
3. Create your Level 1 Category by selecting one of the suggested options or creating your own category
4. If you need a Level 2 Category under Level 1, do that by selecting one of the suggested options under Level 2 or creating your own category
5. Select Save; you will notice that the category definition(s) appear to the left of the Settings menu item at the top of the Categories screen
Project
Important info
In this example, categories have been defined as Projects and we chose to create a second level category, namely Sub-projects.
Projects and Sub-projects can be defined as something else at any time
Only Inactive> Projects and Sub-projects can be deleted. Once a Project or Sub-project is deleted, all associated tasks and their histories are also deleted
If you have, for example, created a second Level Category (optional) and called it sub-project, you have the option to create sub-projects under your projects before you start logging tasks, or you can log tasks against projects without defining sub-projects for them;
You could also have a mixture of projects with sub-projects, and projects with no sub-project.
If, for example, you have categorised your tasks by Project, you need to define your projects to start logging tasks for your projects.
Add a Project
1. Select the Categories menu item
2. 2. Select Sub-projects
3. Select New Project
4. Capture your project name; it will default to active
5. You may capture the contact person for a project by selecting Contact details – this is optional
6. Select Save; you will notice that your project is listed under Projects
Sub-project
Important info
In this example, categories have been defined as Projects and we chose to create a second level category, namely Sub-projects.
Projects and Sub-projects can be defined as something else at any time
Only Inactive> Projects and Sub-projects can be deleted. Once a Project or Sub-project is deleted, all associated tasks and their histories are also deleted
If you would like to add sub-projects, you need to have at least one Project
If you have, for example, created a second Level Category (optional) and called it sub-project, you have the option to create sub-projects under your projects before you start logging tasks, or you can log tasks against projects without defining sub-projects for them; You could also have a mixture of projects with sub-projects, and projects with no sub-project.
Add a Sub-project
1. Select the Categories menu item
2. Select Sub-projects
3. Select the Project for which you would like to create a sub-project
4. Select New Sub-project
5. Capture your sub-project name; it will default to active
6. You may capture the contact person for a sub-project by selecting Contact details – this is optional
7. Select Save; you will notice that your sub-project is listed under Sub-projects
You may now start adding tasks!
Important info
The new user will receive an email containing a One Time Password (OTP) that they can use to logon to Qualimi web and mobile app. The user will then be asked to create their own password once they have logged on successfully.
If the user did not receive the OTP email, you can re-invite the user by selecting “Resend invite” on the Users screen
The Role of a user determines what permissions the user has on the system. To learn more about Roles
 watch the Users & Roles video
To add a user
1. Select the Users menu item
2. Select New User
3. Capture the details of the user in the mandatory fields
4. Select Save & Assign
5. The Assign User to Projects screen is displayed. Suppose you defined your categories as Project, Select the projects that this user will need access to
6. Select Save; the user will receive an OTP via email that they can use to logon to the web or mobile app
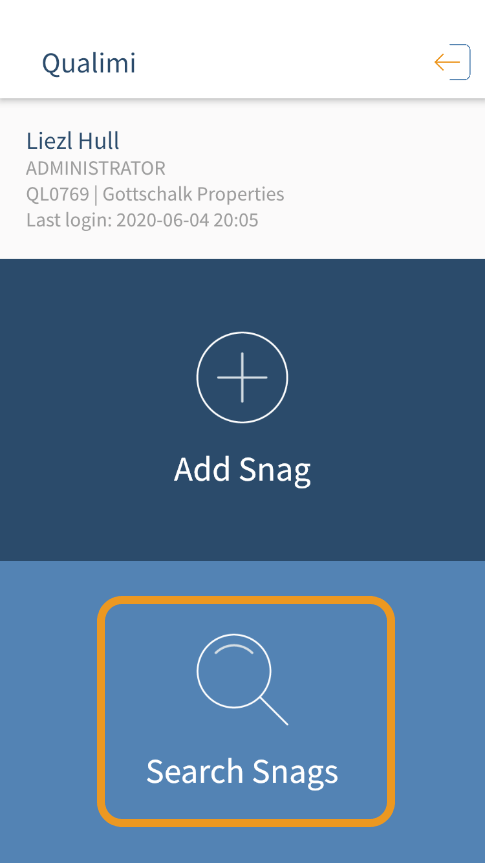
Steps to add a task on the mobile app
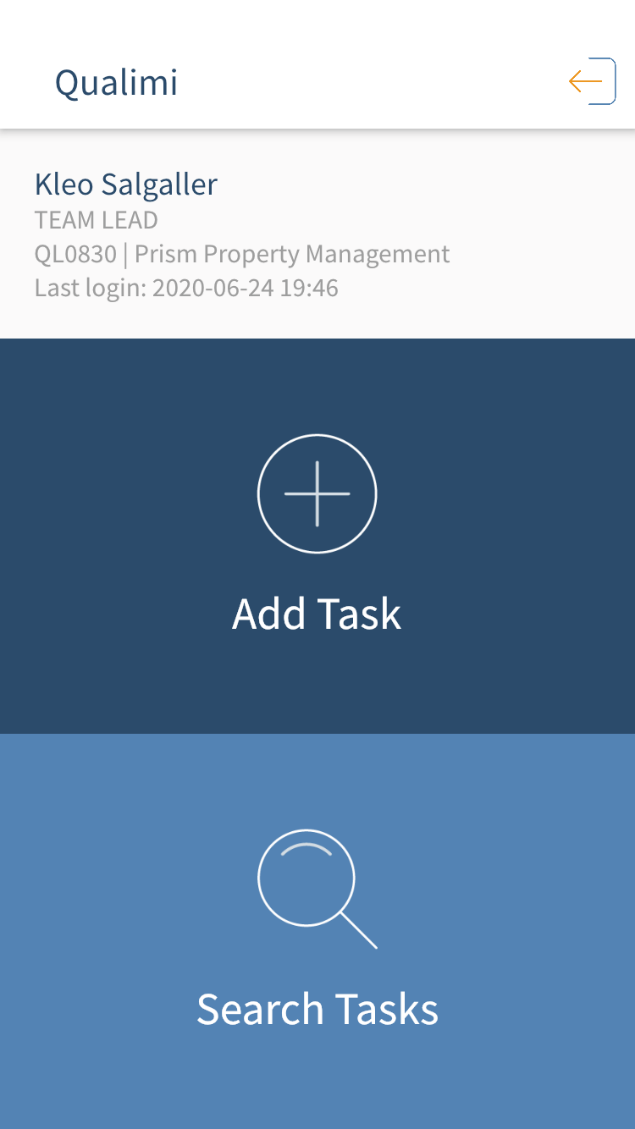
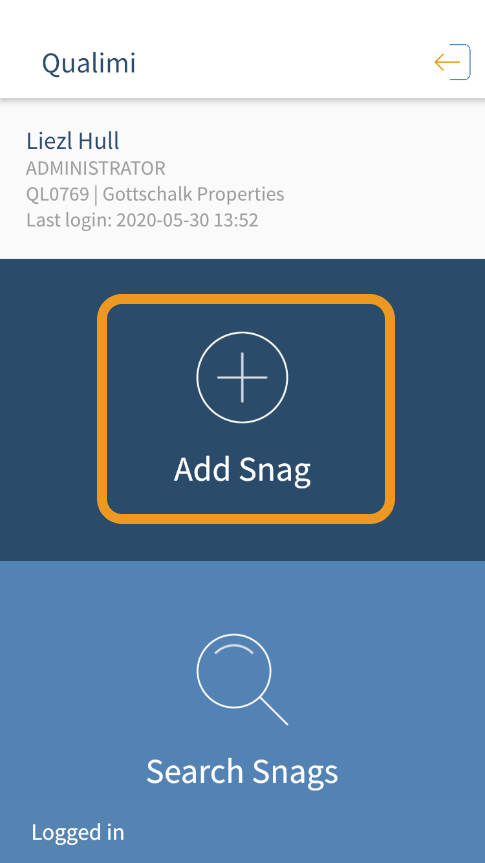
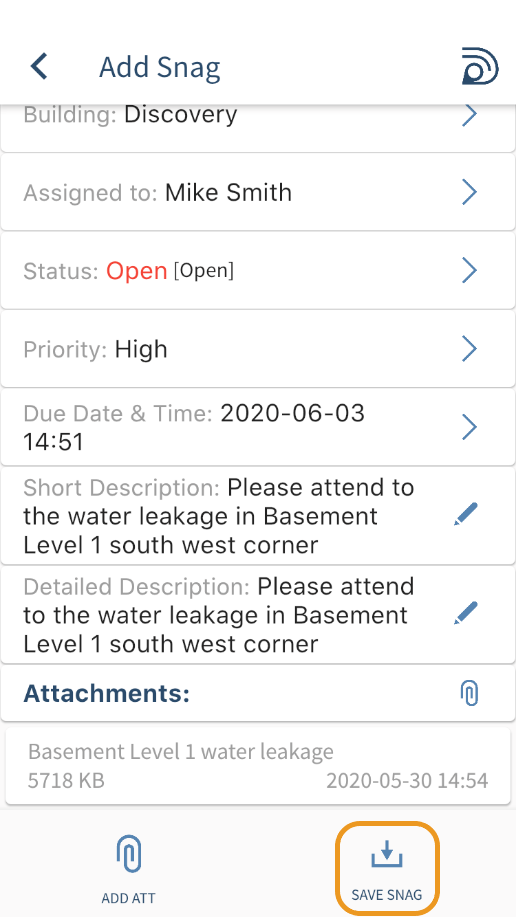
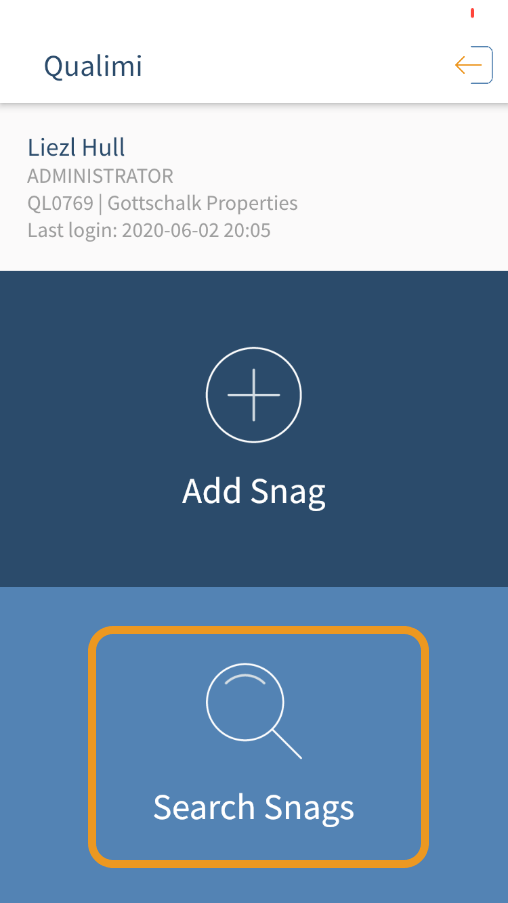
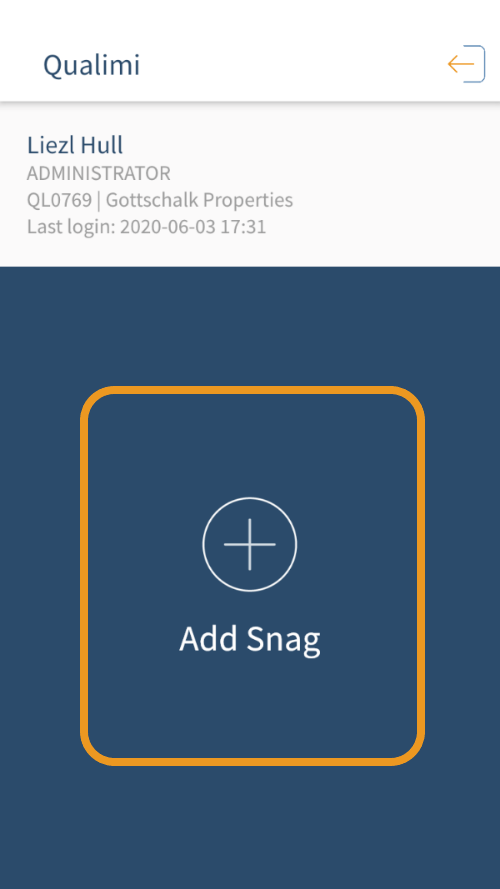
1. On the Mobile app landing page select ADD TASK; the Add TASK screen is displayed
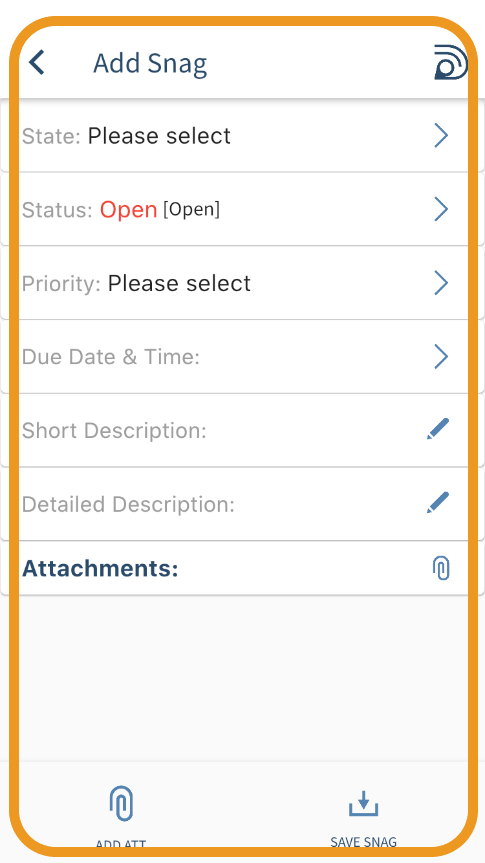
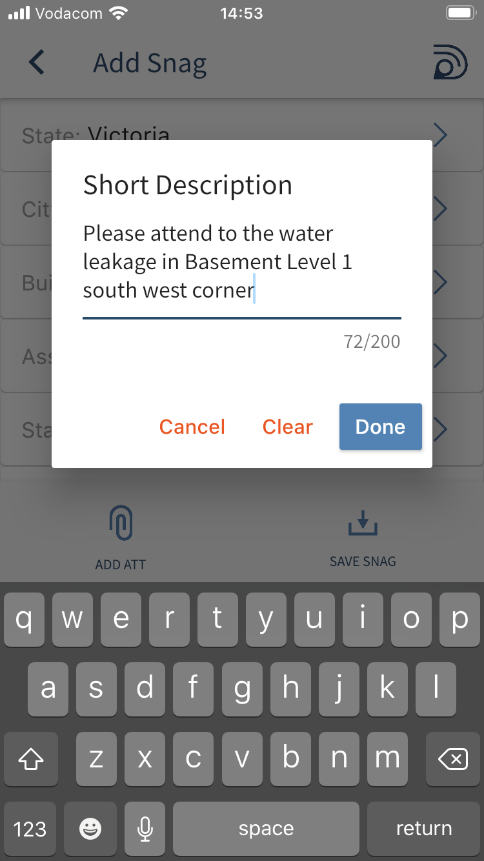
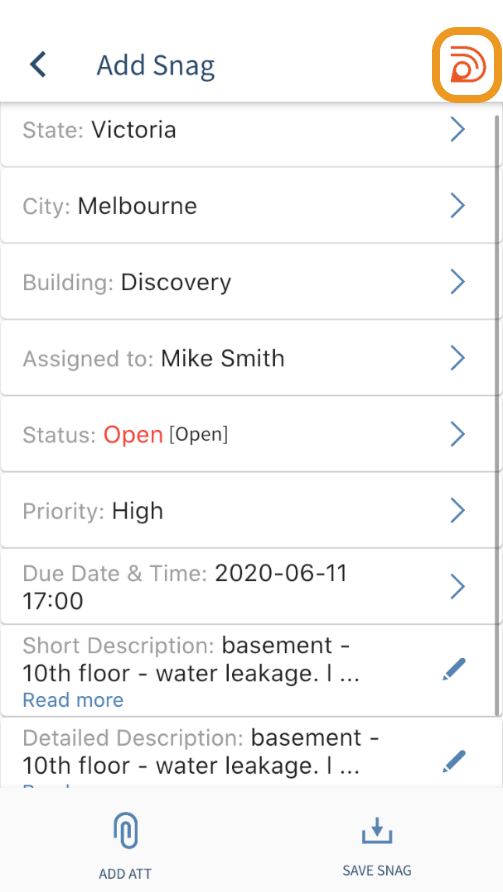
2. Capture the TASK information and add attachments if required by selecting ADD ATT
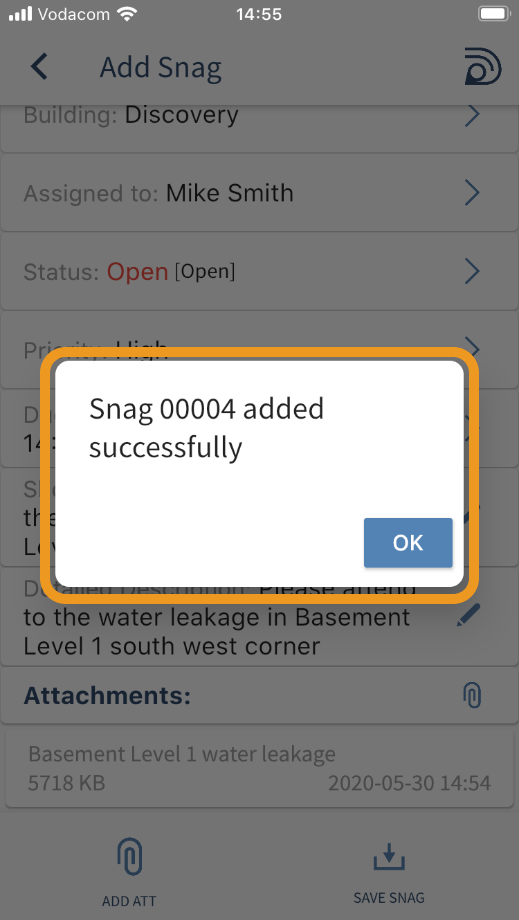
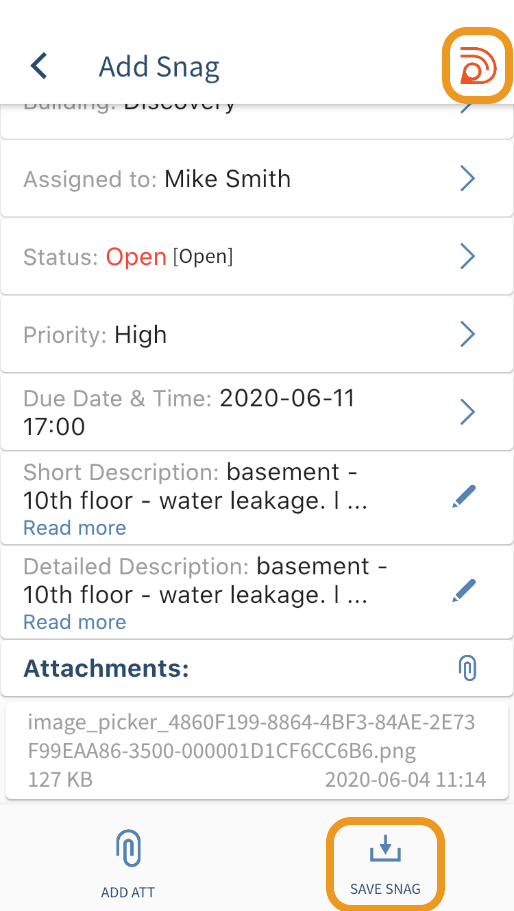
3. Select SAVE TASK
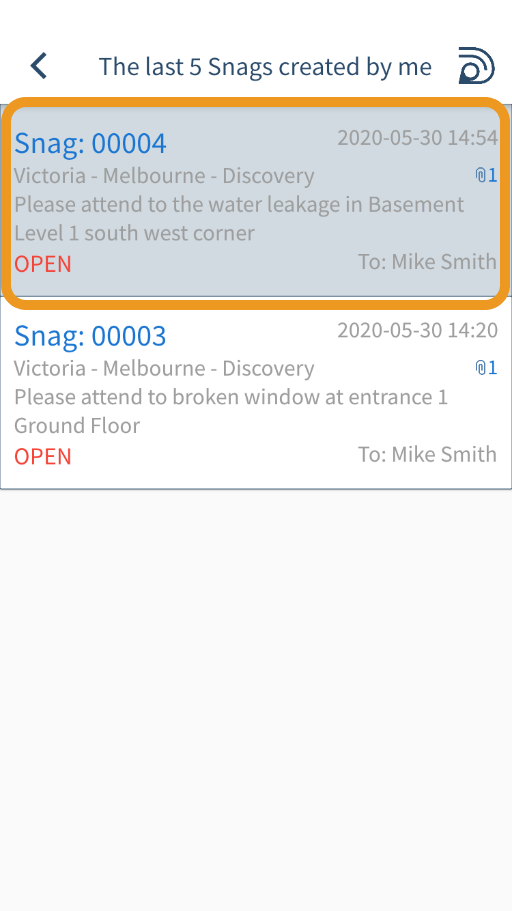
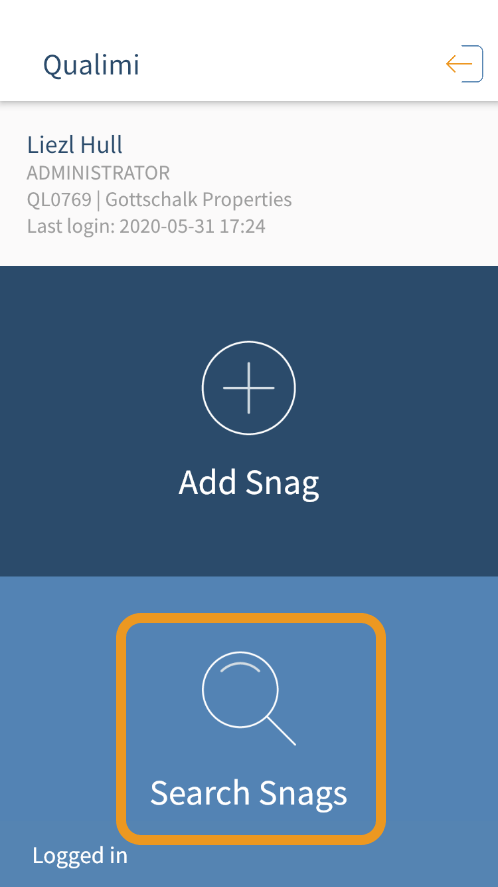
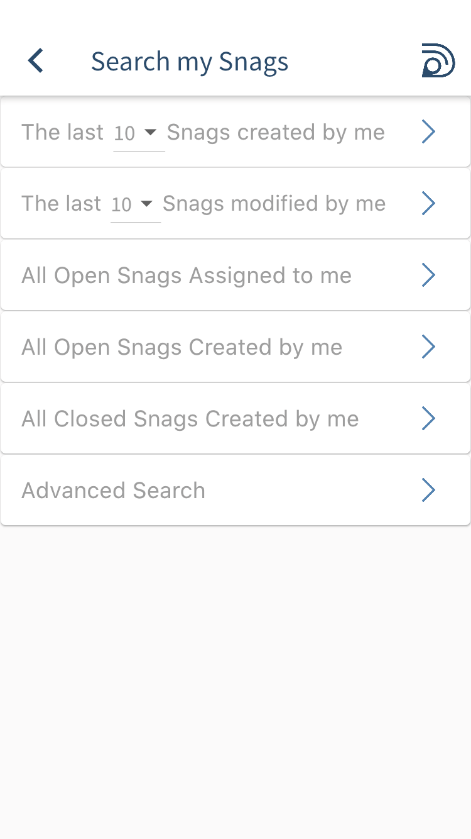
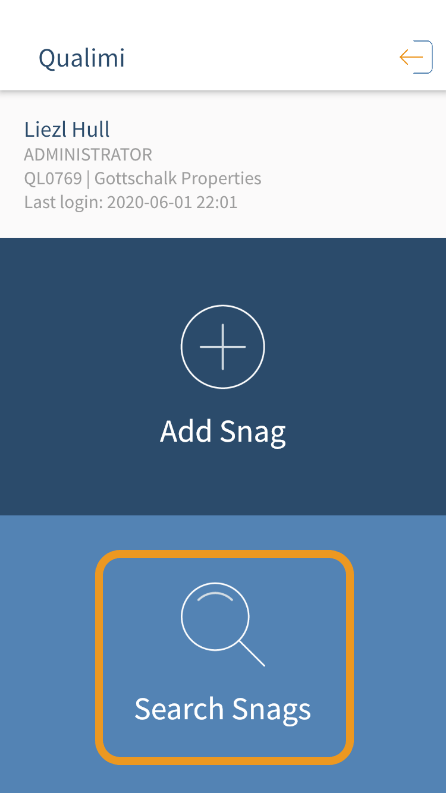
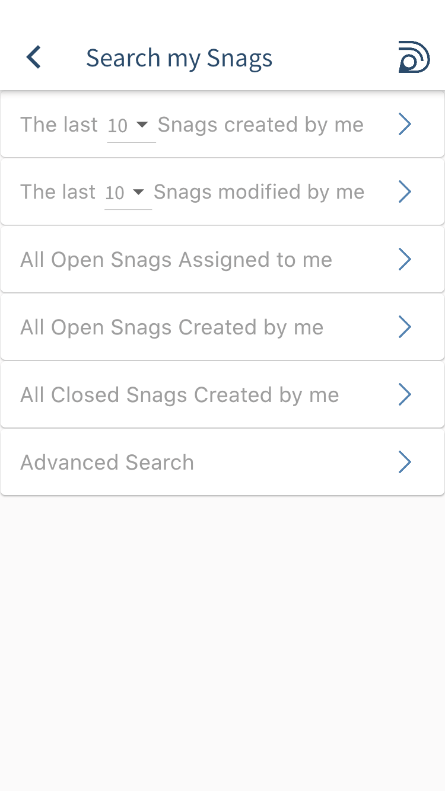
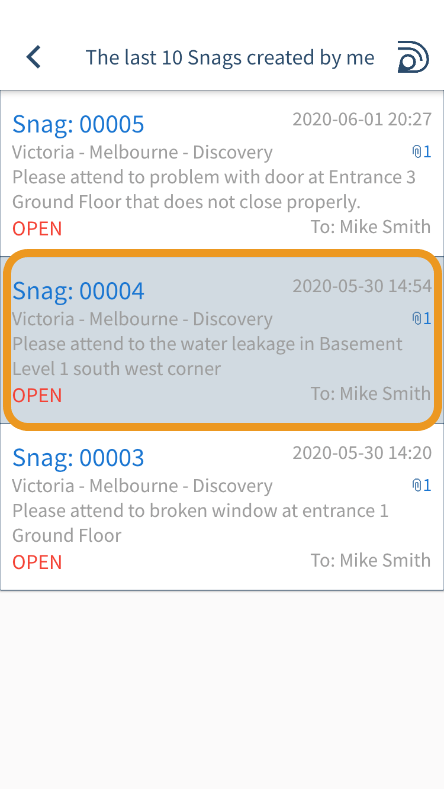
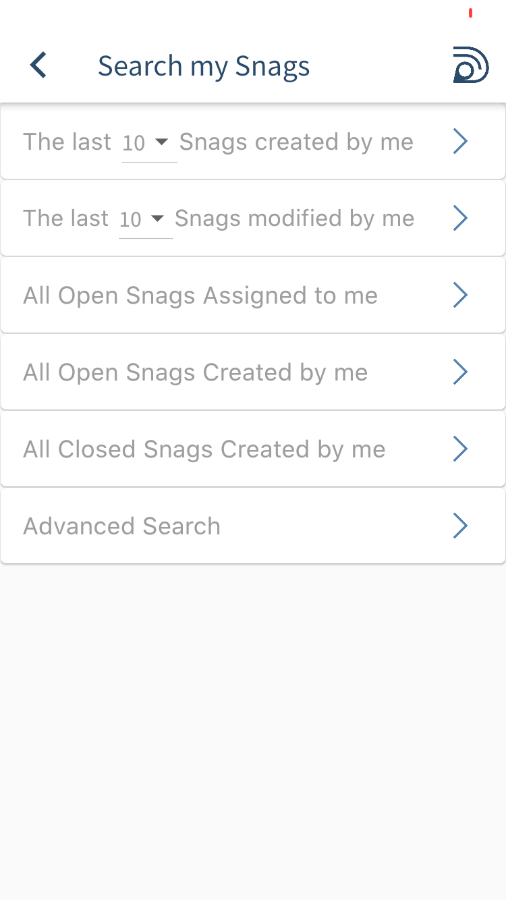
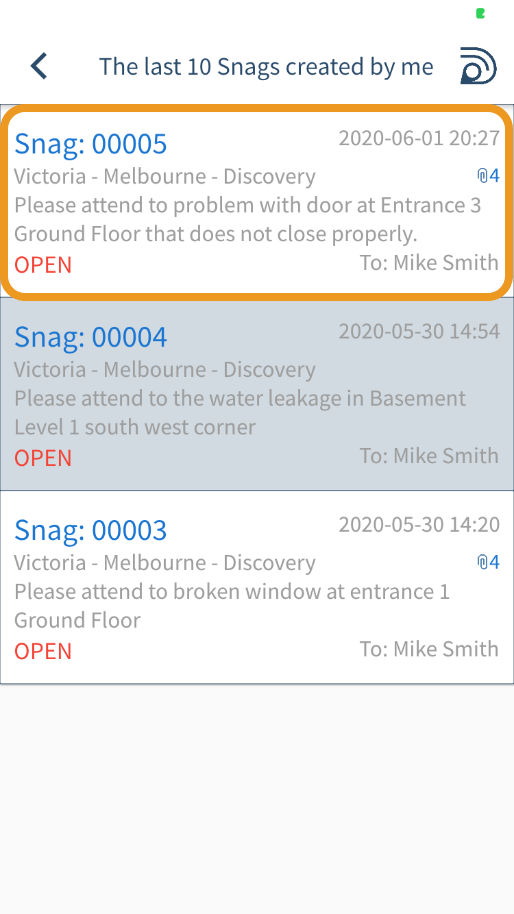
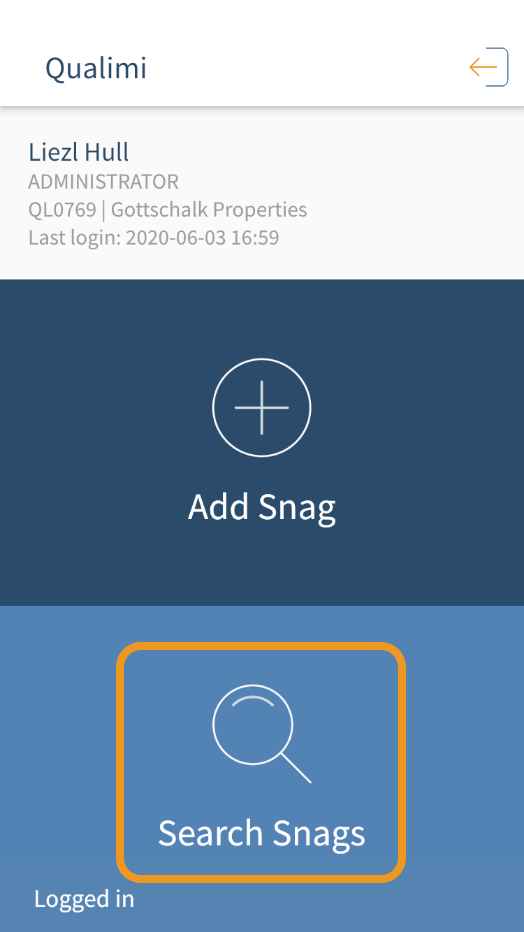
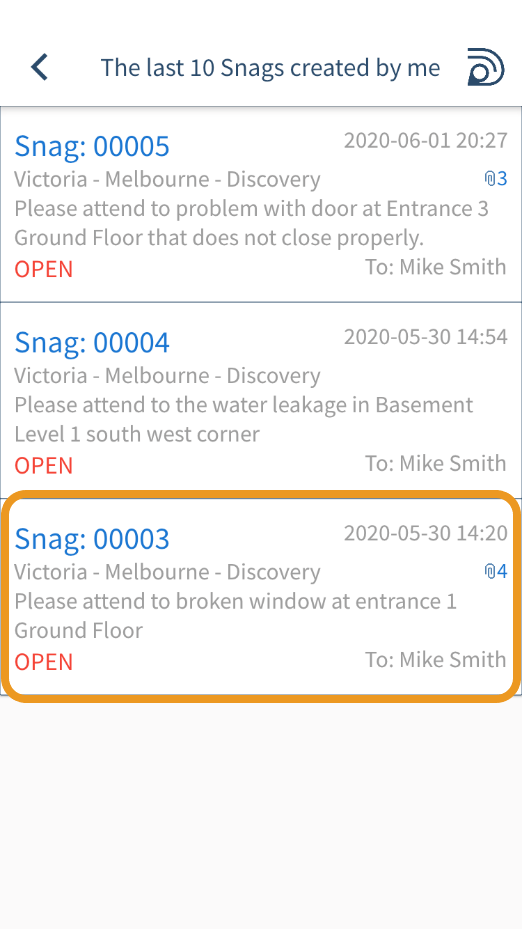
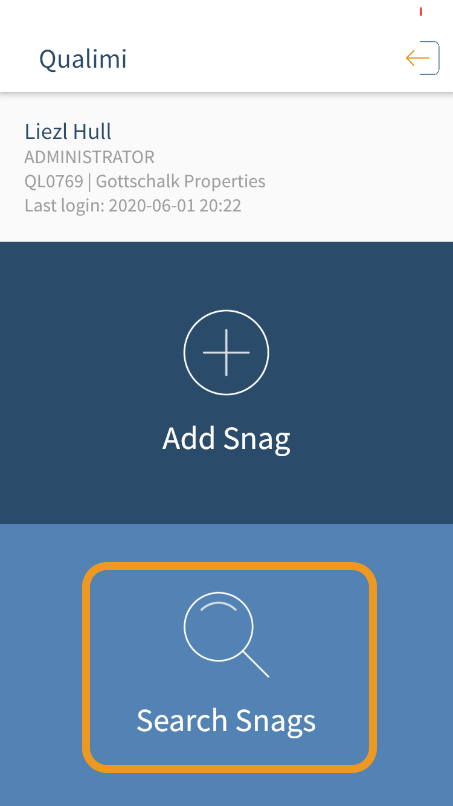
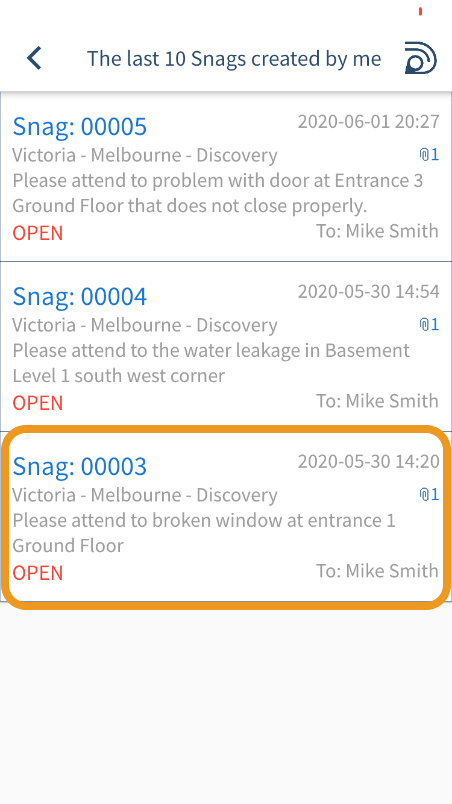
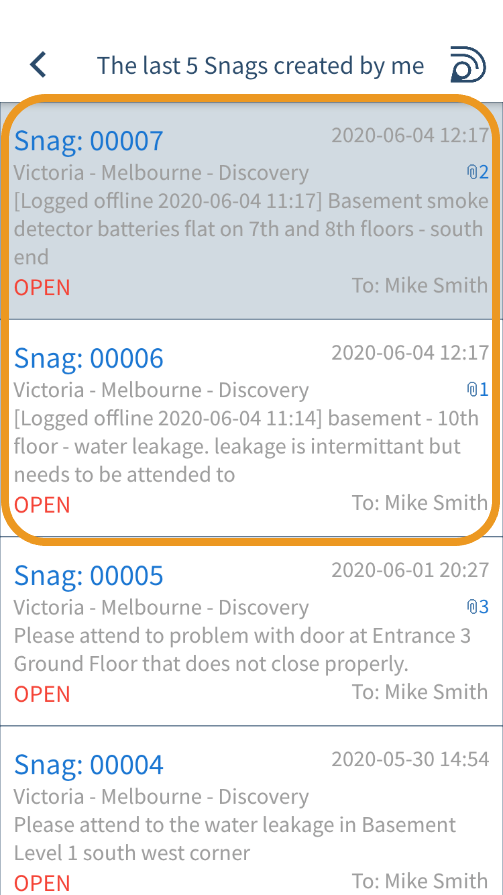
Steps to search for tasks on the mobile app
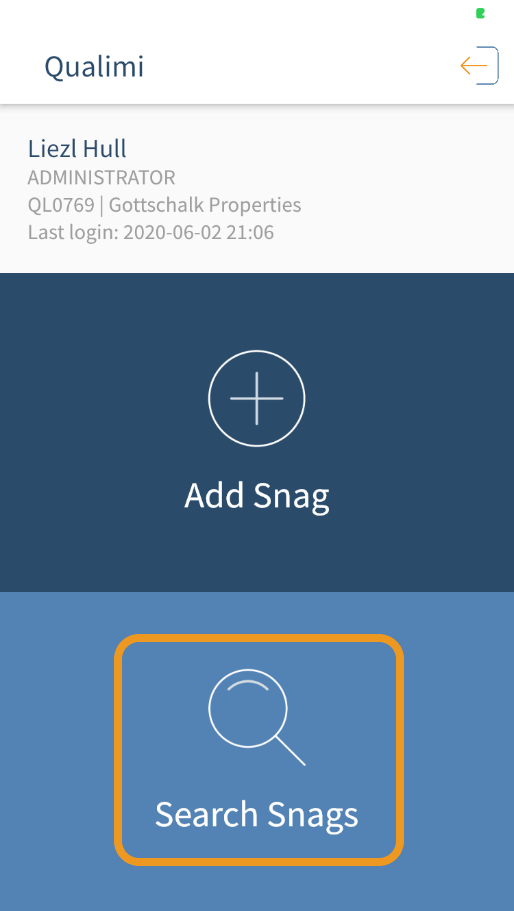
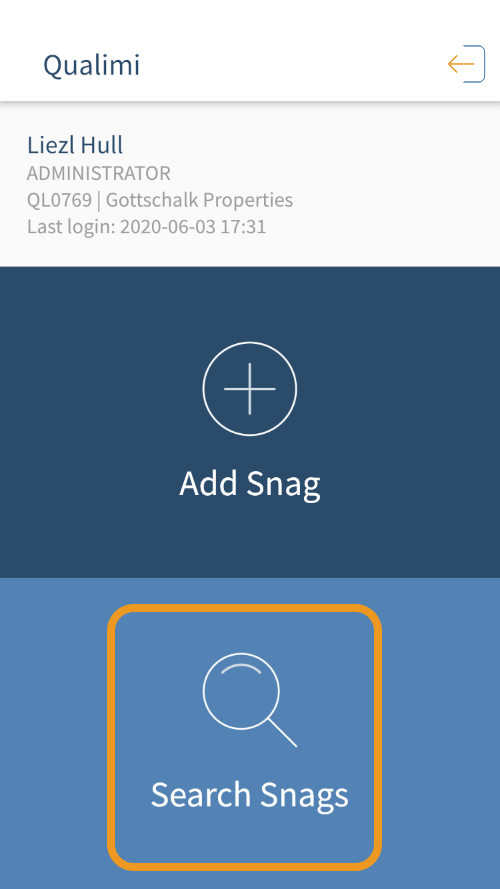
1. On the Mobile app landing page select VIEW TASKS; All Tasks or your last search is displayed
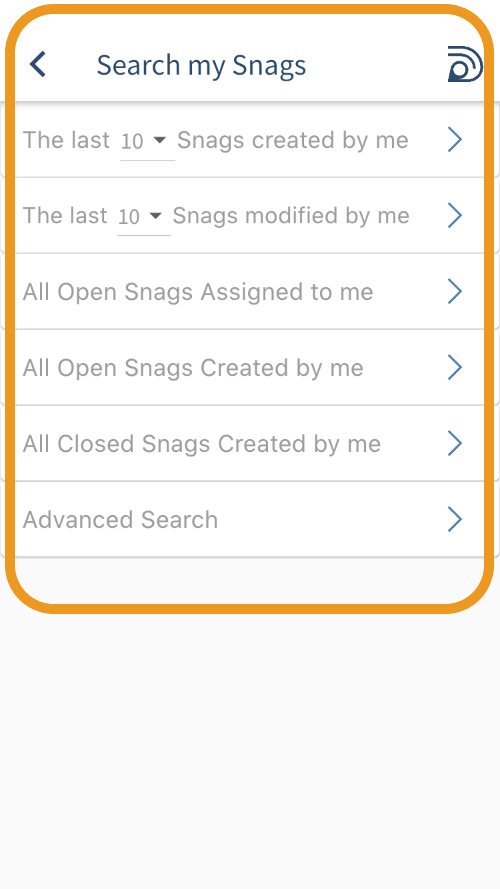
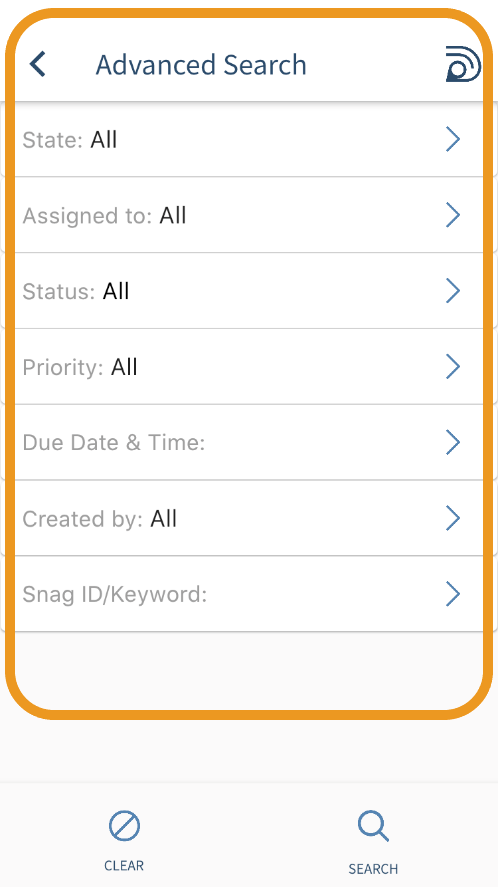
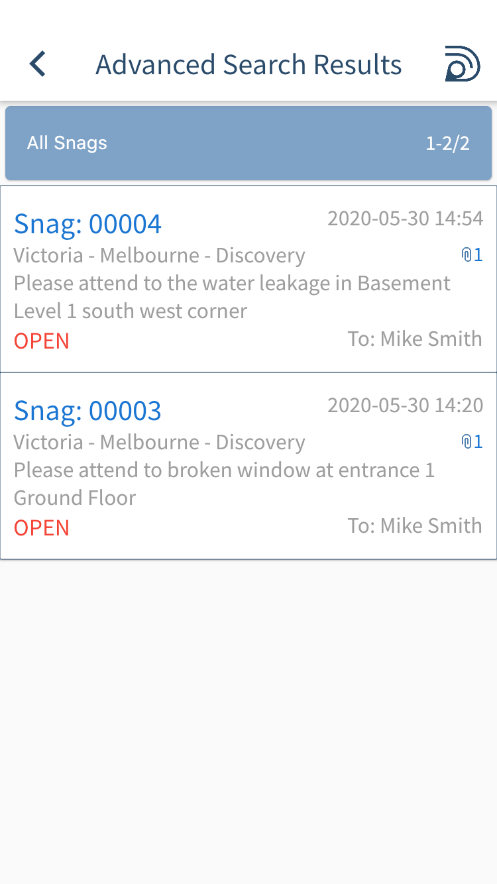
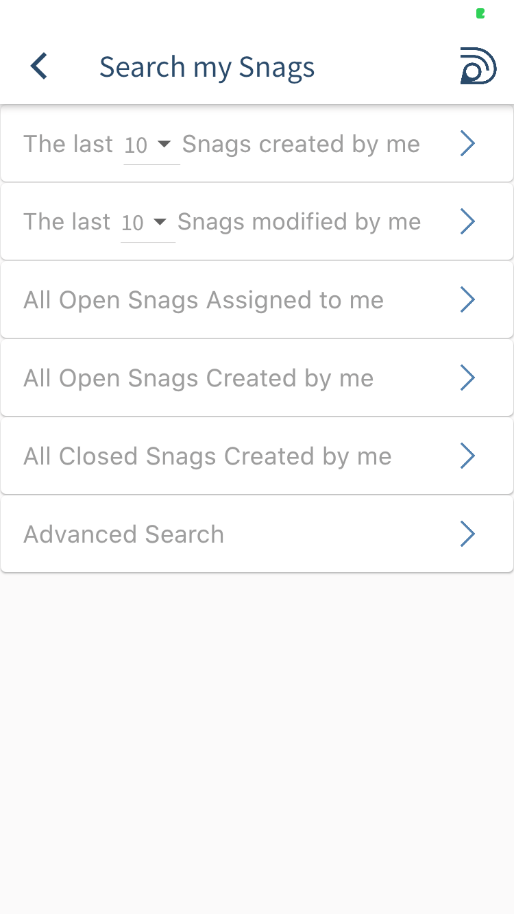
2. Use the Filters to refine your search
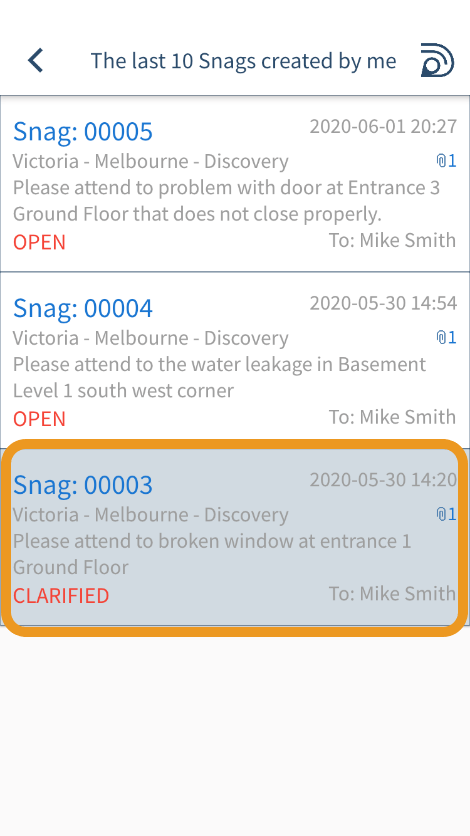
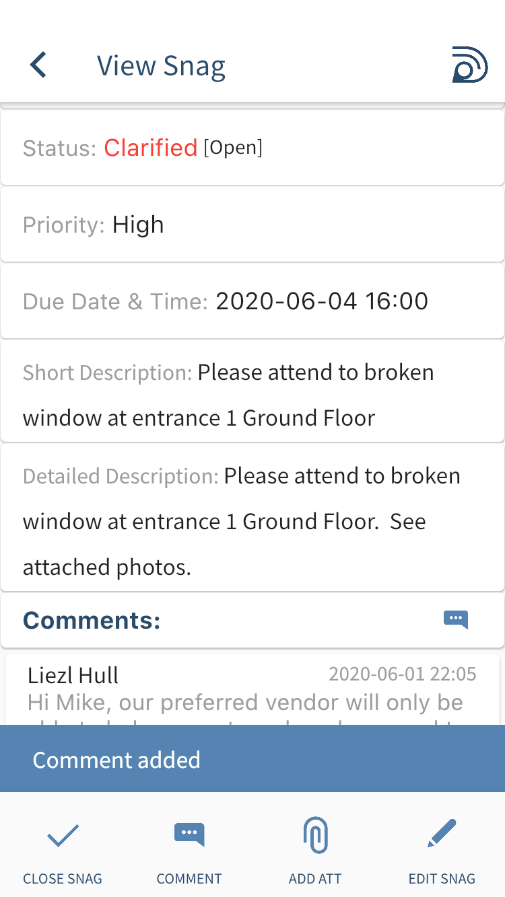
Steps to add a comment to a task on the mobile app
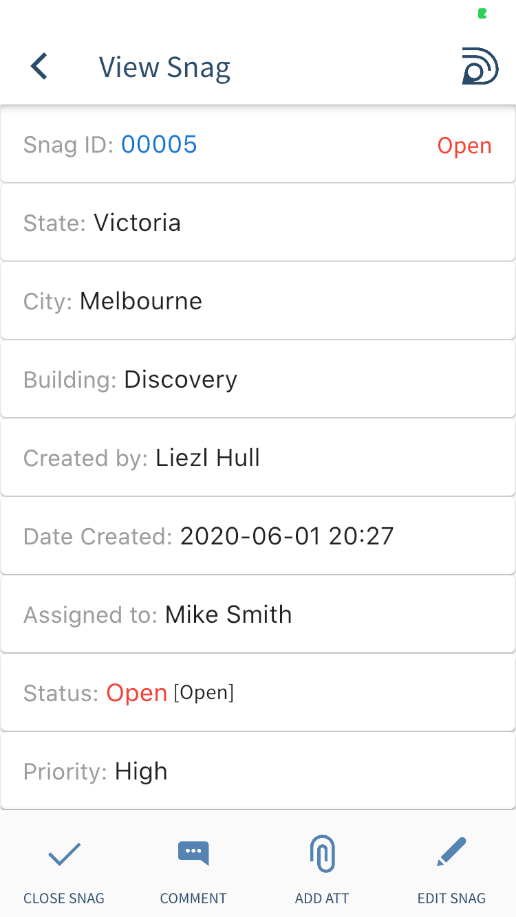
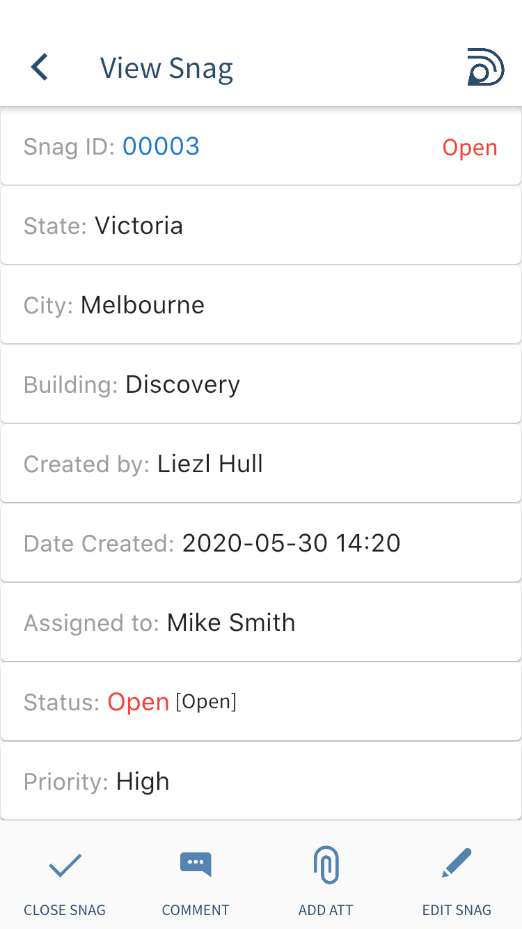
1. On the Mobile app landing page select VIEW TASKS;
2. Use the Filters to refine your search

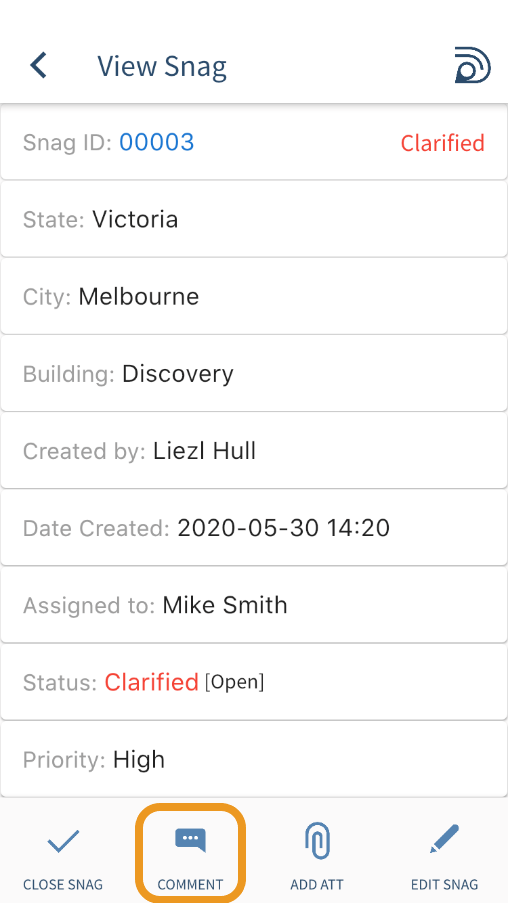
3. Select the task you wish to comment on by clicking on the task; the View task screen is displayed
4. Select ASSIGN & COMMENT
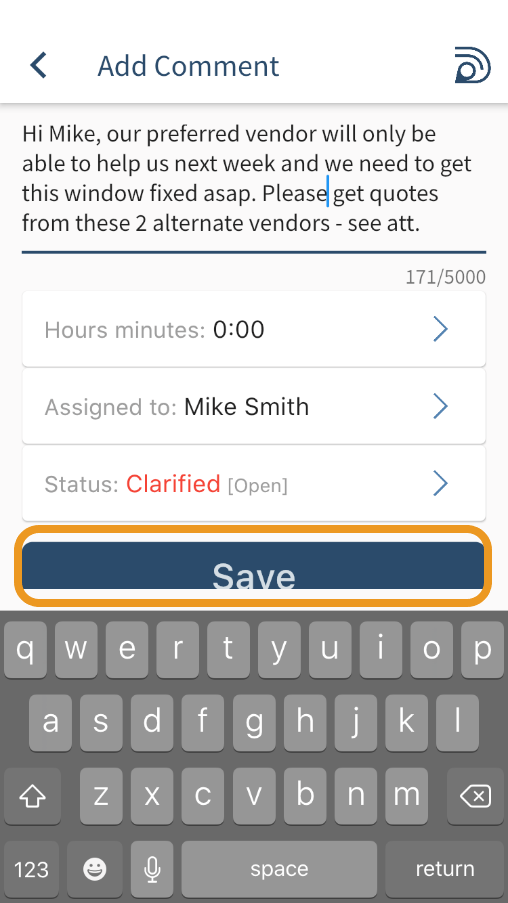
5. Capture the comment in the pop-up provided; if required you can also change the Status, assign the task to another person and capture hours spent on this task
Status and Assigned To will only be available to you to
change if you have the Edit or Assign TASK Permission.
To learn more about Users and Roles,
watch the Users & Roles video
6. Select SAVE
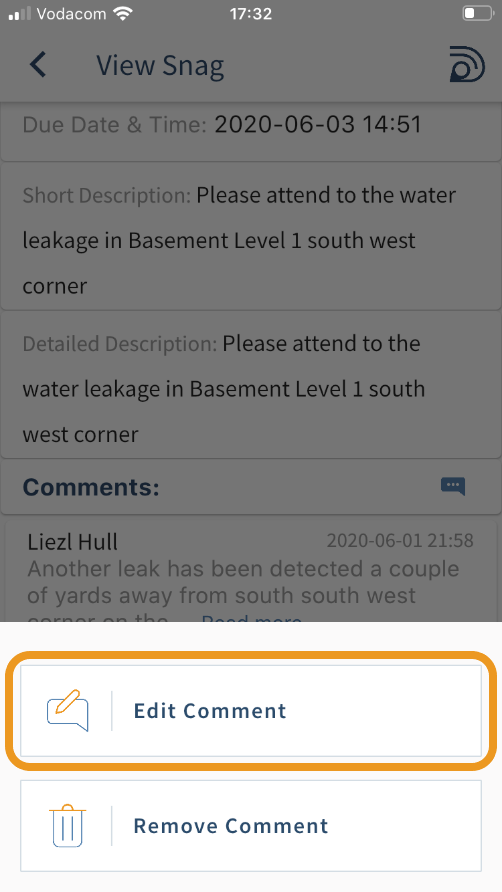
Steps to edit / remove a comment on the mobile app
1. On the Mobile app landing page select VIEW TASKS;
2. Use the Filters to refine your search
3. Select the task you wish to edit a comment on by clicking on the task; the View task screen is displayed

4. Click on the comment you would like to edit or remove – a menu is displayed with EDIT COMMENT and REMOVE COMMENT options
The EDIT and REMOVE Comment icons will only be available
to you if you have the Edit Comment Permission. To learn
more about Users and Roles,
watch the Users & Roles video

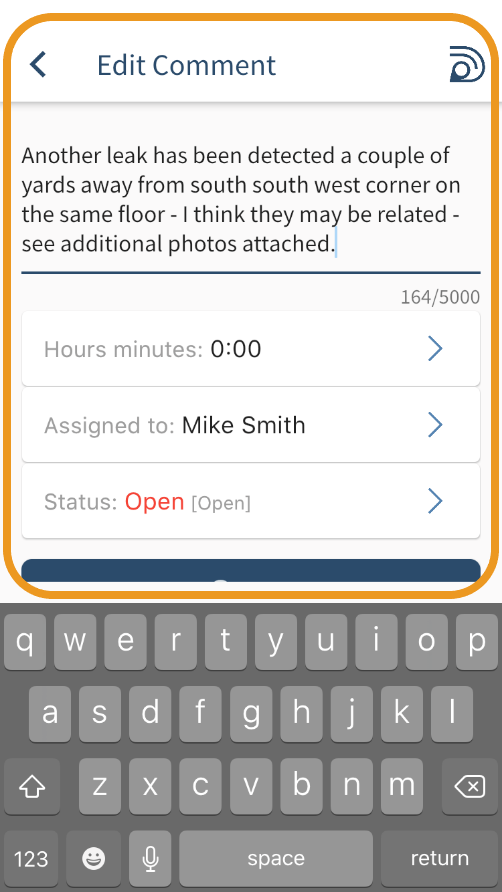
5. If you are editing: select the EDIT COMMENT menu item and make changes to the comment; if required you can also change the Status, assign the task to another person and capture hours spent on this task; Select SAVE
Status and Assigned To will only be available to you to
change if you have the Edit or Assign TASK Permission.
To learn more about Users and Roles,
watch the Users & Roles video
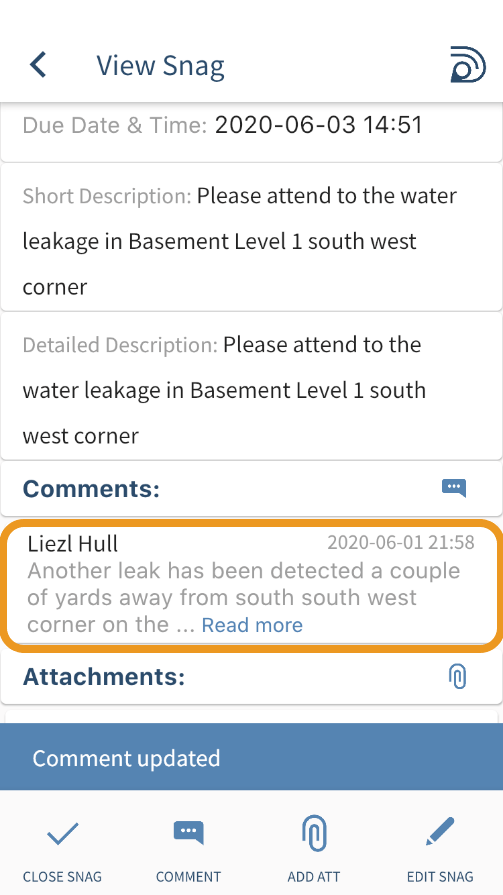
If you are removing: select the REMOVE COMMENT option
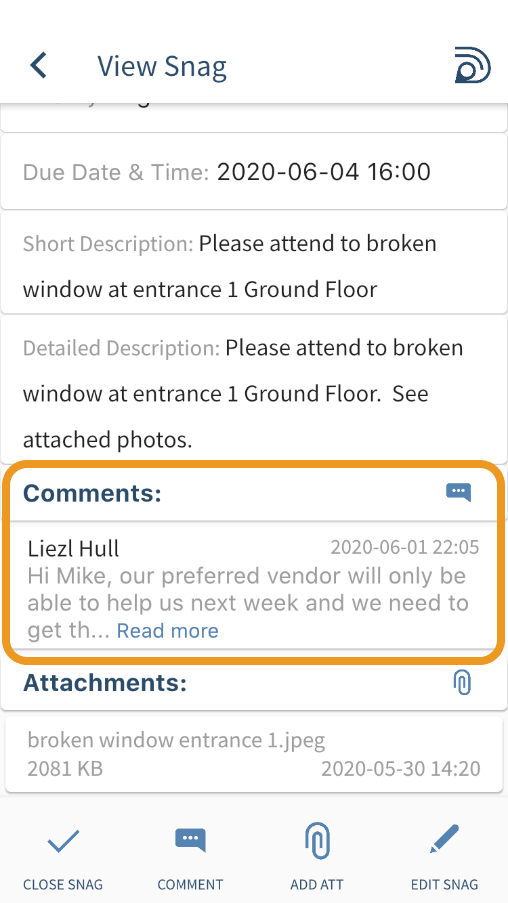
Steps to add an attachment to an existing task on the mobile app
1. On the Mobile app landing page select VIEW TASKS; All Tasks or your last search is displayed
2. Use the Filters to refine your search
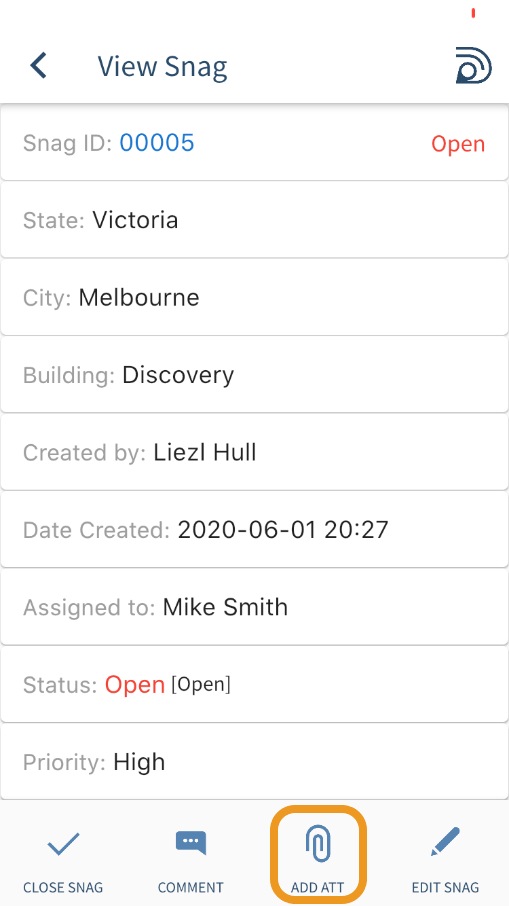
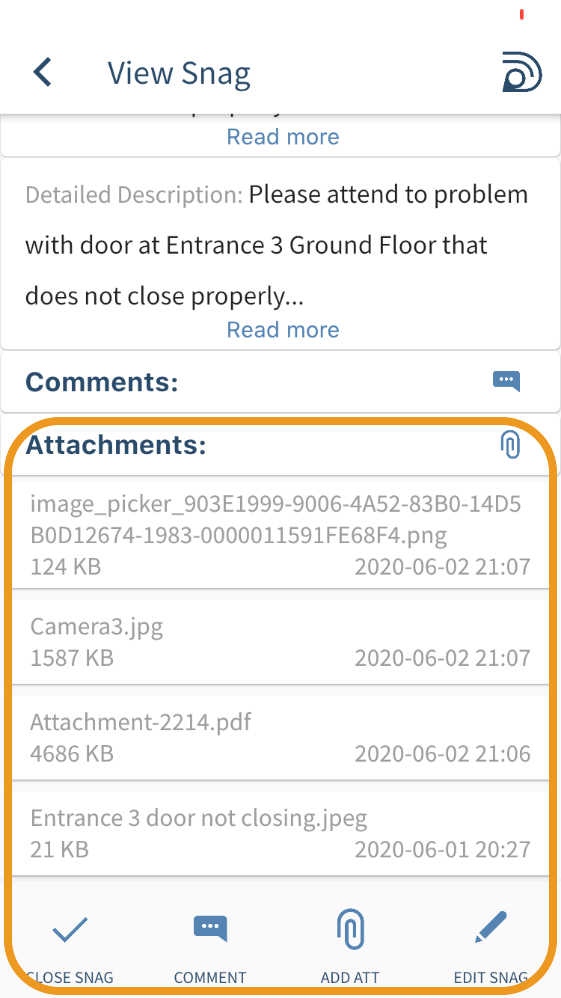
3. Select the task you wish to add an attachment to; the View Task screen is displayed
4. Select ADD ATT

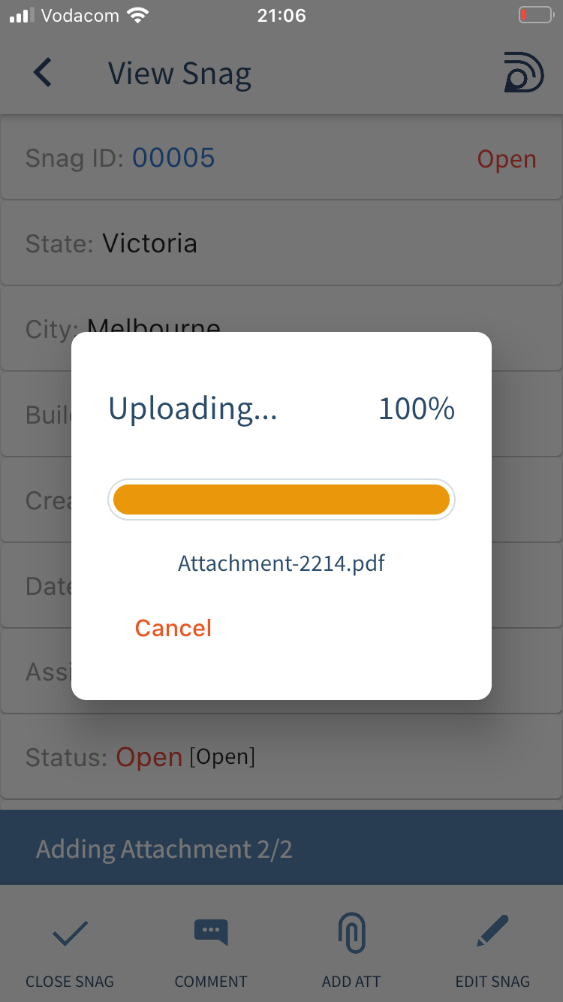
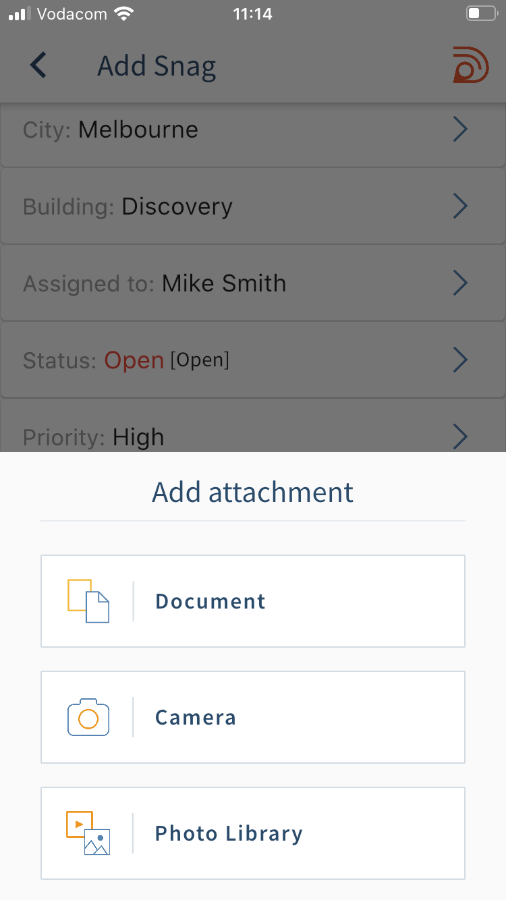
5. The Add Attachment menu is displayed; select Document, Camera or Photo & Video Library, depending on the type of attachment
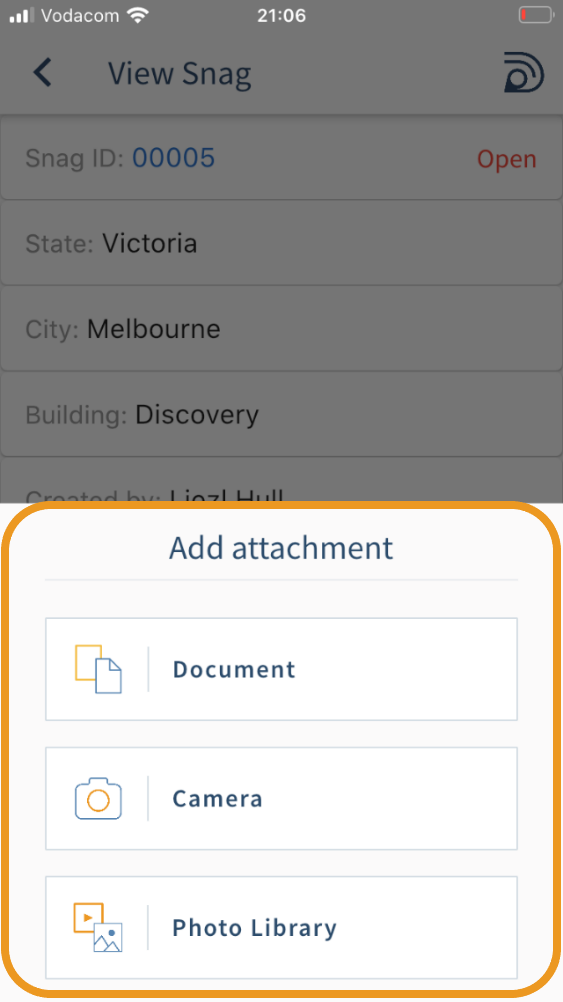
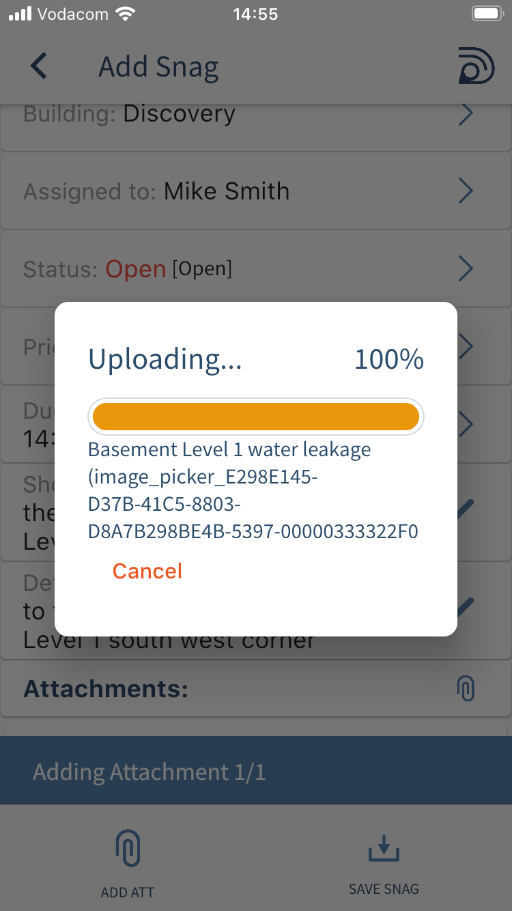
6. Select the attachment you would like to add – the attachment is uploaded
The maximum size per cumulative upload is 150MB
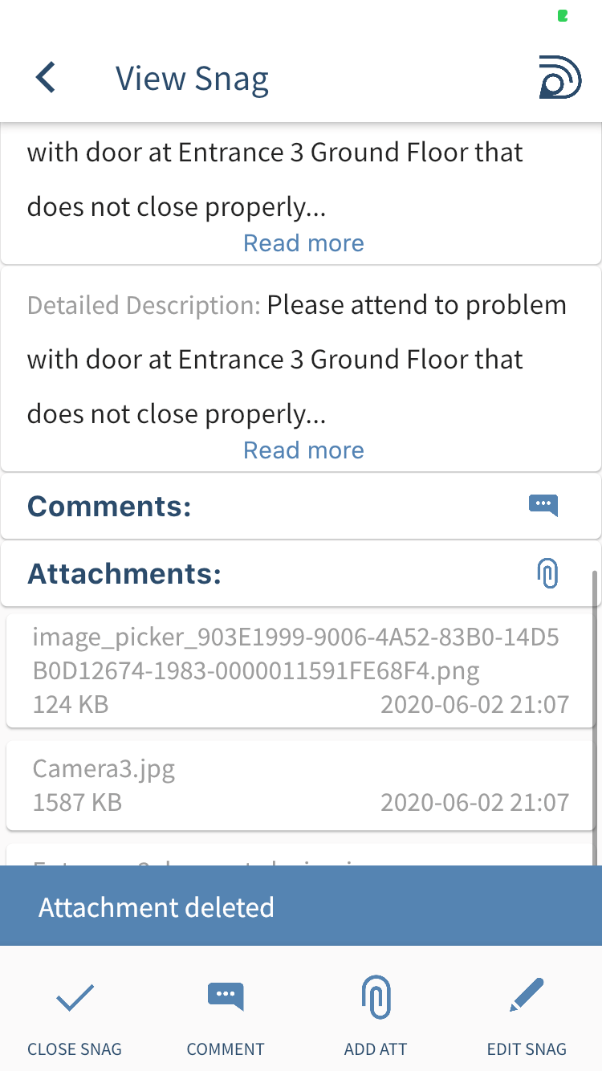
Steps to remove an attachment from a task on the mobile app
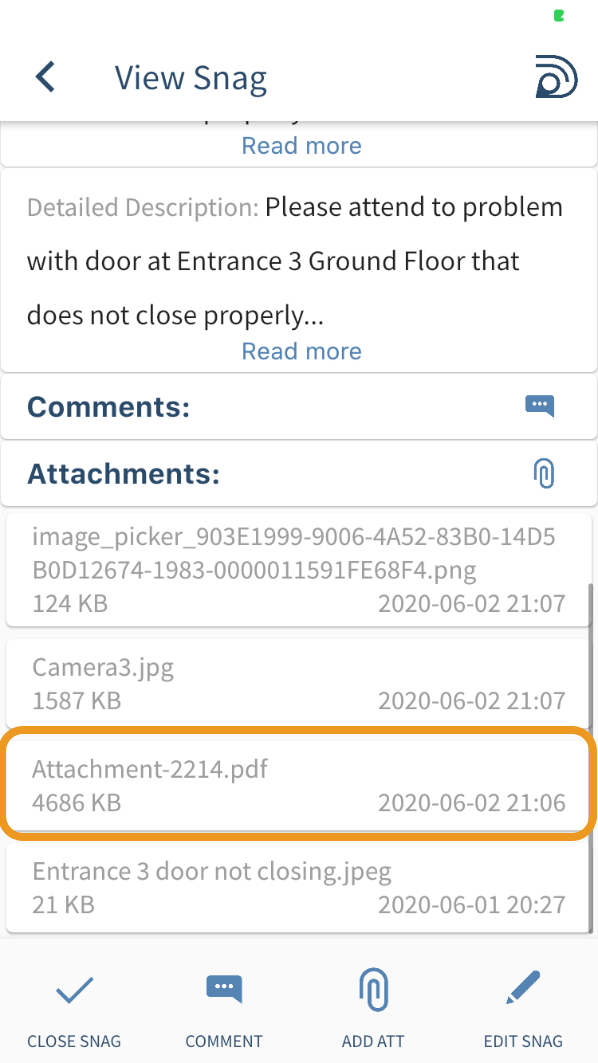
1. On the Mobile app landing page select VIEW TASKS; All Tasks or your last search is displayed
2. Use the Filters to refine your search
3. Select the task you wish to remove an attachment from; the View Task screen is displayed
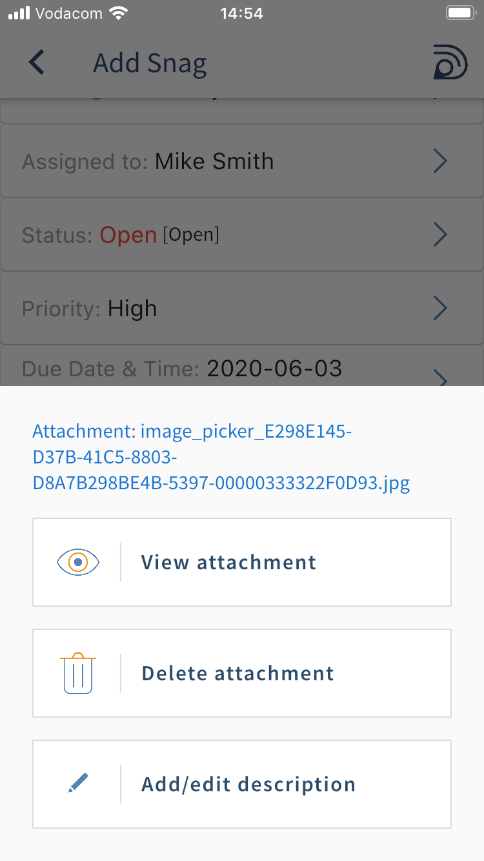
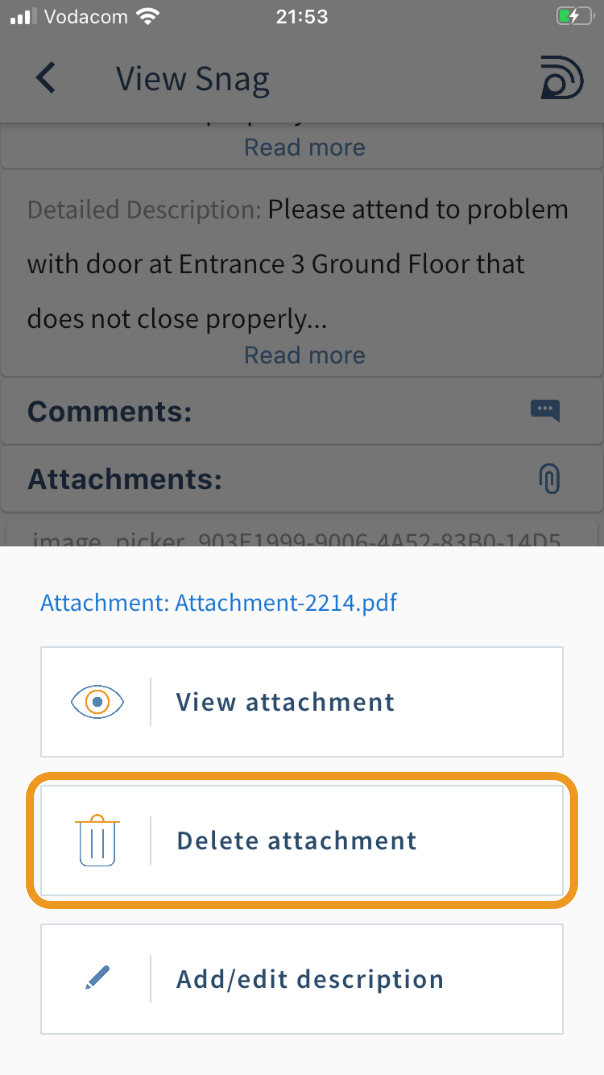
4. Click on the attachment you would like to remove – a menu is displayed with VIEW ATTACHMENT, DELETE ATTACHMENT AND ADD/EDIT DESCRIPTION options;
The DELETE ATTACHMENT icon will only be available to you
if you have the Delete attachment Permission. To learn more about Users and Roles,
watch the Users & Roles video
5. Select DELETE ATTACHMENT
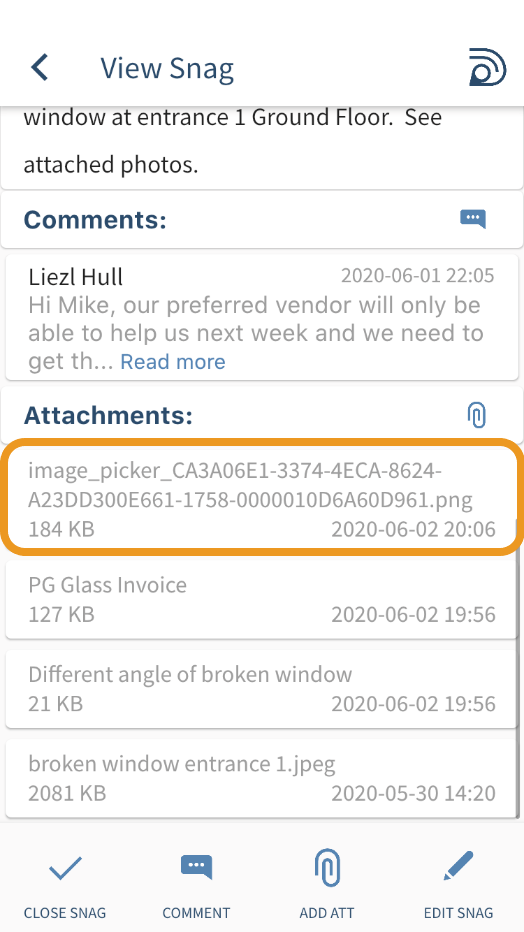
Steps to Add description to attachment / edit description of attachment on the mobile app
Why? An attachment often lacks a user-friendly name e.g.photos often have default names consisting of random letters and numbers; to make it easier for the person you are assigning this task to, give each photo a user-friendly name.
1. On the Mobile app landing page select VIEW TASKS; All Tasks or your last search is displayed
2. Use the Filters to refine your search

3. Select the task on which you wish to add / edit the description of an attachment; the View Task screen is displayed
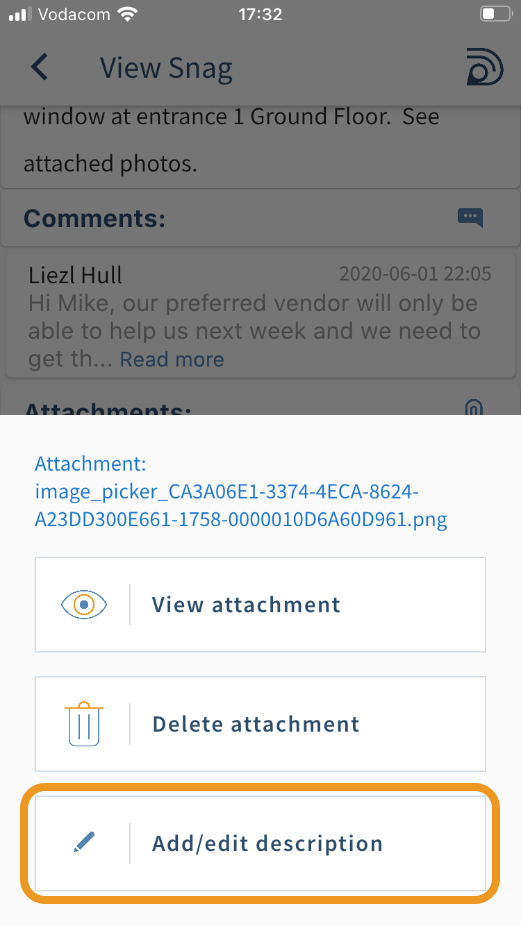
4. Click on the attachment– a menu is displayed with VIEW ATTACHMENT, DELETE ATTACHMENT AND ADD/EDIT DESCRIPTION options; Select ADD/EDIT DESCRIPTION
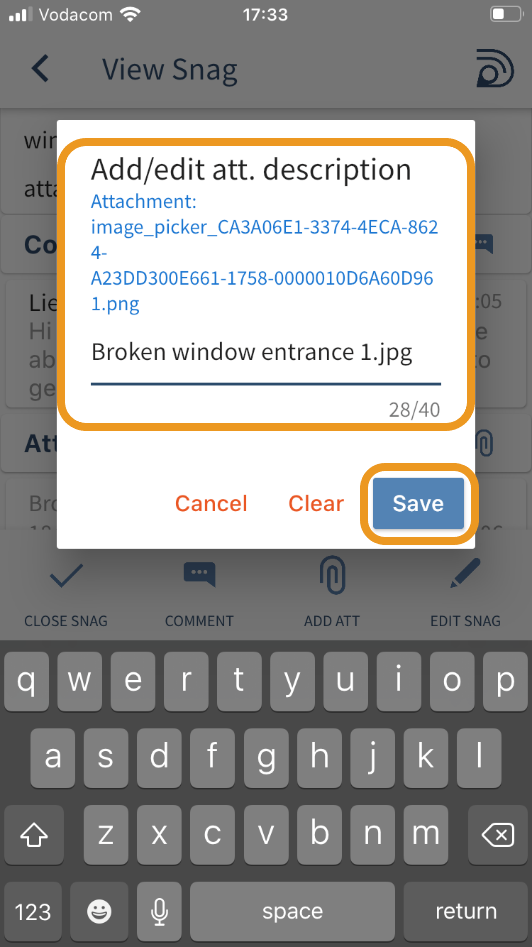
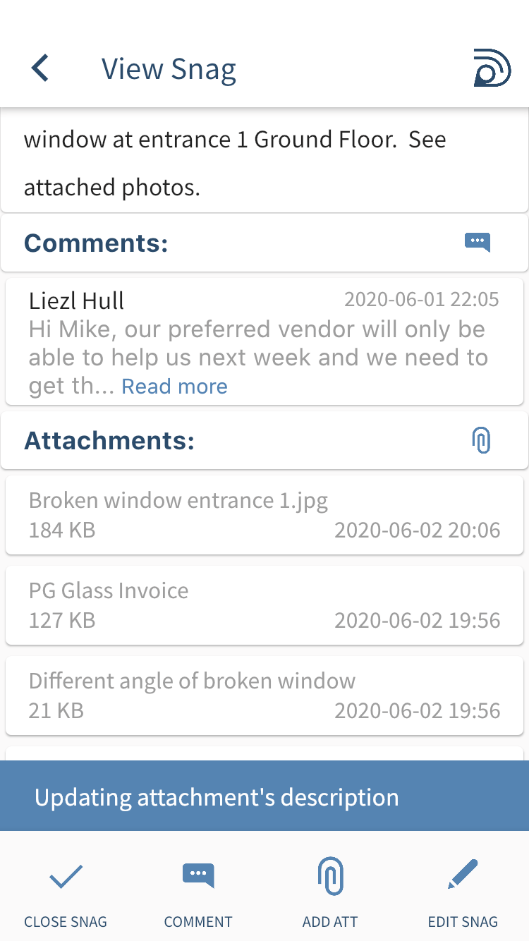
5. Add or edit your description and SAVE
Useful Info before we start:
- To Edit a task, you require the Edit task Permission. This permission will allow you to edit all attributes of a task.
- If you have the Assign task permission, you will be able to edit all attributes of the task except the Short and Detailed Description
-
To learn more about Users and Roles,
watch the Users & Roles video
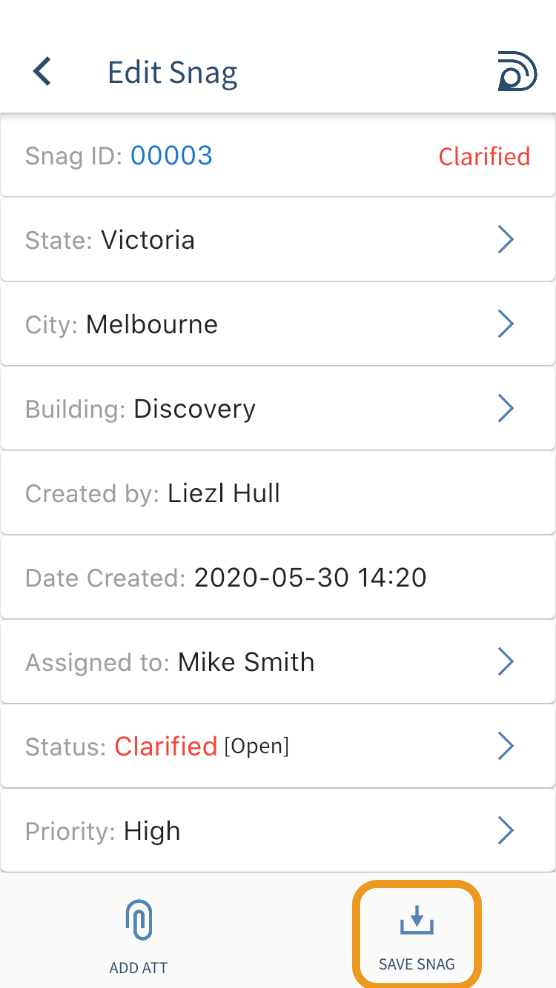
Steps to edit/assign a task on the mobile app
1. On the mobile app landing page, select VIEW TASKS
2. Use the Search filters provided to find the TASK you are looking for
3. Select the task you wish to edit to by clicking on the task; the View Task screen is displayed
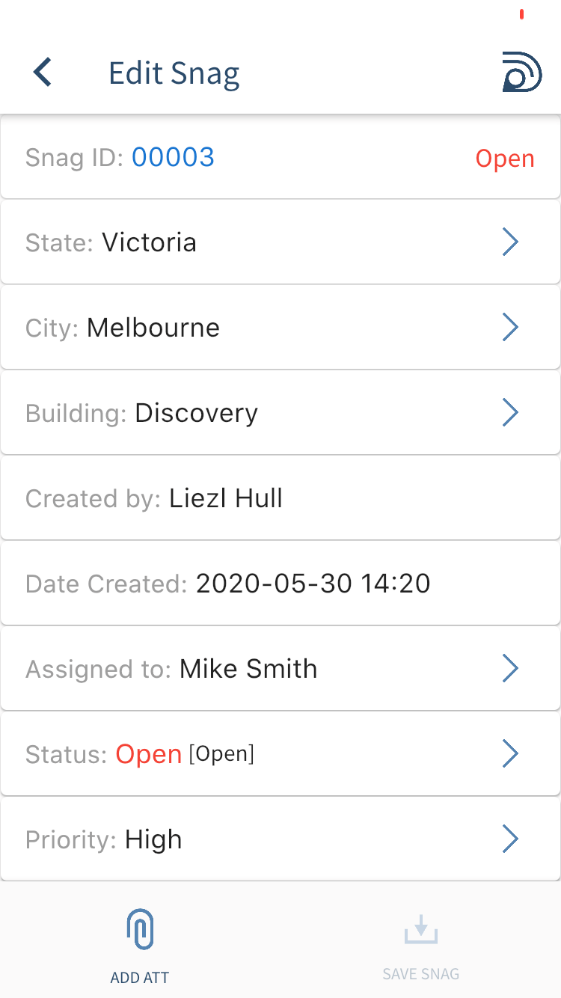
4. Select EDIT TASK
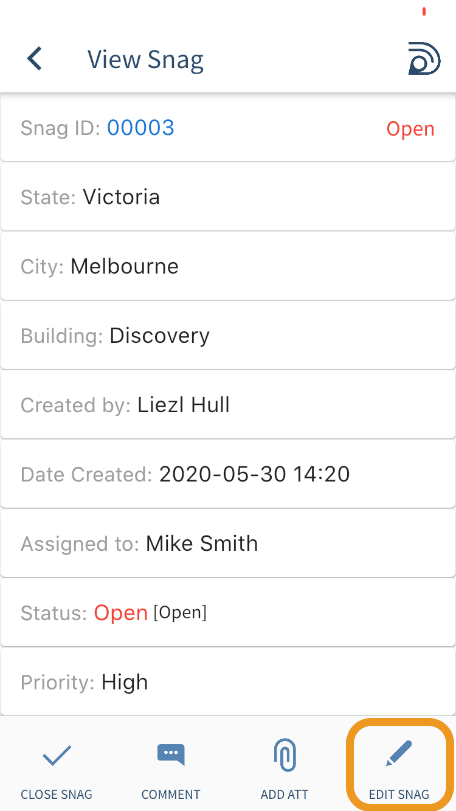
5. Edit the details of the task that you require to change and SAVE
- In this example we have categorised tasks by Job.
- If a job has been completed, and you would like to keep the history of all the tasks in a job, but you don’t want any new tasks to be logged for it, you can simply deactivate the job.
To do this:
1. Go to Categories
2. Jobs
3. Select Edit Job next to the relevant Job
4. Select Inactive
5. Save; this job is now specified as [inactive]
By deactivating the Job, users won’t be able to log new tasks for this job under Tasks
You can also not search for this job under View Tasks.
You will, however, still be able to access tasks for this job under Reports:
1. Go to Reports
2. Go to Custom Reports / Operational Reports / Comparative Reports
3. Select Active and Inactive Jobs
4. Use the filters to refine your search and select GO
5. Your search results will include the deactivated jobs
- In this example we have categorised tasks by Job.
- Note that Tasks cannot be deleted individually - however you could deactivate the job they belong to, and then delete the job.
- You could also create a Project called Trash, move unwanted tasks into Trash, de-activate this job and delete it.
It is important to note that only INACTIVE jobs can be deleted. To de-activate a Job:
1. Go to Categories
2. Jobs
3. Select Edit Job next to the relevant Job
4. Select Inactive
5. Save; this job is now specified as [inactive]
You can now delete the Job. To do this:
1. Go to Categories
2. Select Delete Job from the menu next the relevant INACTIVE job
3. You will be warned that all tasks will be deleted permanently
4. Select OK
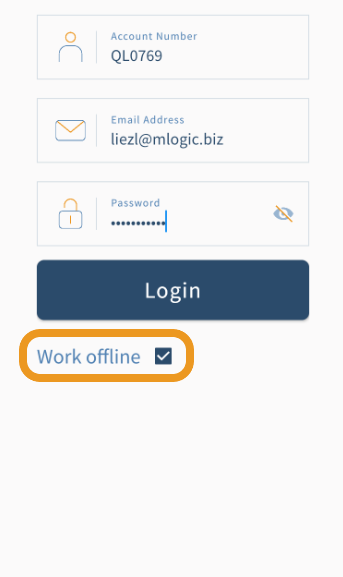
Work OFFLINE on the Mobile App
If you are in an area where you have no signal or internet access, you can select the WORK OFFLINE option when you logon to the mobile app. This will allow you to add tasks and attach documents and photos that will be stored on your phone and can be uploaded when you have internet access again.
Important info before we start
- To ensure that you have the latest business information on the app when working offline, logon to the Qualimi mobile app when you do have internet access prior to moving into an out of signal area whenever possible – this will ensure you are working with the latest business information.
- The Qualimi menu will be orange (not blue) when working offline
-
You need to have the Add Task Permission to add Tasks
Offline. To learn more about Users and Roles,
watch the Users & Roles video
Steps to add tasks OFFLINE on the mobile app
Important info before we start
- To ensure that you have the latest business information on the app when working offline, logon to the Qualimi mobile app when you do have internet access prior to moving into an out of signal area whenever possible – this will ensure you are working with the latest business information.
- The Qualimi menu will be orange (not blue) when working offline
-
You need to have the Add Task Permission to add tasks
Offline. To learn more about Users and Roles,
watch the Users & Roles video
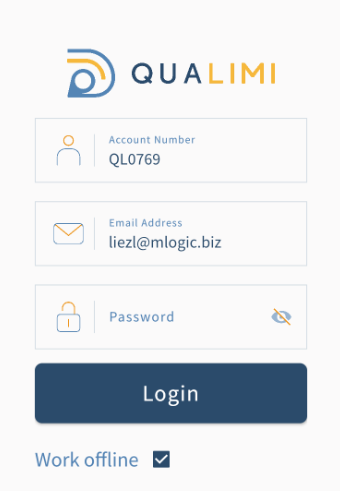
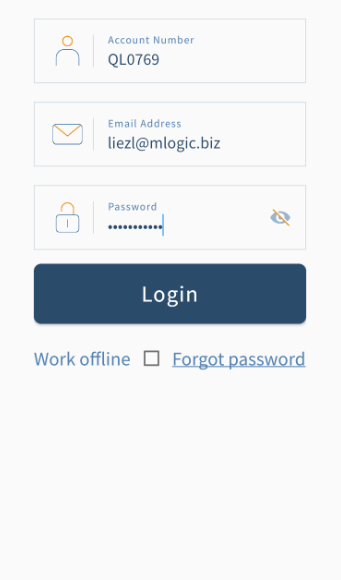
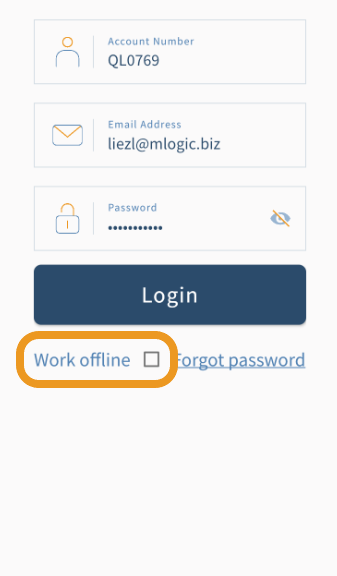
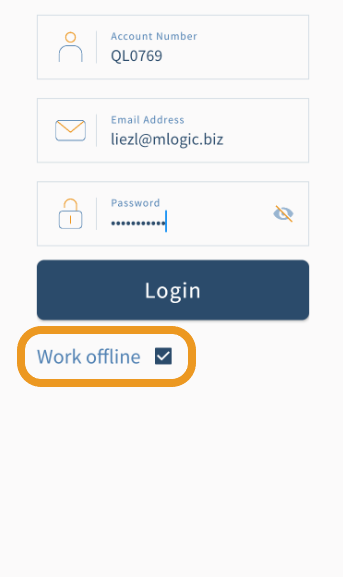
1. Login to the mobile app in OFFLINE mode: capture your logon details, select WORK OFFLINE and select Login
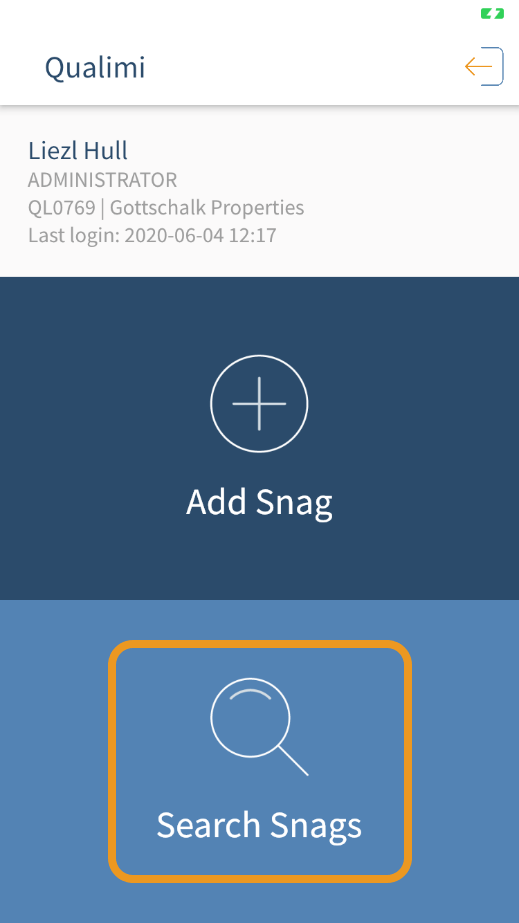
2. The landing page will only display the ADD TASK option (unless there are already existing offline TASKs – in which case the VIEW TASKS option will also be displayed)
3. Select ADD TASK; the ADD TASK Screen is displayed
4. Capture the details of the task and add attachments if required
5. Select SAVE
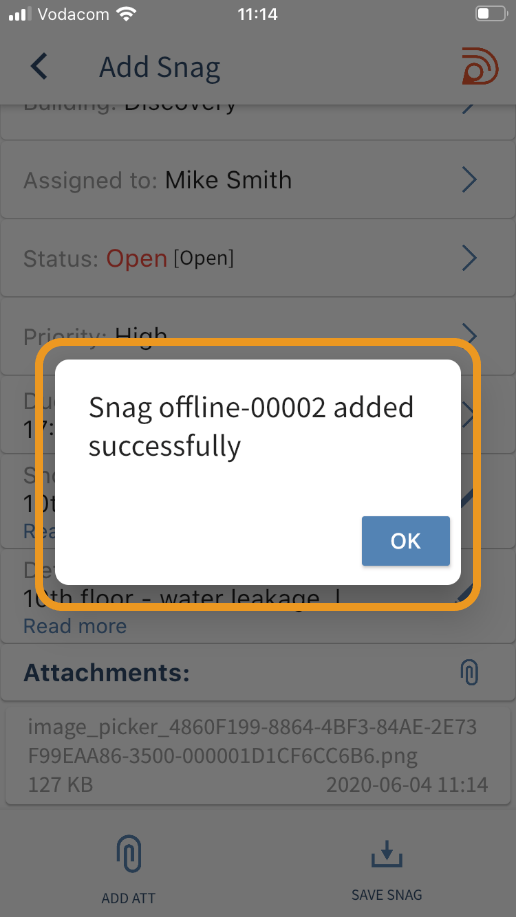
6. The Task is saved offline and can be uploaded when you have internet access again
You will notice that the VIEW TASKS option has become available – click VIEW TASKS to view your offline tasks
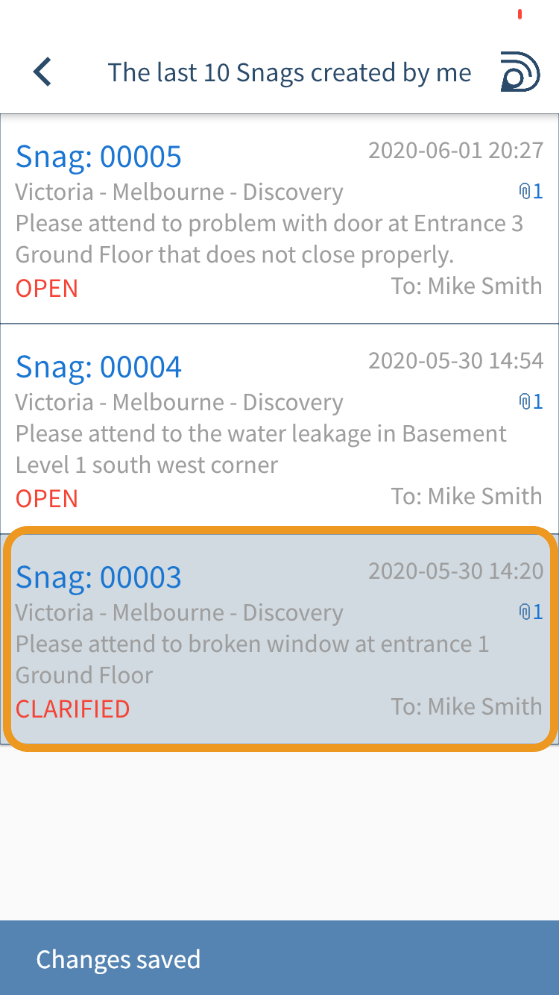
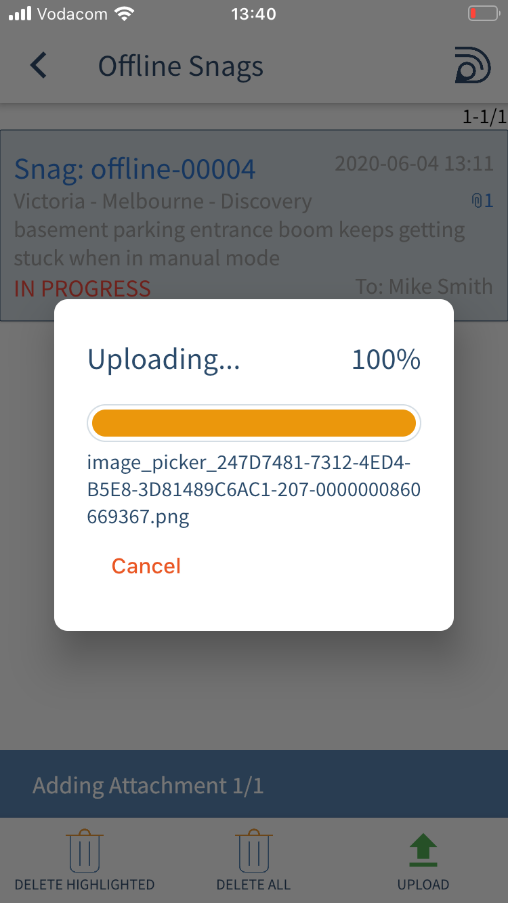
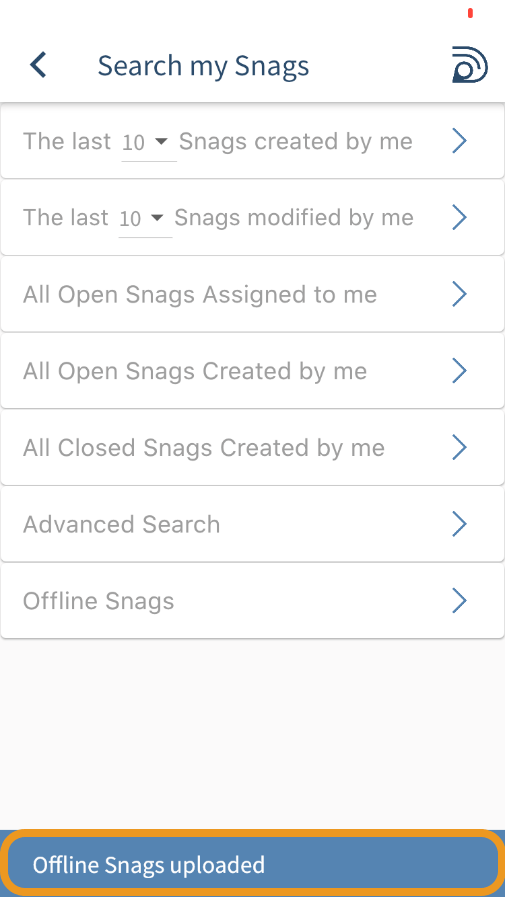
Steps to upload tasks when you are back online
1. Login to the mobile app in ONLINE mode – don’t select WORK OFFLINE
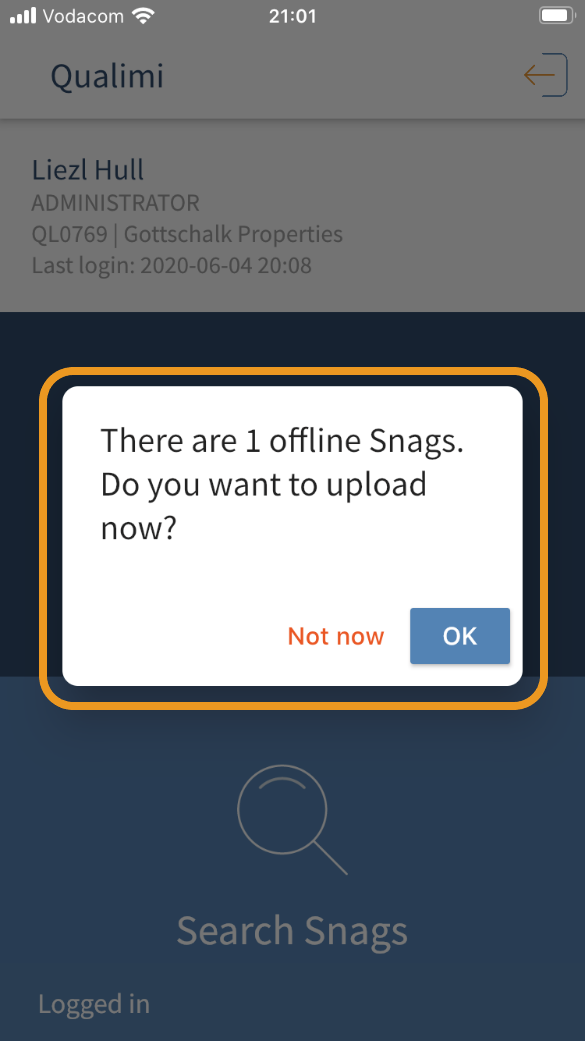
2. A message is displayed indicating the number of offline tasks there are, asking you whether you would like to upload them now.
3. Select OK;
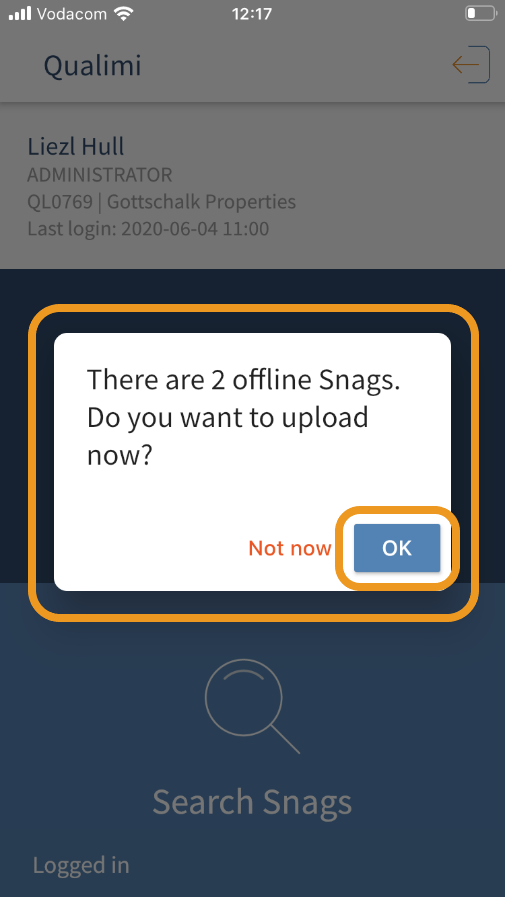
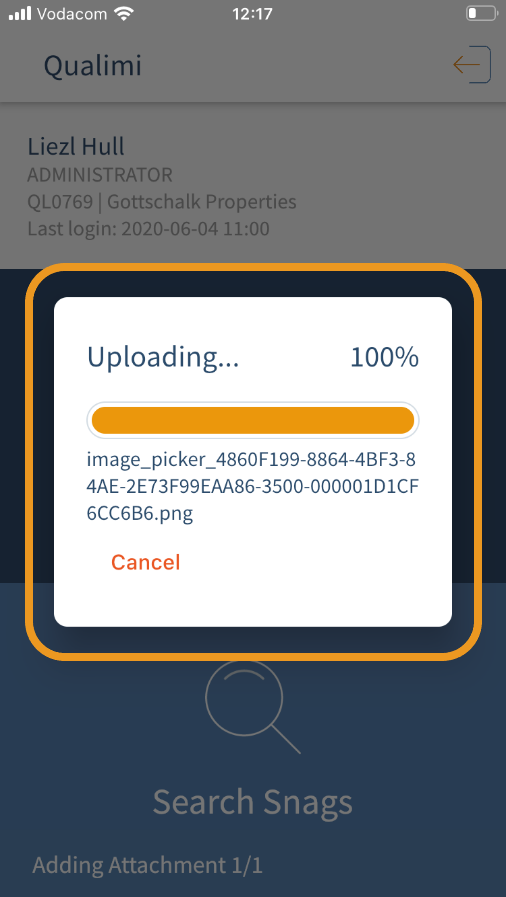
4. The tasks are uploaded and are issued new task ID’s – they will be listed with the other tasks in your account
Steps to edit offline tasks before uploading them - while working OFFLINE
Useful info before we start
- When working in OFFLINE mode the Qualimi menu
 will be orange
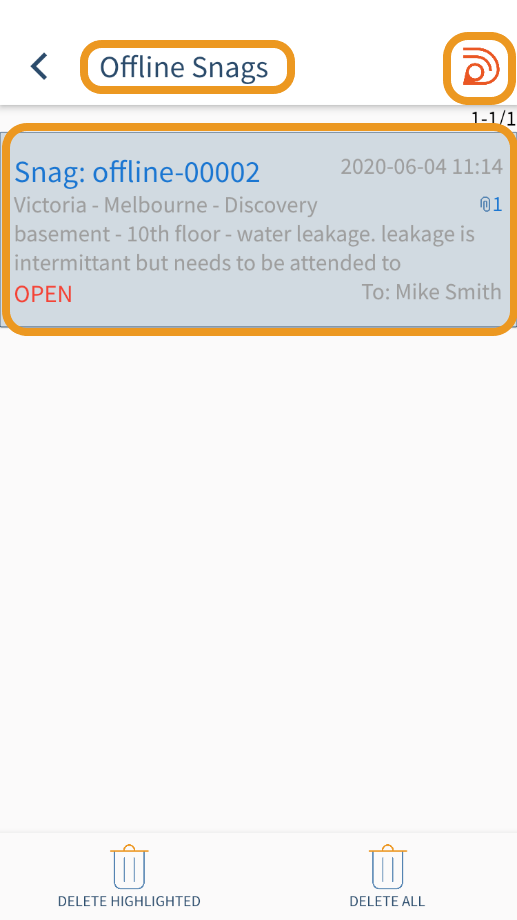
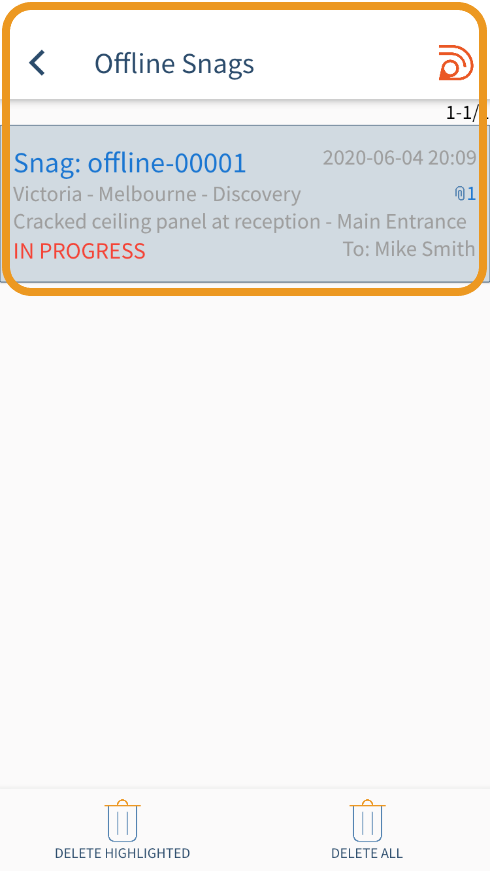
1. Login to the mobile app in OFFLINE mode: capture your logon details, select WORK OFFLINE and select Login

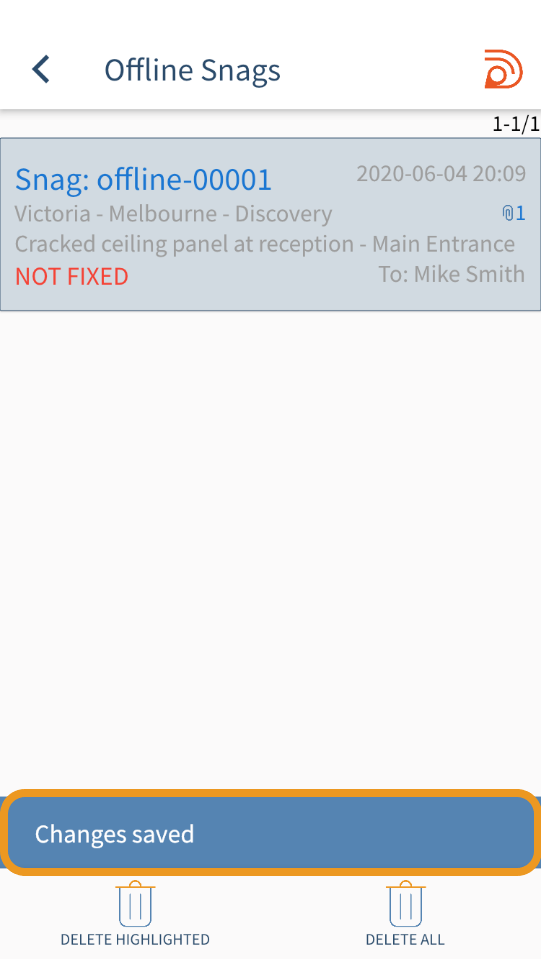
2. Select VIEW TASKS; the Offline Tasks are displayed
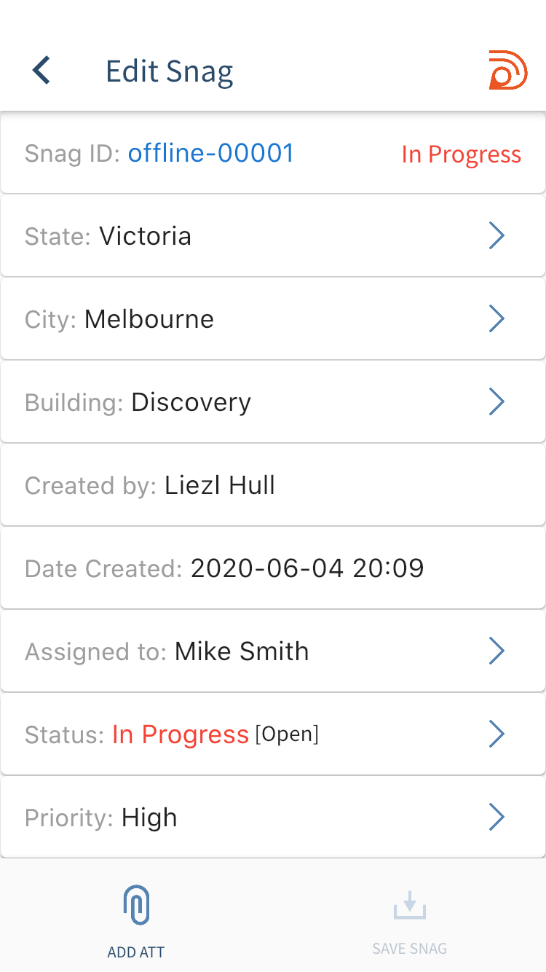
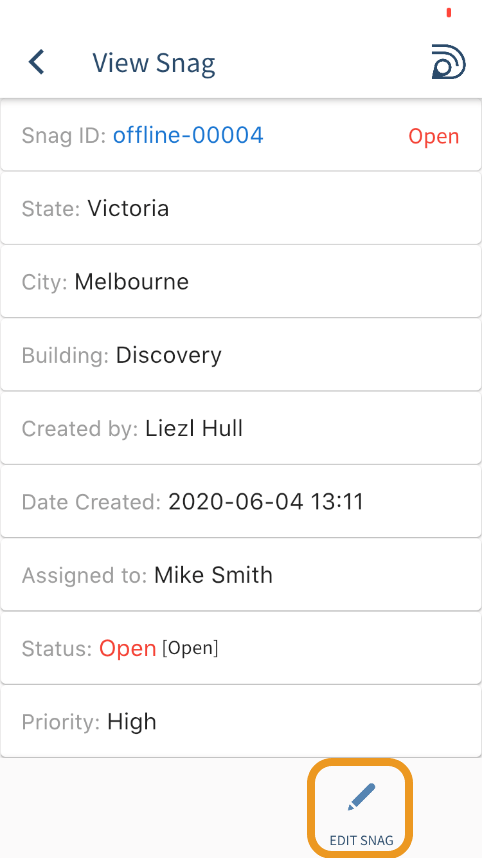
3. Select the offline task you wish to edit; the VIEW TASK screen is displayed
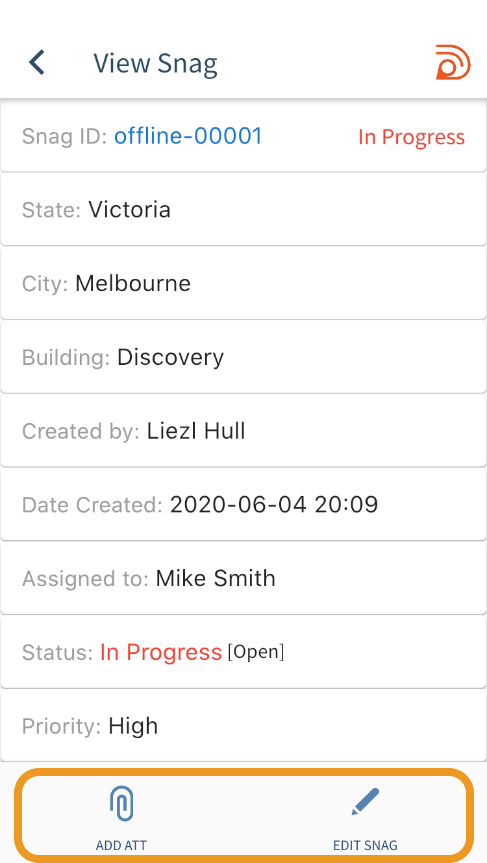
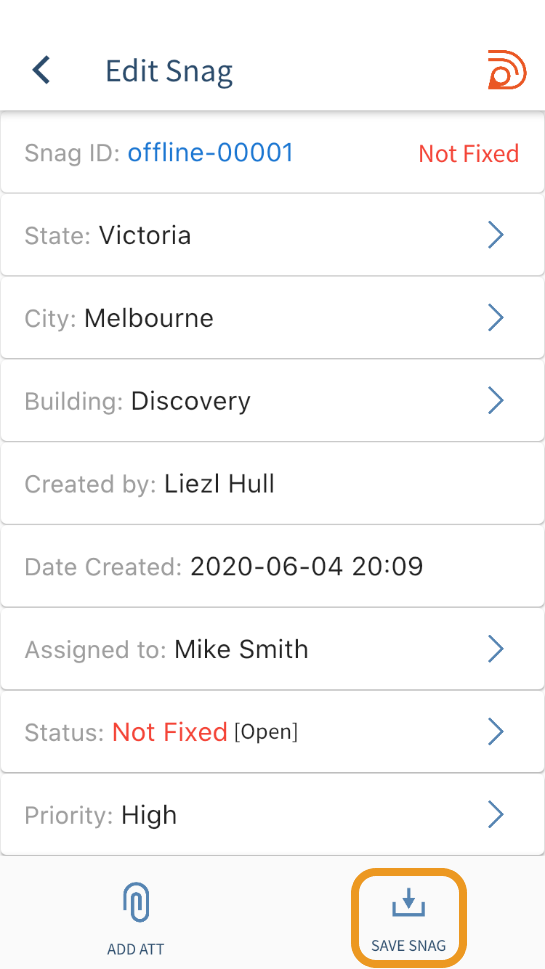
4. Select ADD ATT to add an attachment or select EDIT TASK to edit information on the Task
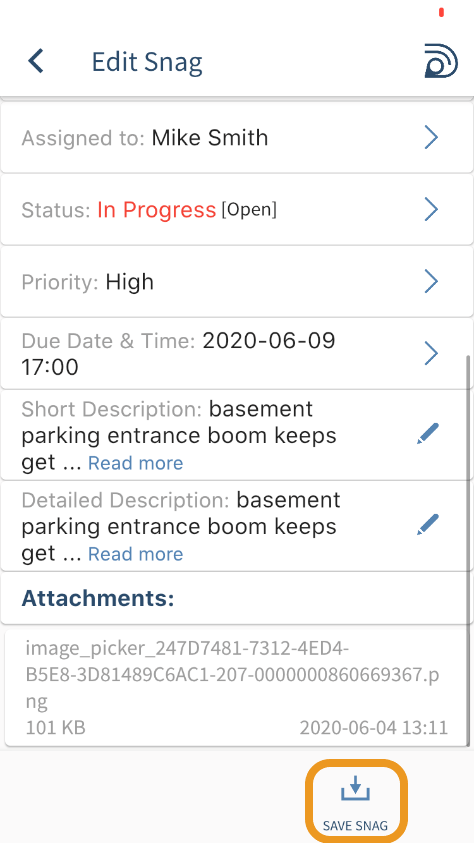
5. If you selected EDIT TASK, make the relevant changes and select SAVE
Steps to edit offline tasks before uploading them - while working ONLINE
Useful info before we start
- When working in ONLINE mode the Qualimi menu
 will be blue
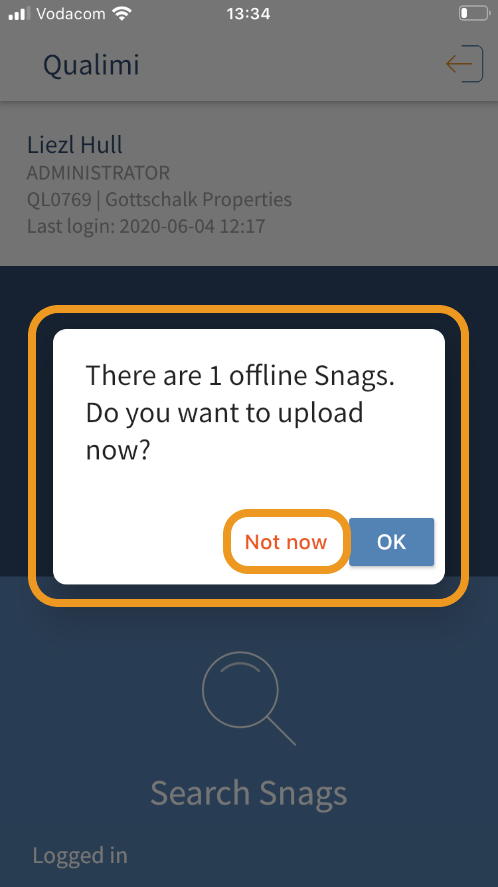
1. Login to the mobile app in ONLINE mode – don’t select WORK OFFLINE
2. A message is displayed indicating the number of offline tasks there are, asking you whether you would like to upload them.
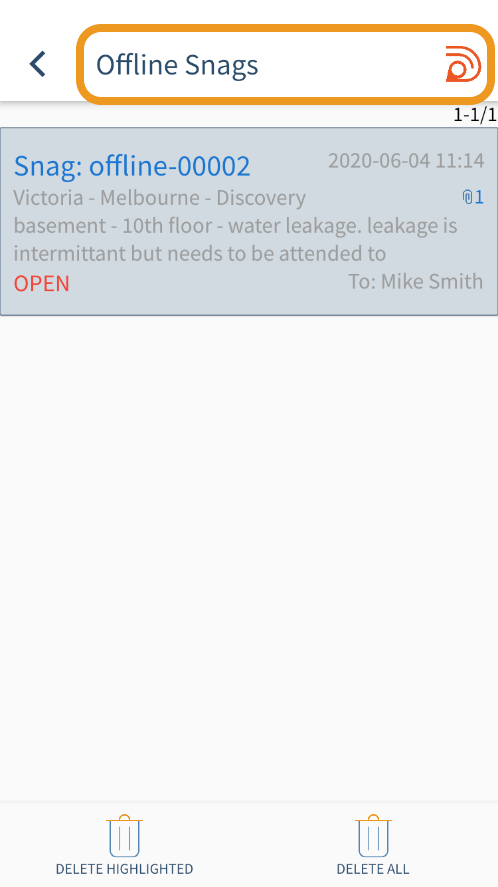
3. Select NOT NOW; the offline tasks will remain in the OFFLINE TASKS folder and will not be uploaded.
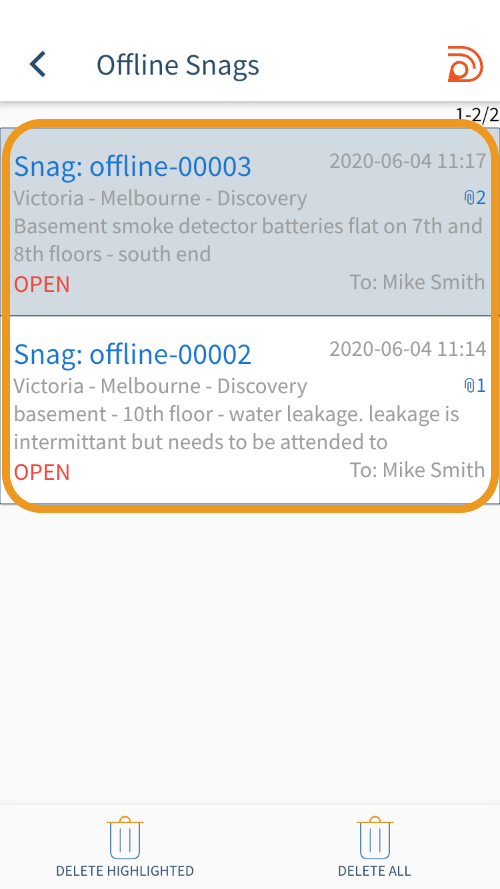
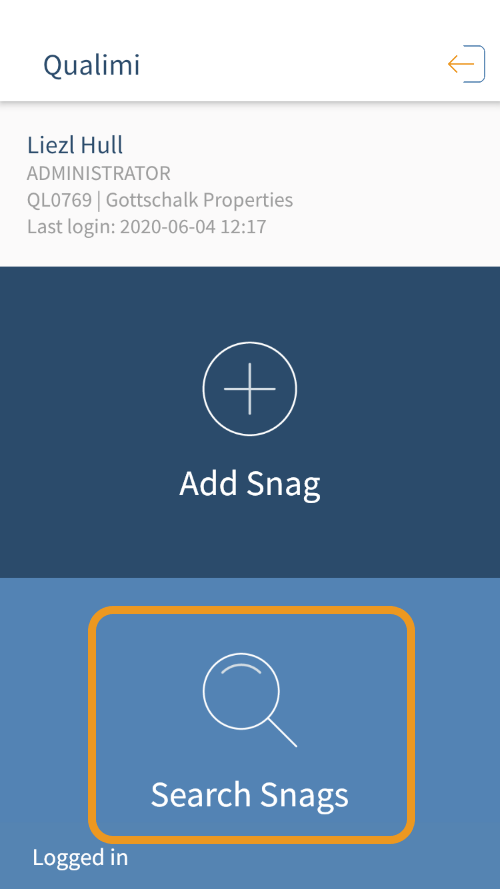
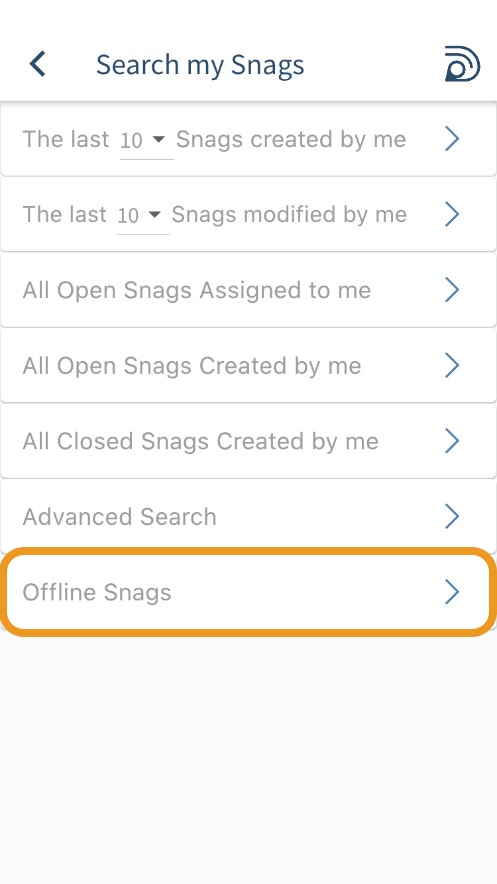
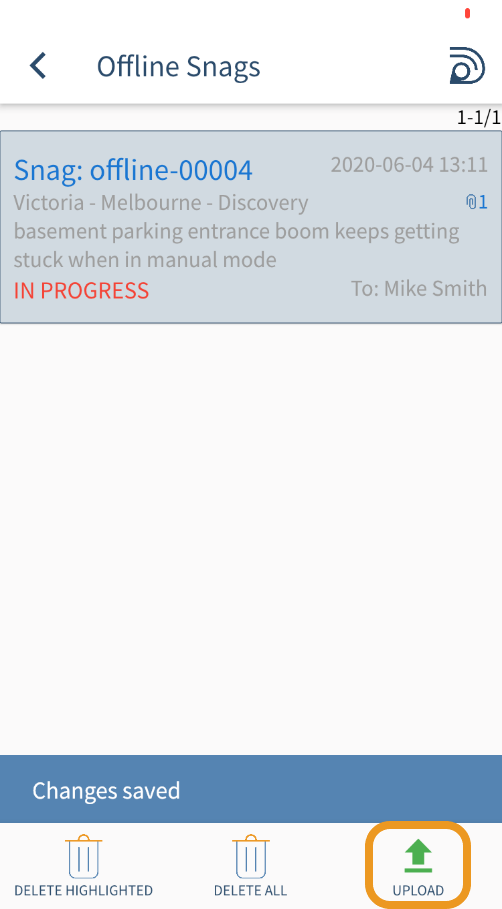
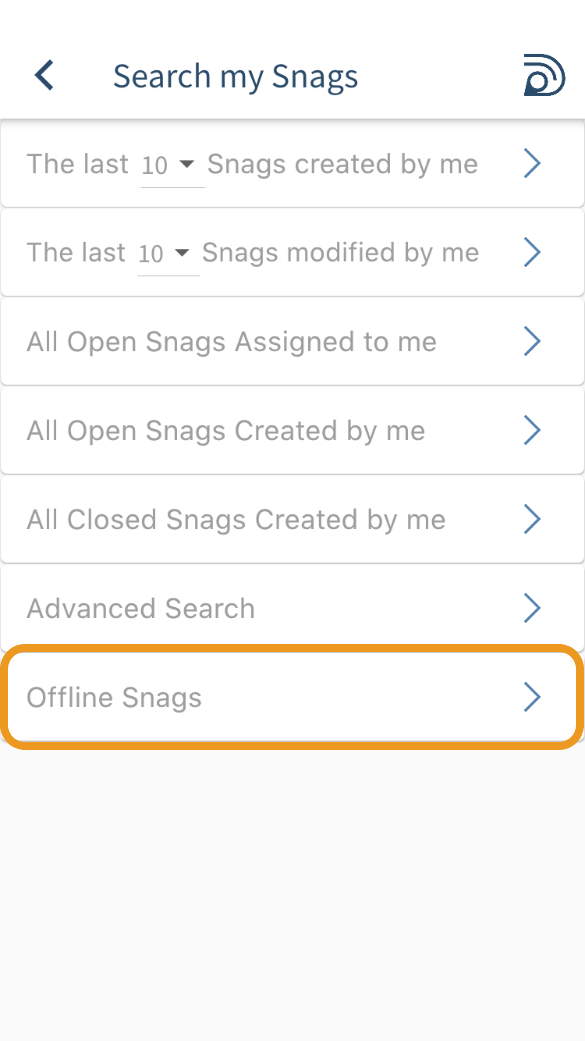
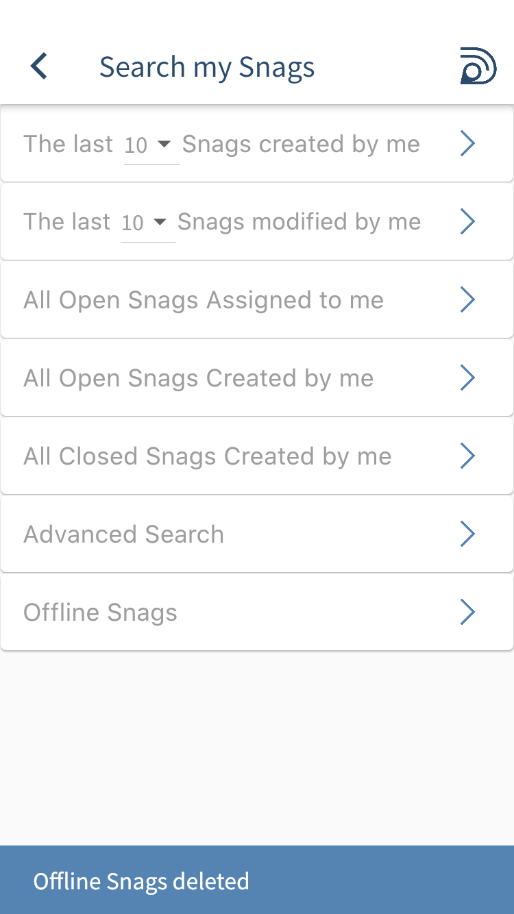
4. Go to VIEW TASKS, select OFFLINE TASKS – your offline tasks are listed
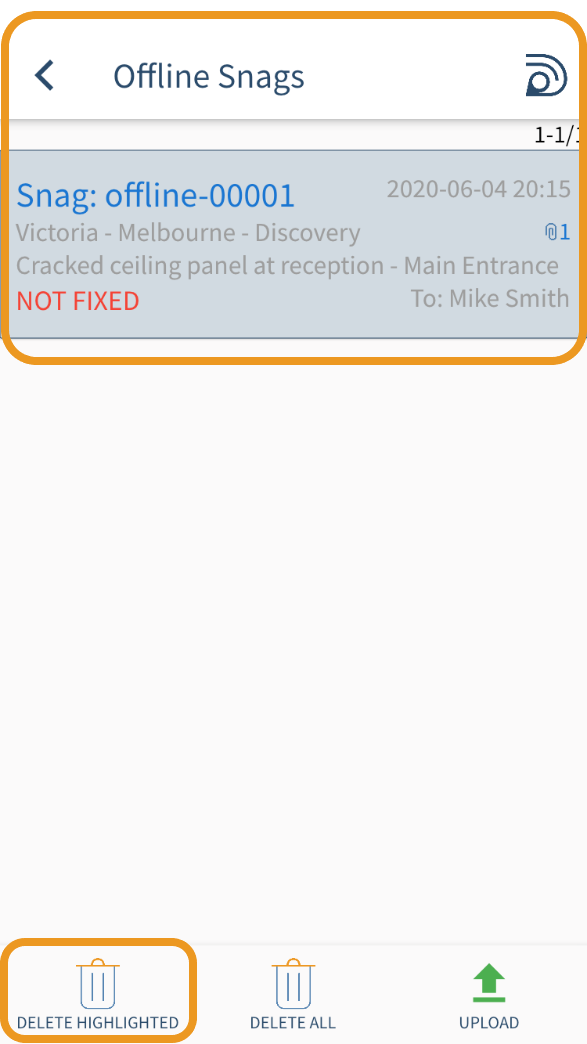
5. The following options are available:
- DELETE HIGHLIGTED
- DELETE ALL
- UPLOAD
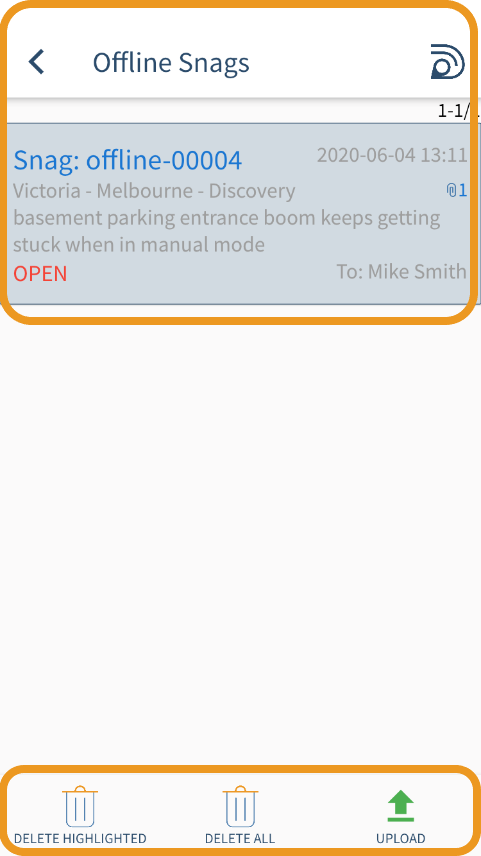
6. Don’t select any of these options; To EDIT a task before you upload it, select the relevant task – the View Task is displayed
7. Select EDIT TASK, make your required changes and SAVE TASK

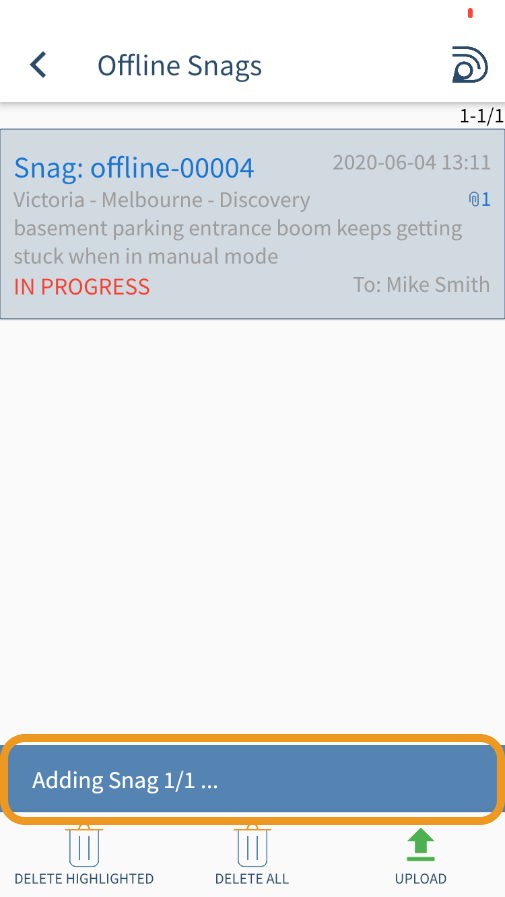
8. If you are ready, select UPLOAD
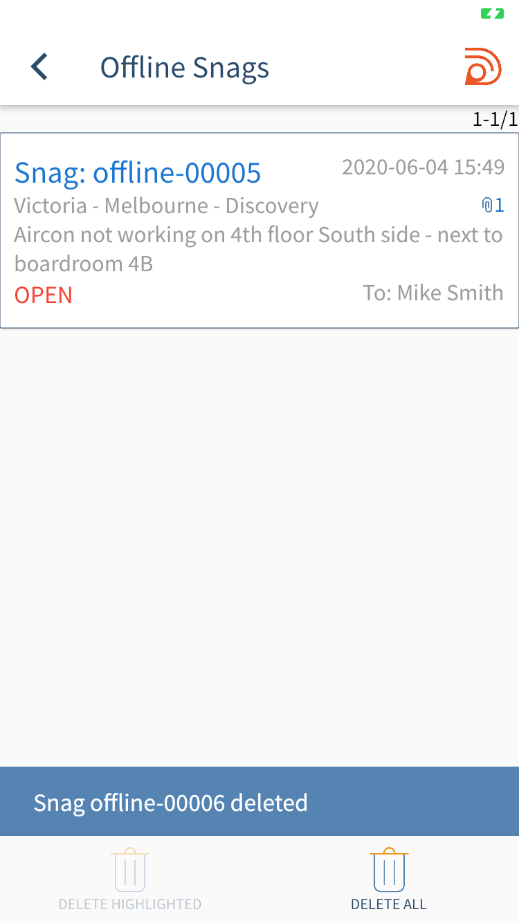
9. All the Offline tasks are now added to the Account’s tasks and are no longer listed in the Offline Tasks list
Steps to delete offline tasks while working OFFLINE
If you have offline tasks that you would like to delete while you are still working OFFLINE:1. Login to the mobile app in OFFLINE mode: capture your logon details, select WORK OFFLINE and select Login
When working in OFFLINE mode the Qualimi menu will be orange
2. Select VIEW TASKS
The VIEW TASKS option will only be available if there are offline tasks, else only the ADD TASK option will be displayed
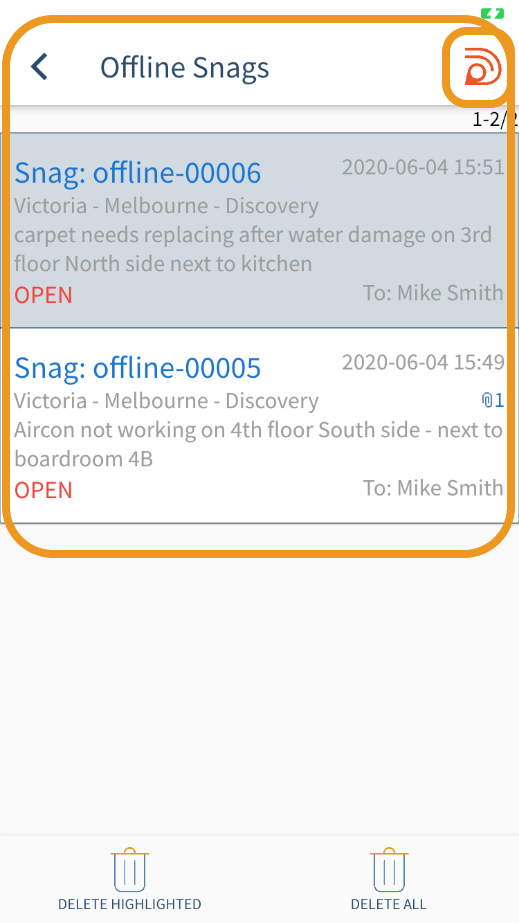
3a. To delete only ONE offline task,
- Select the task you wish to delete – the View Task screen is displayed;
- Select the BACK icon – you are back on the list of tasks and the task you selected is highlighted in grey
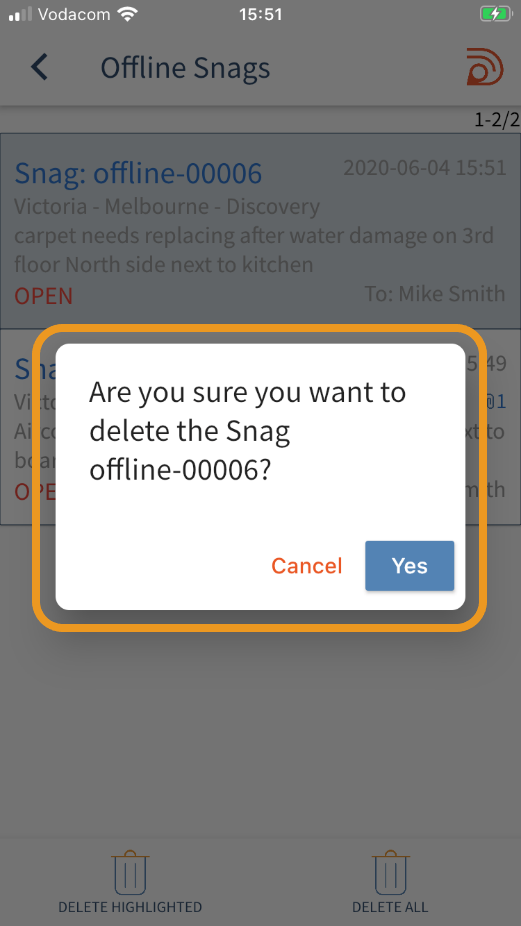
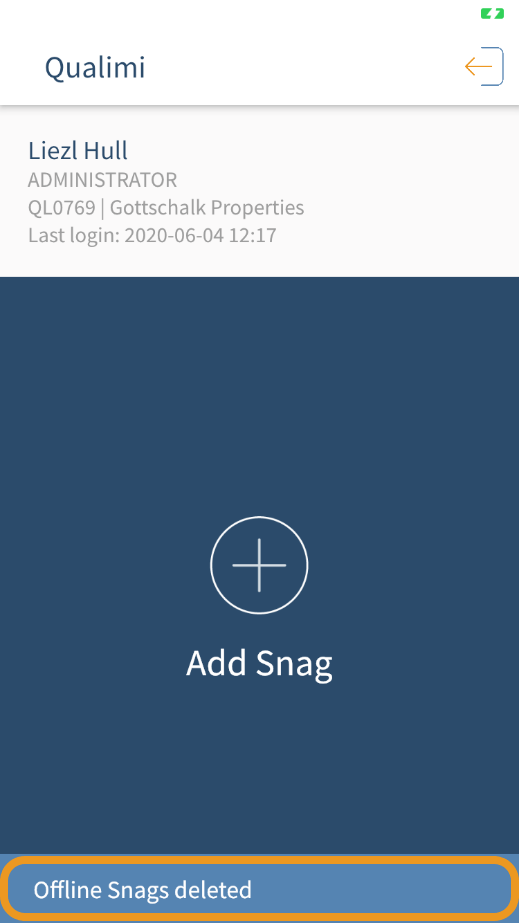
- Select DELETE HIGHLIGHTED
- You are prompted whether you want to delete that task: select YES
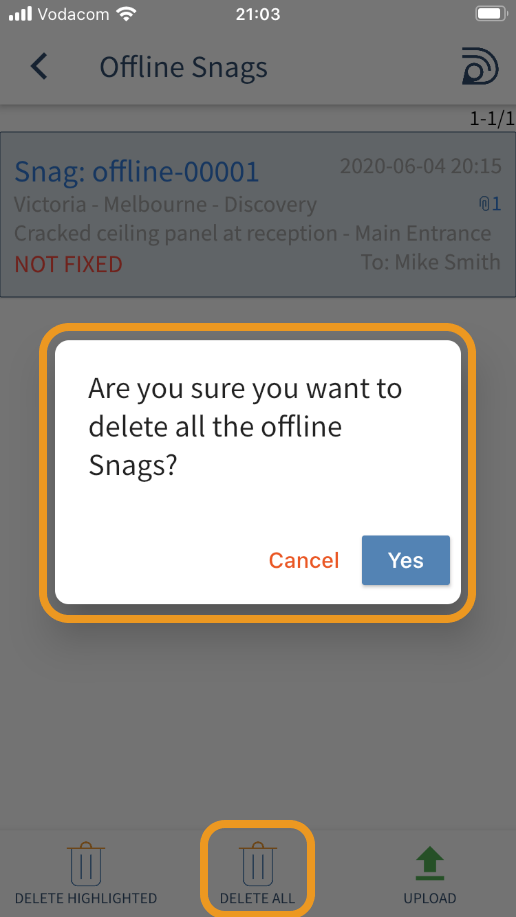
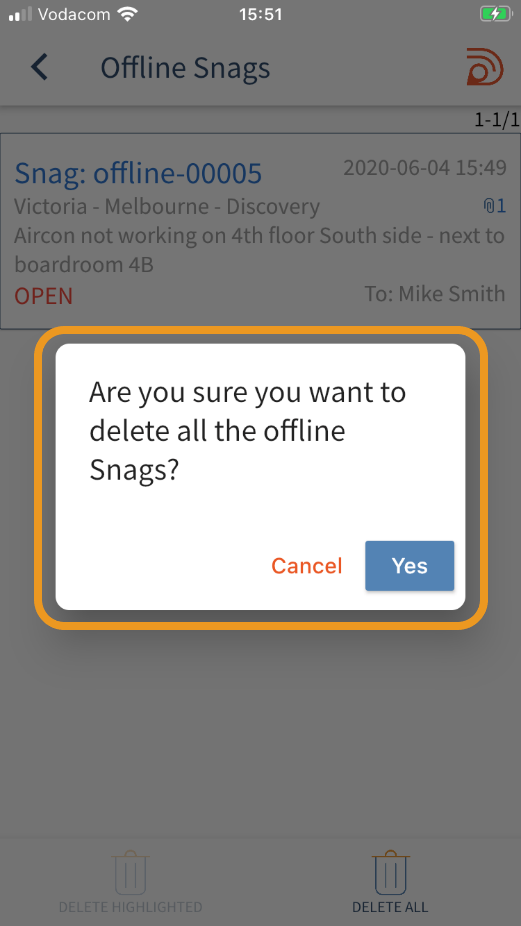
3b. To delete ALL offline tasks,
- Select DELETE ALL
- You are prompted whether you want to delete all: select YES
Steps to delete offline tasks while working ONLINE
1. Login to the mobile app in ONLINE mode – don’t select WORK OFFLINE
When working in ONLINE mode the Qualimi menu will be blue
2. A message is displayed indicating the number of offline tasks there are, asking you whether you would like to upload them.
3. Select NOT NOW; the offline tasks will remain in the OFFLINE TASKS folder and will not be uploaded.
4. Go to VIEW TASKS, select OFFLINE TASKS – your offline tasks are listed
5a. To delete only ONE offline task,
- Select the task you wish to delete – the View Task screen is displayed;
- Select the BACK icon – you are back on the list of tasks and the task you selected is highlighted in grey
- Select DELETE HIGHLIGHTED
- You are prompted whether you want to delete that task: select YES
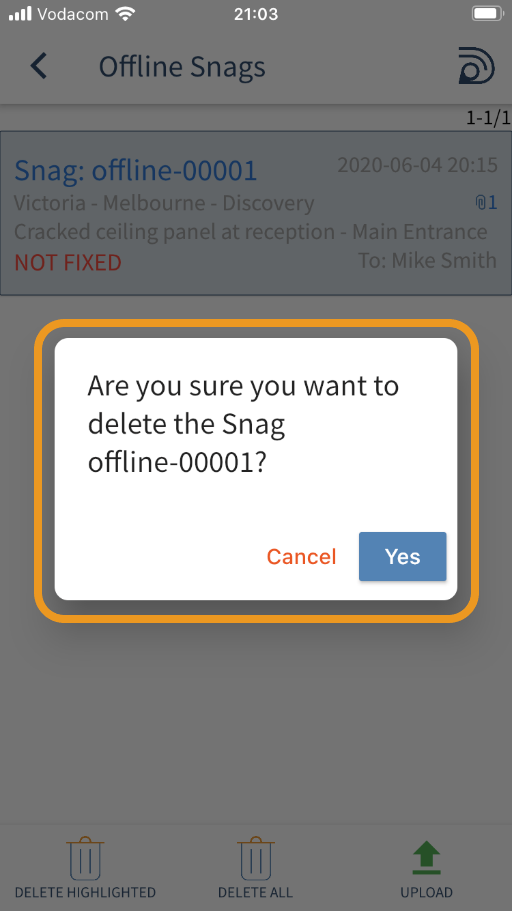
5b. To delete ALL offline tasks,
- Select DELETE ALL
- You are prompted whether you want to delete all tasks: select YES